Email Forwarding with AWS SES, Route53, S3 and Lambda
- Posted Sunday, July 21, 2019 from Vancouver, Canada
- 9 minute read
Introduction
The end result of following these steps will yield you a robust mailing list with a few strings attached.
Simple Email Service (SES), which is Amazon’s SMTP software (and then some) as a service initially begins in sandbox mode, which limits daily email sends to 150. This can be overcome by working with AWS to “graduate” from sandbox mode. I never attempted this as the 150 limit was plenty for the needs of the CSCU.
Secondly, each email address added to the list needs to be manually validated once. This is to prevent email services being being spun up to send spam.
Lastly, there is not a GUI for making or viewing mailing lists. A JSON map will have to be modified in the Lambda function code, which stores all email aliases and recipients. It’s not as elegant (in a 90s way) as say, Mailman does it, but there are benefits that are outlined below.
Motivation
Mailman is a popular open source software for hosting and maintaining mailing lists and was previously used by the CSCU. However, as part of the migration away from all university-affiliated infrastructure hosting and onto AWS, I looked into the SES service and found that could do everything that Mailman was being used for previously while leveraging the robust ecosystem.
This is how the SES, Route53, S3 and Lambda solution came to be. While it seems more complicated than Mailman, (being a typical service hosted on a VM) the upfront time cost of this setup is well worth it, as it has been running for almost two years as of July 2019 without any time spent on operations or even really thinking about the status of the service.
Spending time provisioning a VM, updating and rebooting? Even with a cron job set up properly, there’s still plenty of points of failure (Mailman service, python version, database etc.) and mandatory system reboots to deal with. One minor incompatible package that brings down the service or a reliant one means more time spent by you troubleshooting and maintaining the service.
Lesser known about email is just how painful it is to send them. The S in SMTP may stand for simple, but actually ensuring that mail is delivered to (ie. seen by) the recipient is difficult. Take a quick read through RFC 5321, RFC 2821, RFC 1912 and RFC 4408 to see just the known technical challenges (networking, A, MX, DKIM, TXT and SPF records) of email deliverability. These don’t go over implicit behavioural factors of deliverability, like how mail servers assign spam health scores to each other.
Architecture

S3
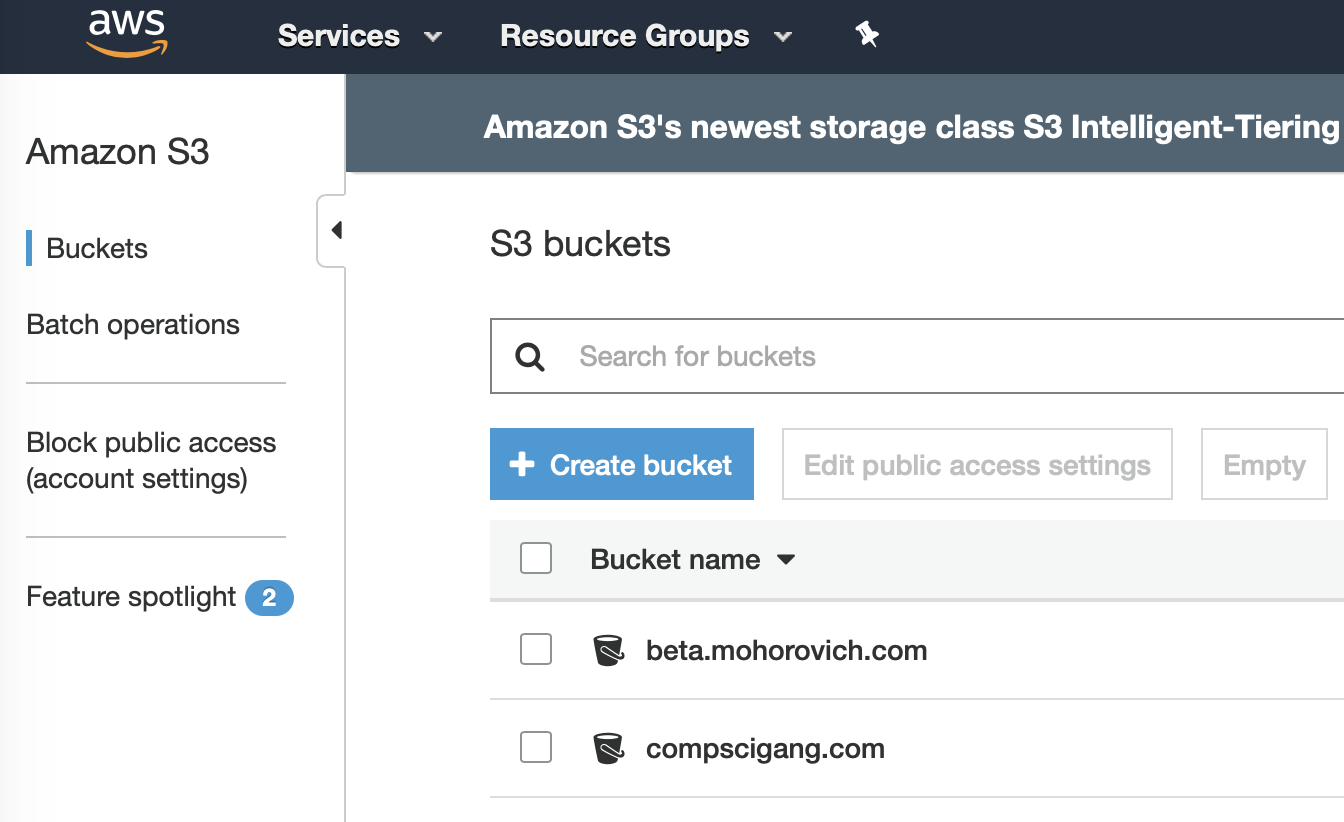
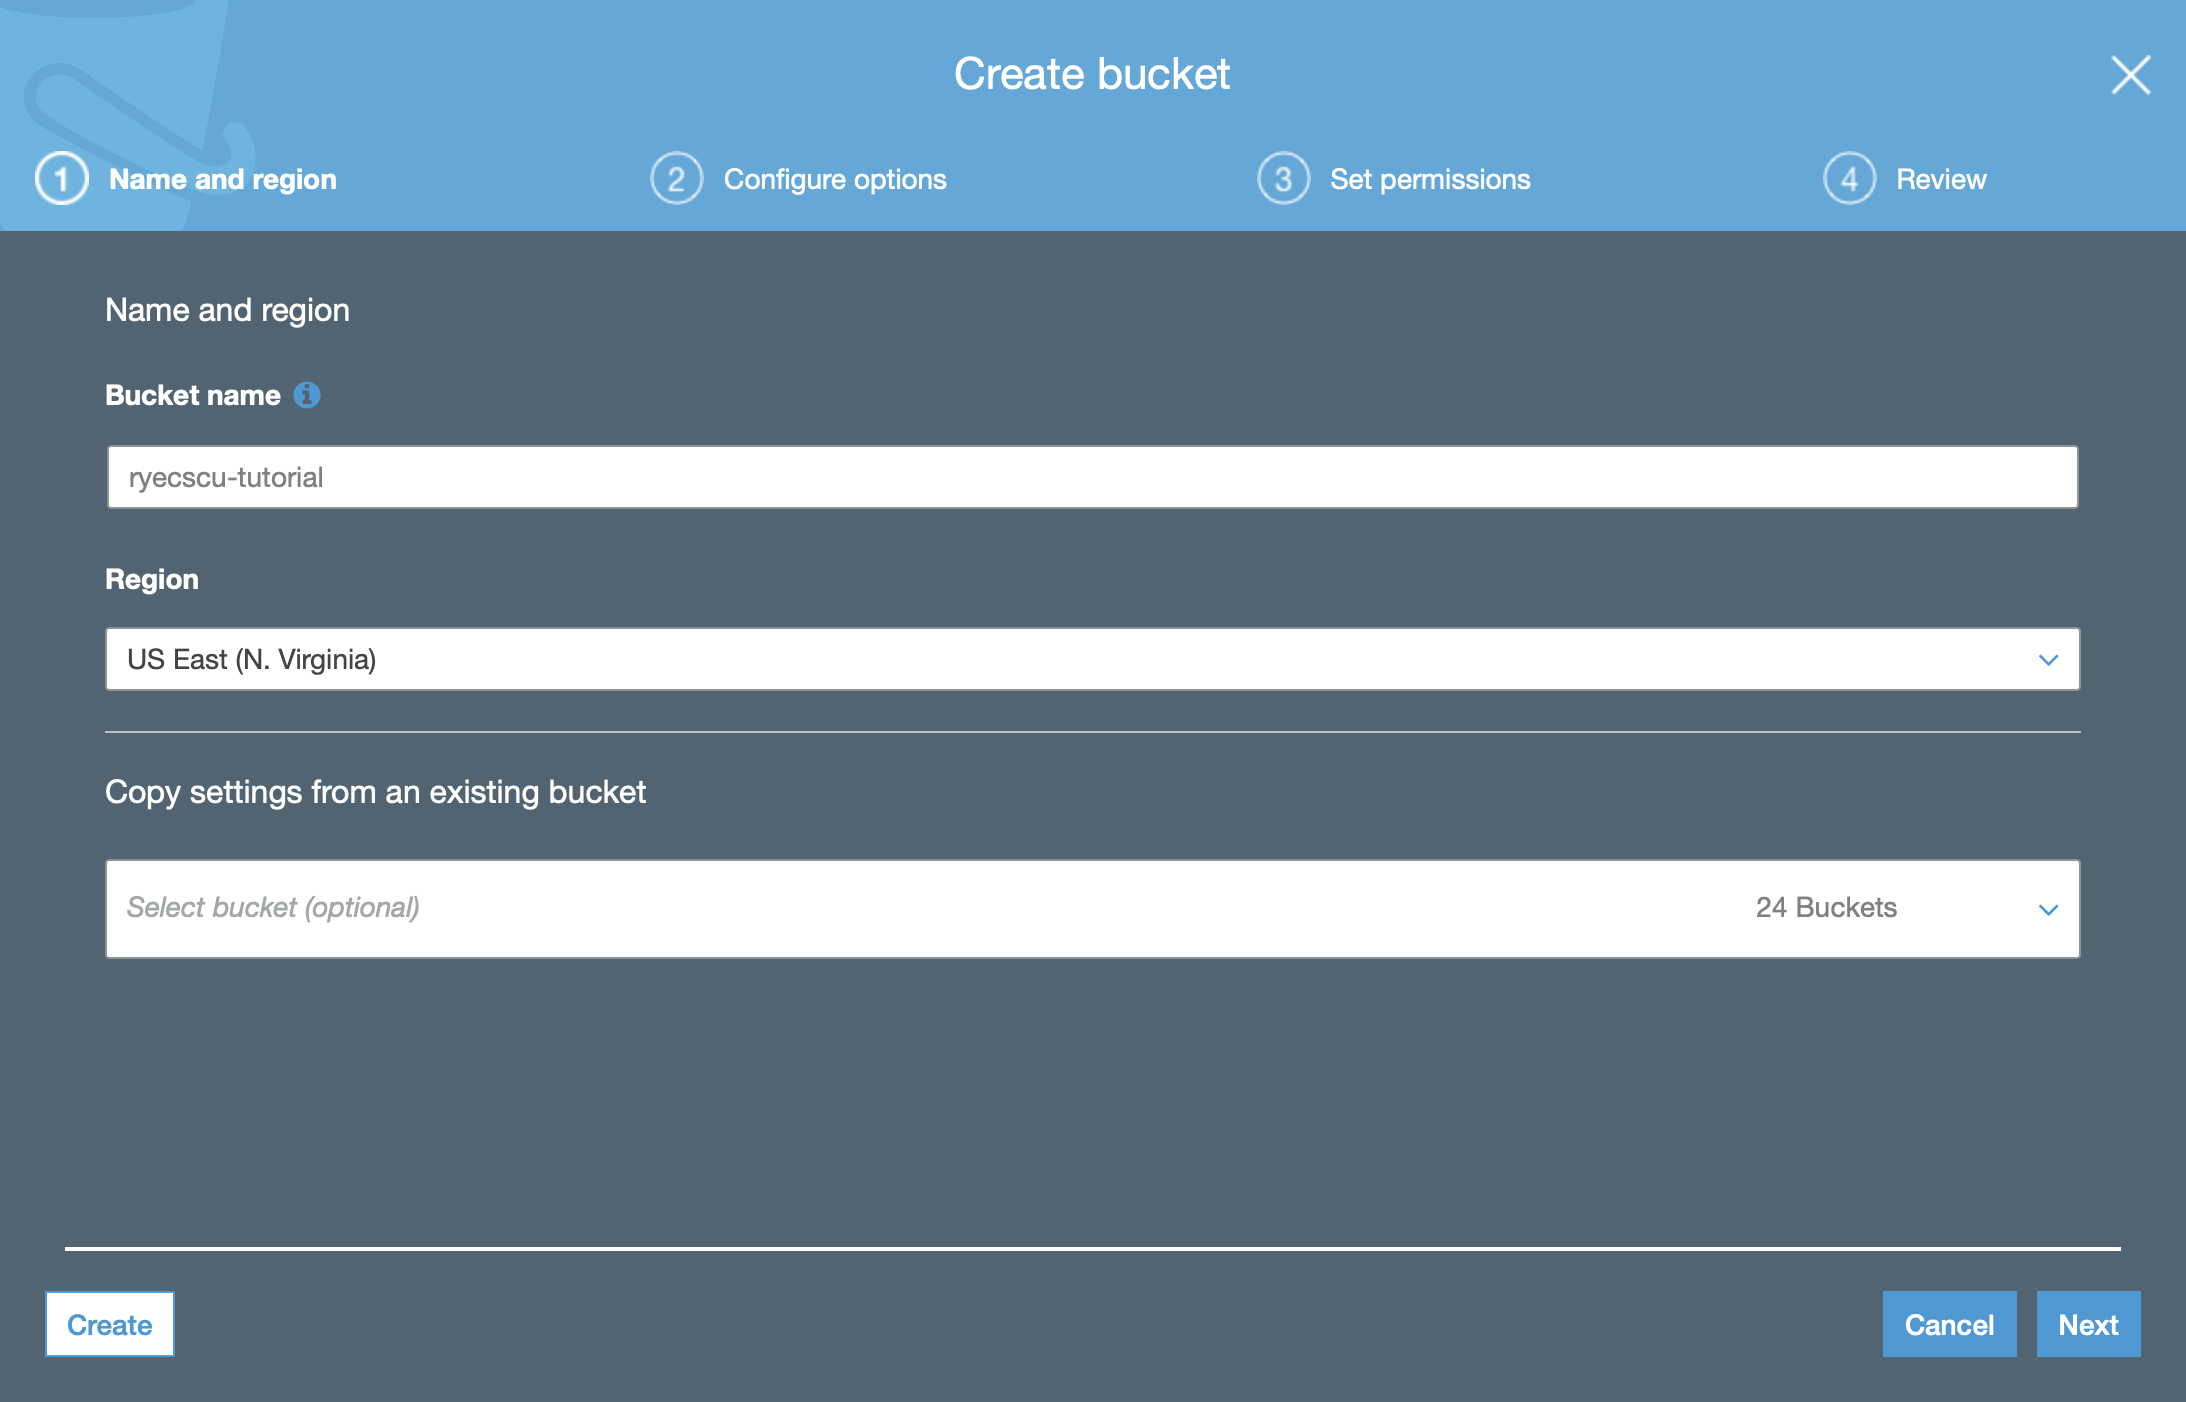
So the first step is very straightforward. Let’s create the S3 bucket that email messages will be stored in. Navigate to S3 and create the Create Bucket button.
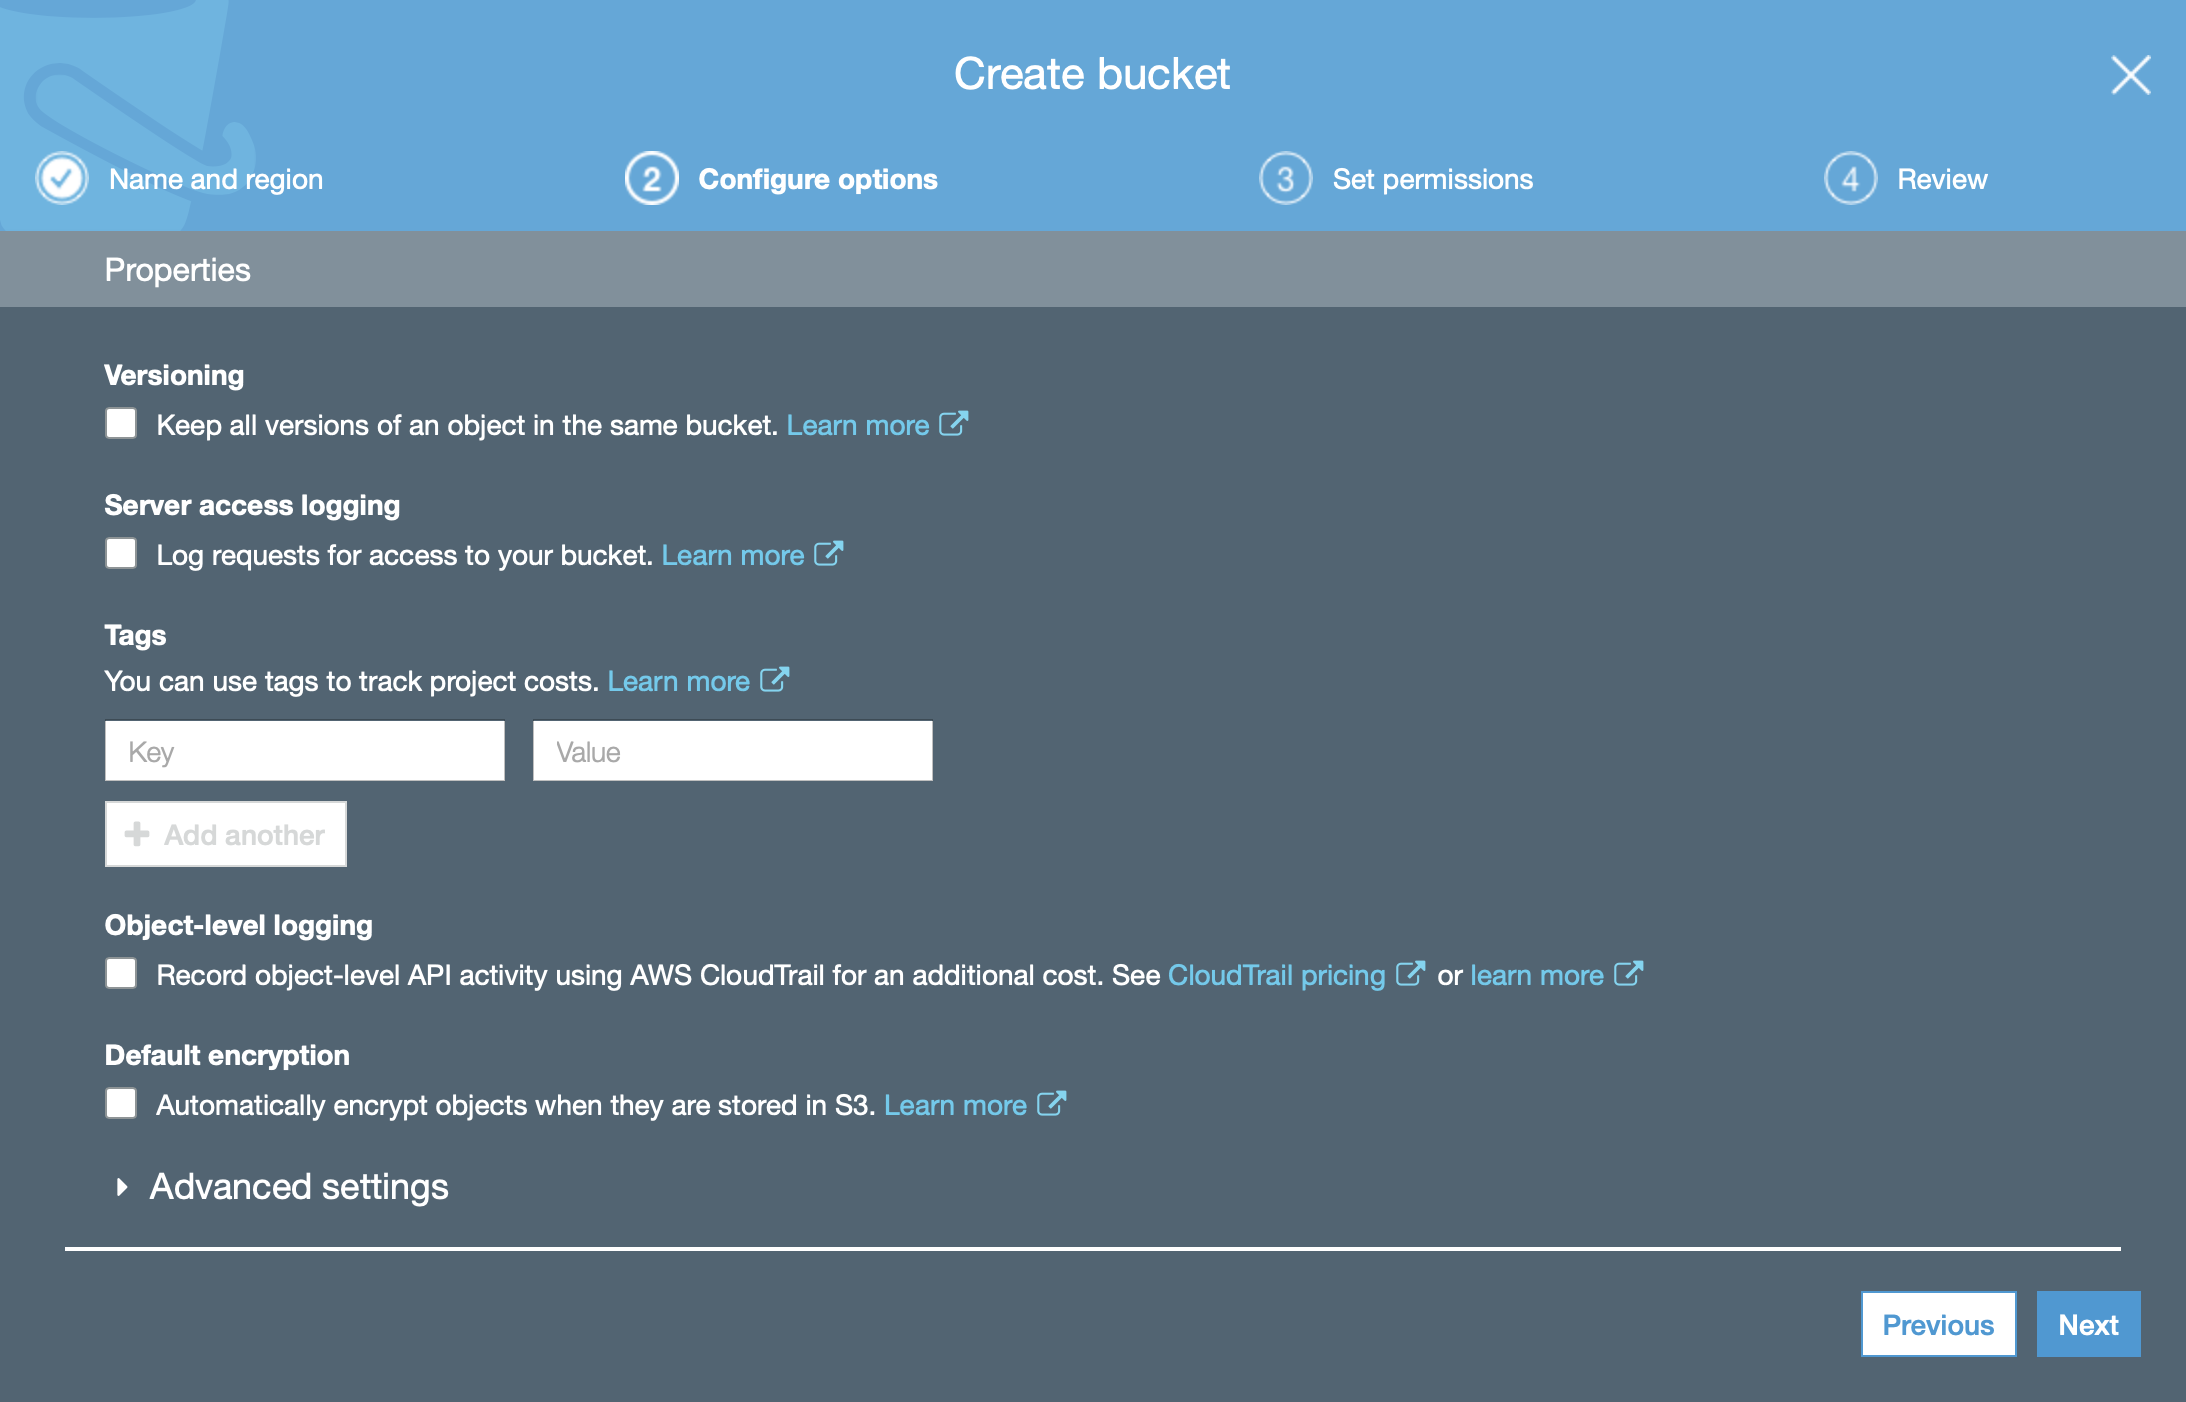
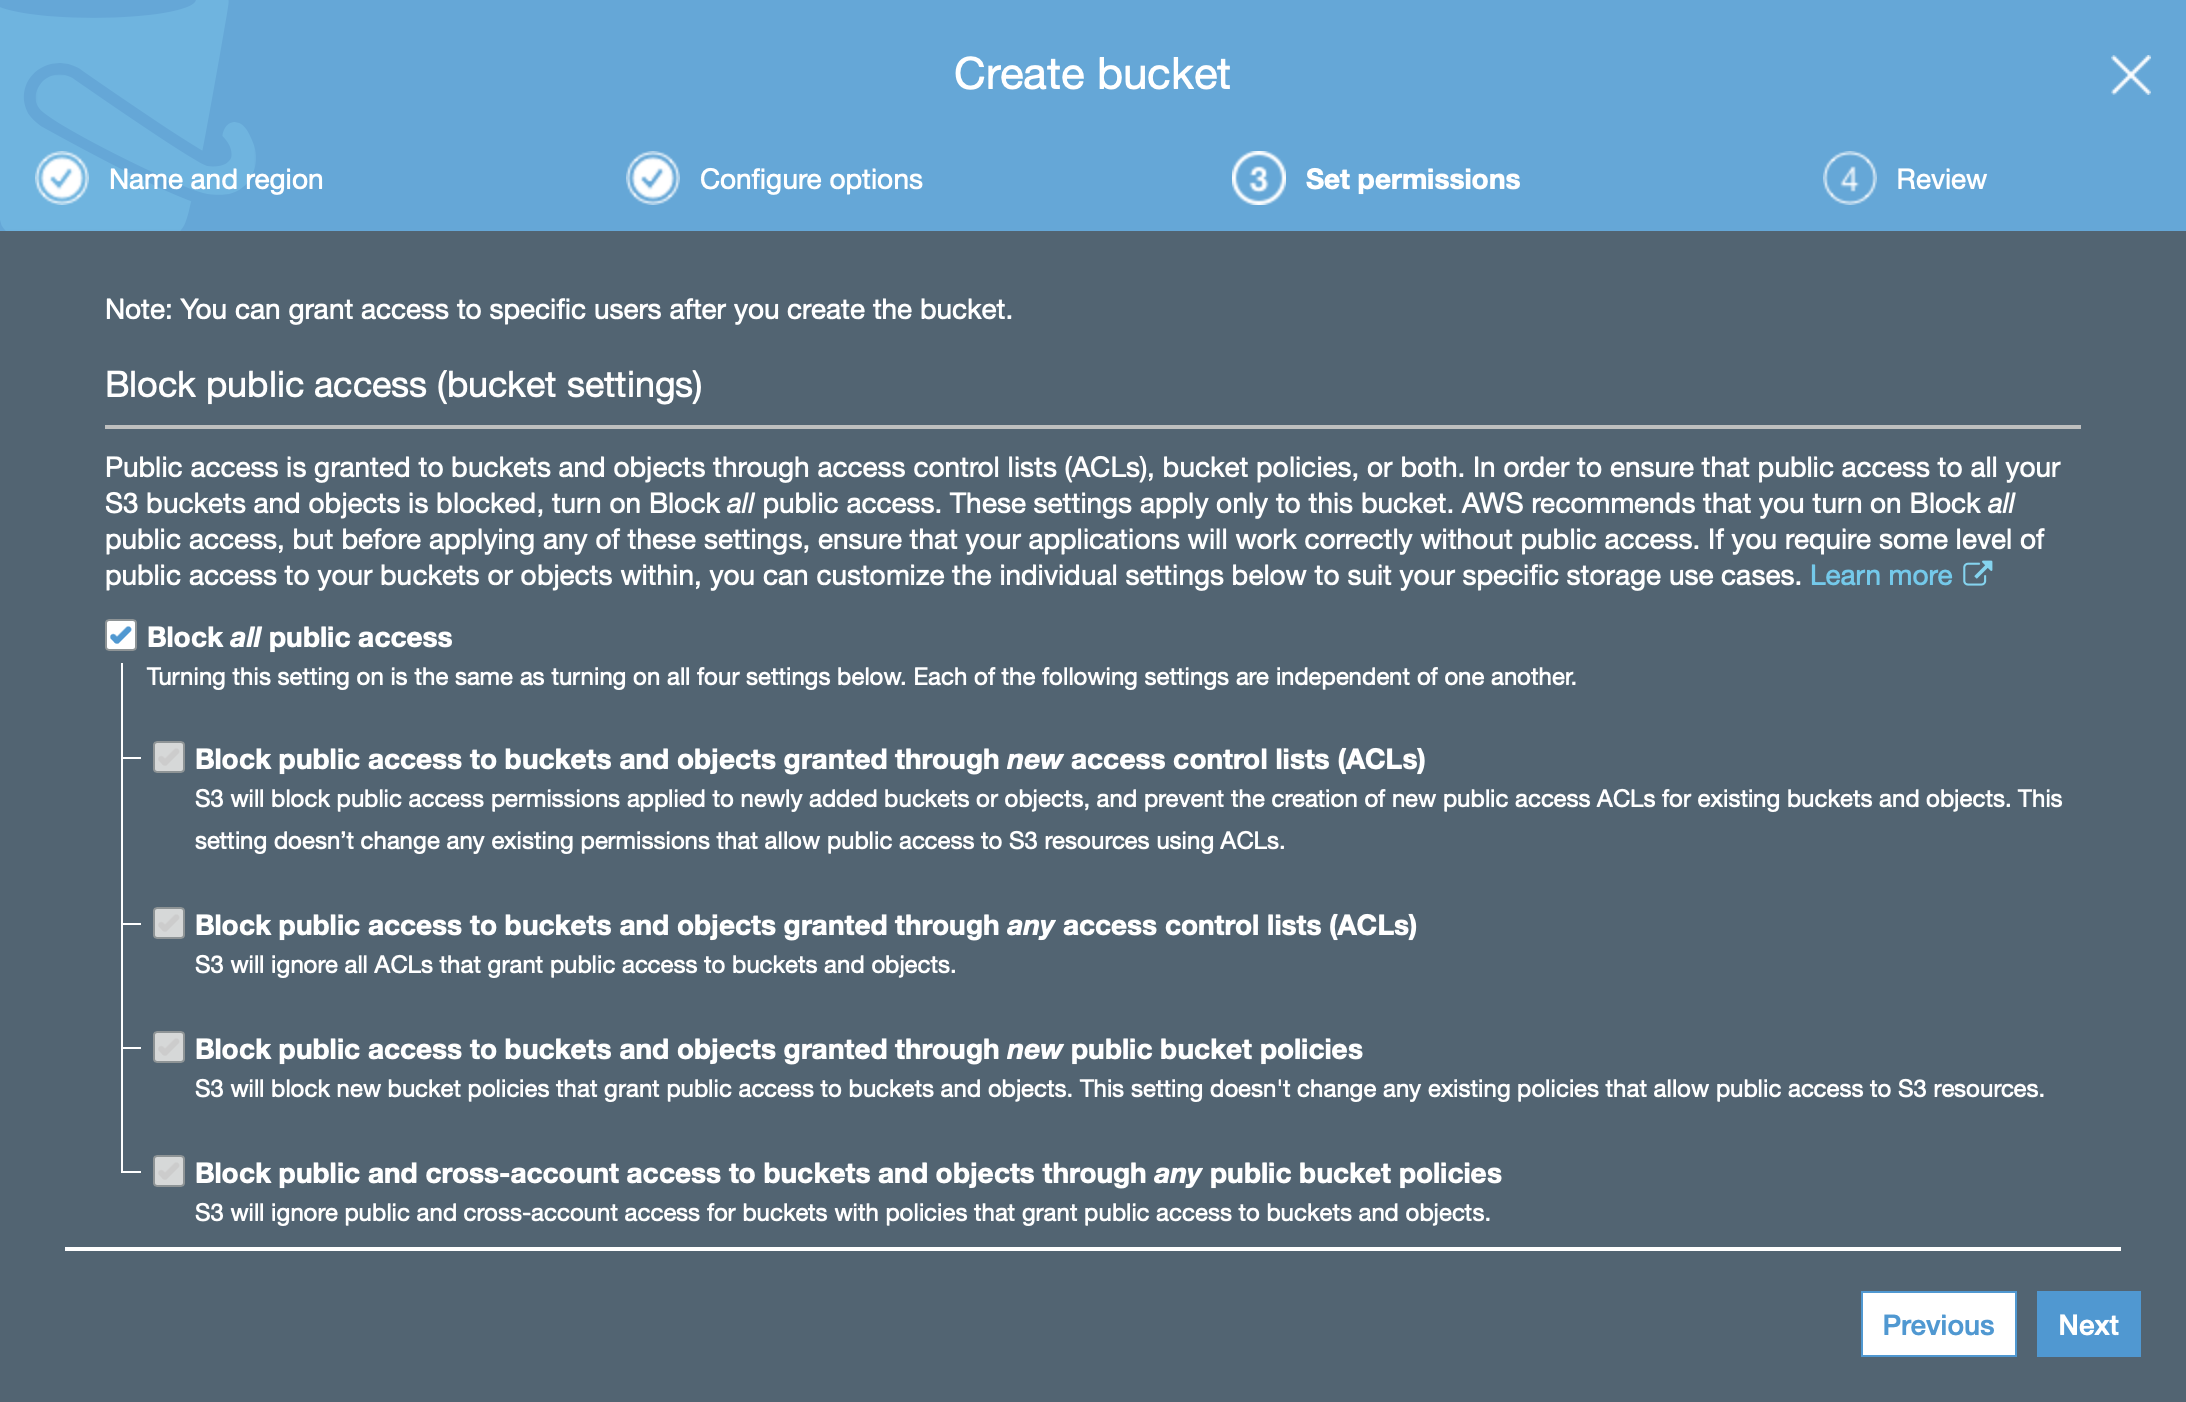
Name it whatever you would like. No configuration changes are necessary – the defaults are sufficient.
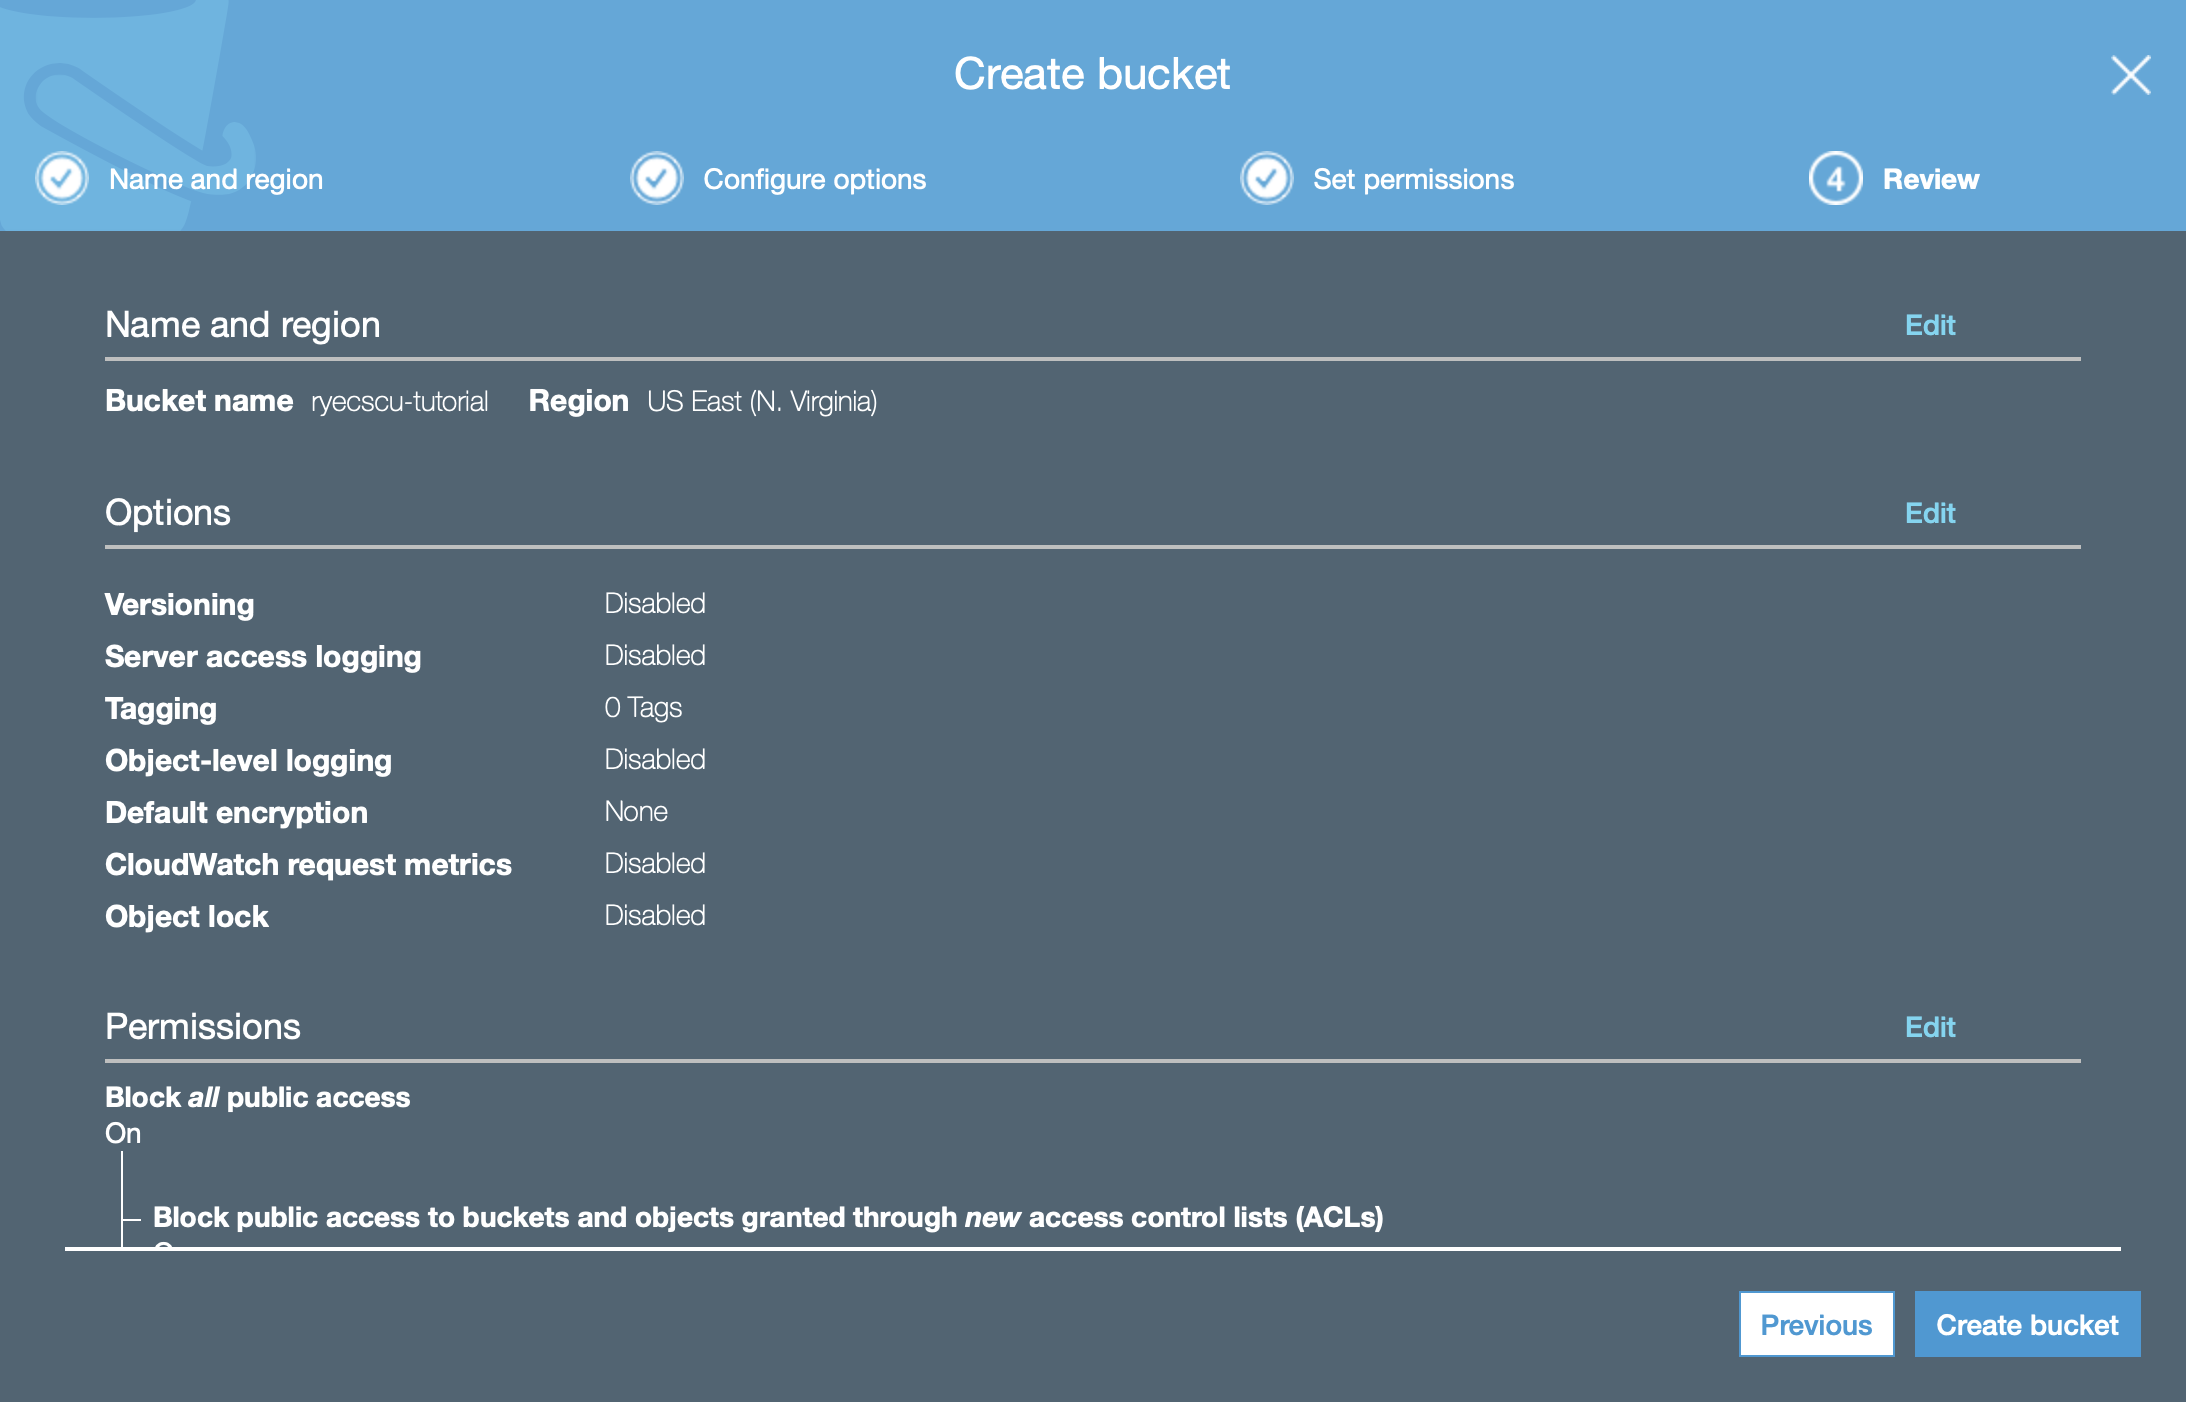
Your bucket settings review should look like the one above: a basic, private by default S3 bucket. Click on Create bucket.
Navigate to the bucket, and click on the permissions tab. Click on the Bucket Policy button and copy the following configuration into the field.
{ “Version”: “2012-10-17”, “Statement”: [ { “Sid”: “GiveSESPermissionToWriteEmail”, “Effect”: “Allow”, “Principal”: { “Service”: “ses.amazonaws.com” }, “Action”: “s3:PutObject”, “Resource”: “arn:aws:s3:::YOUR_BUCKET/*”, “Condition”: { “StringEquals”: { “aws:Referer”: “YOUR_ID” } } } ] }
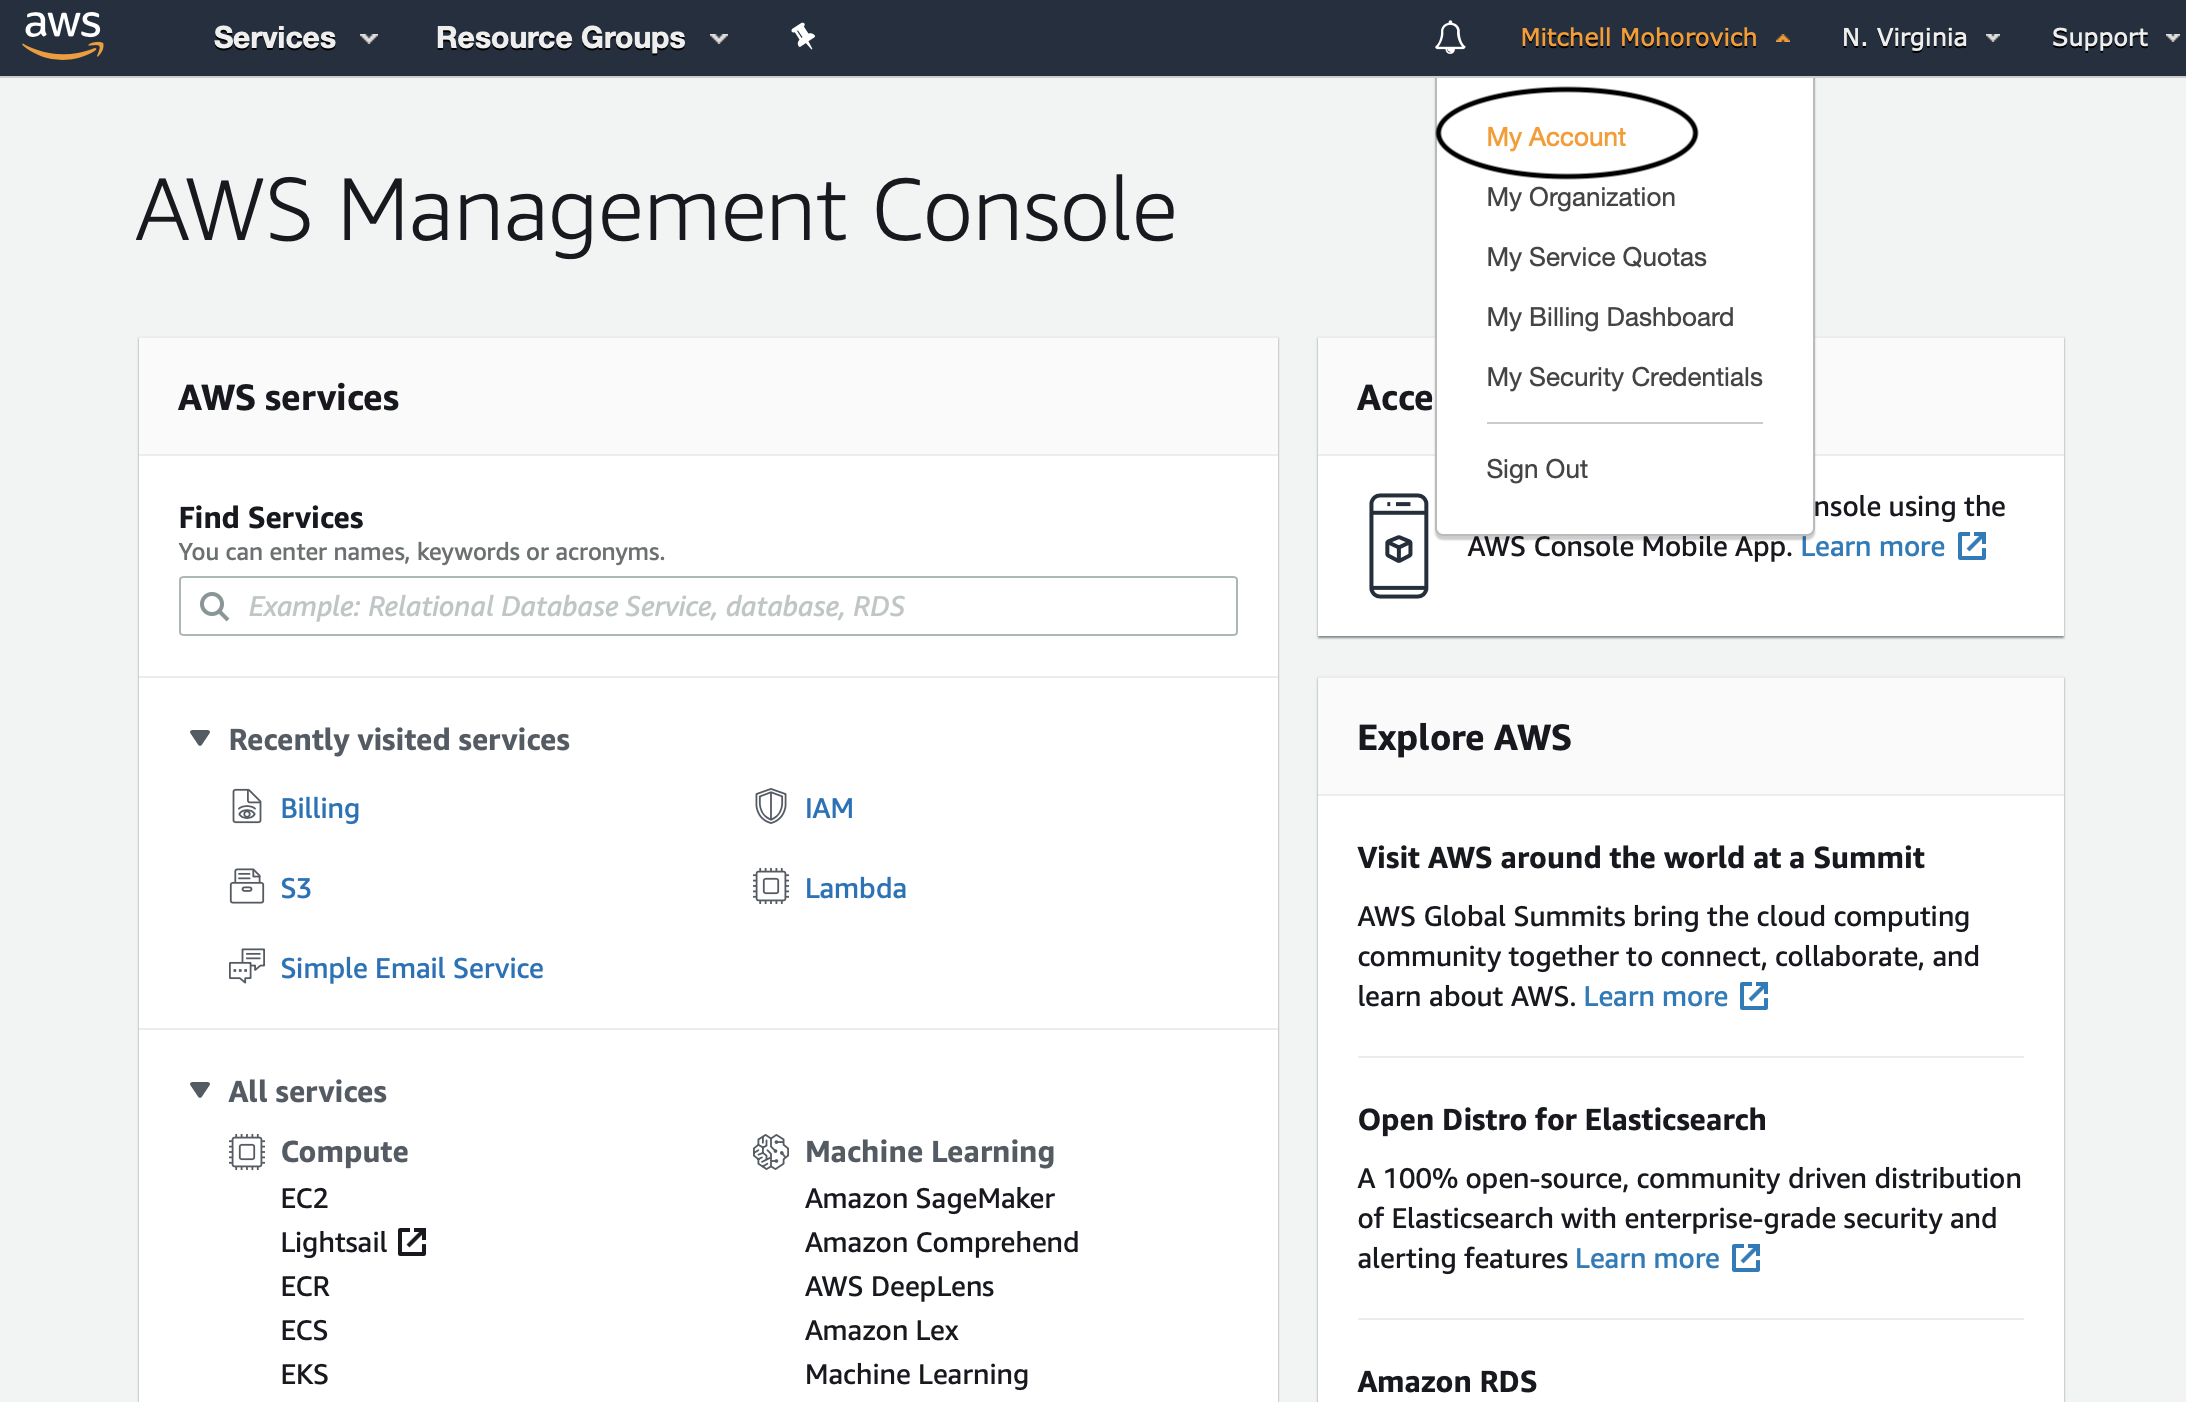
Replace YOUR_BUCKET with the name of the bucket created, and replace YOUR_ID with the current logged in account. To find the latter information, navigate to your Account Settings shown below. (You can also just click this link)
The Account ID is the 12 digit number on the top of the page under Account Settings. After clicking Save, this step is completed.
Simple Email Service (SES)
Domain Verification
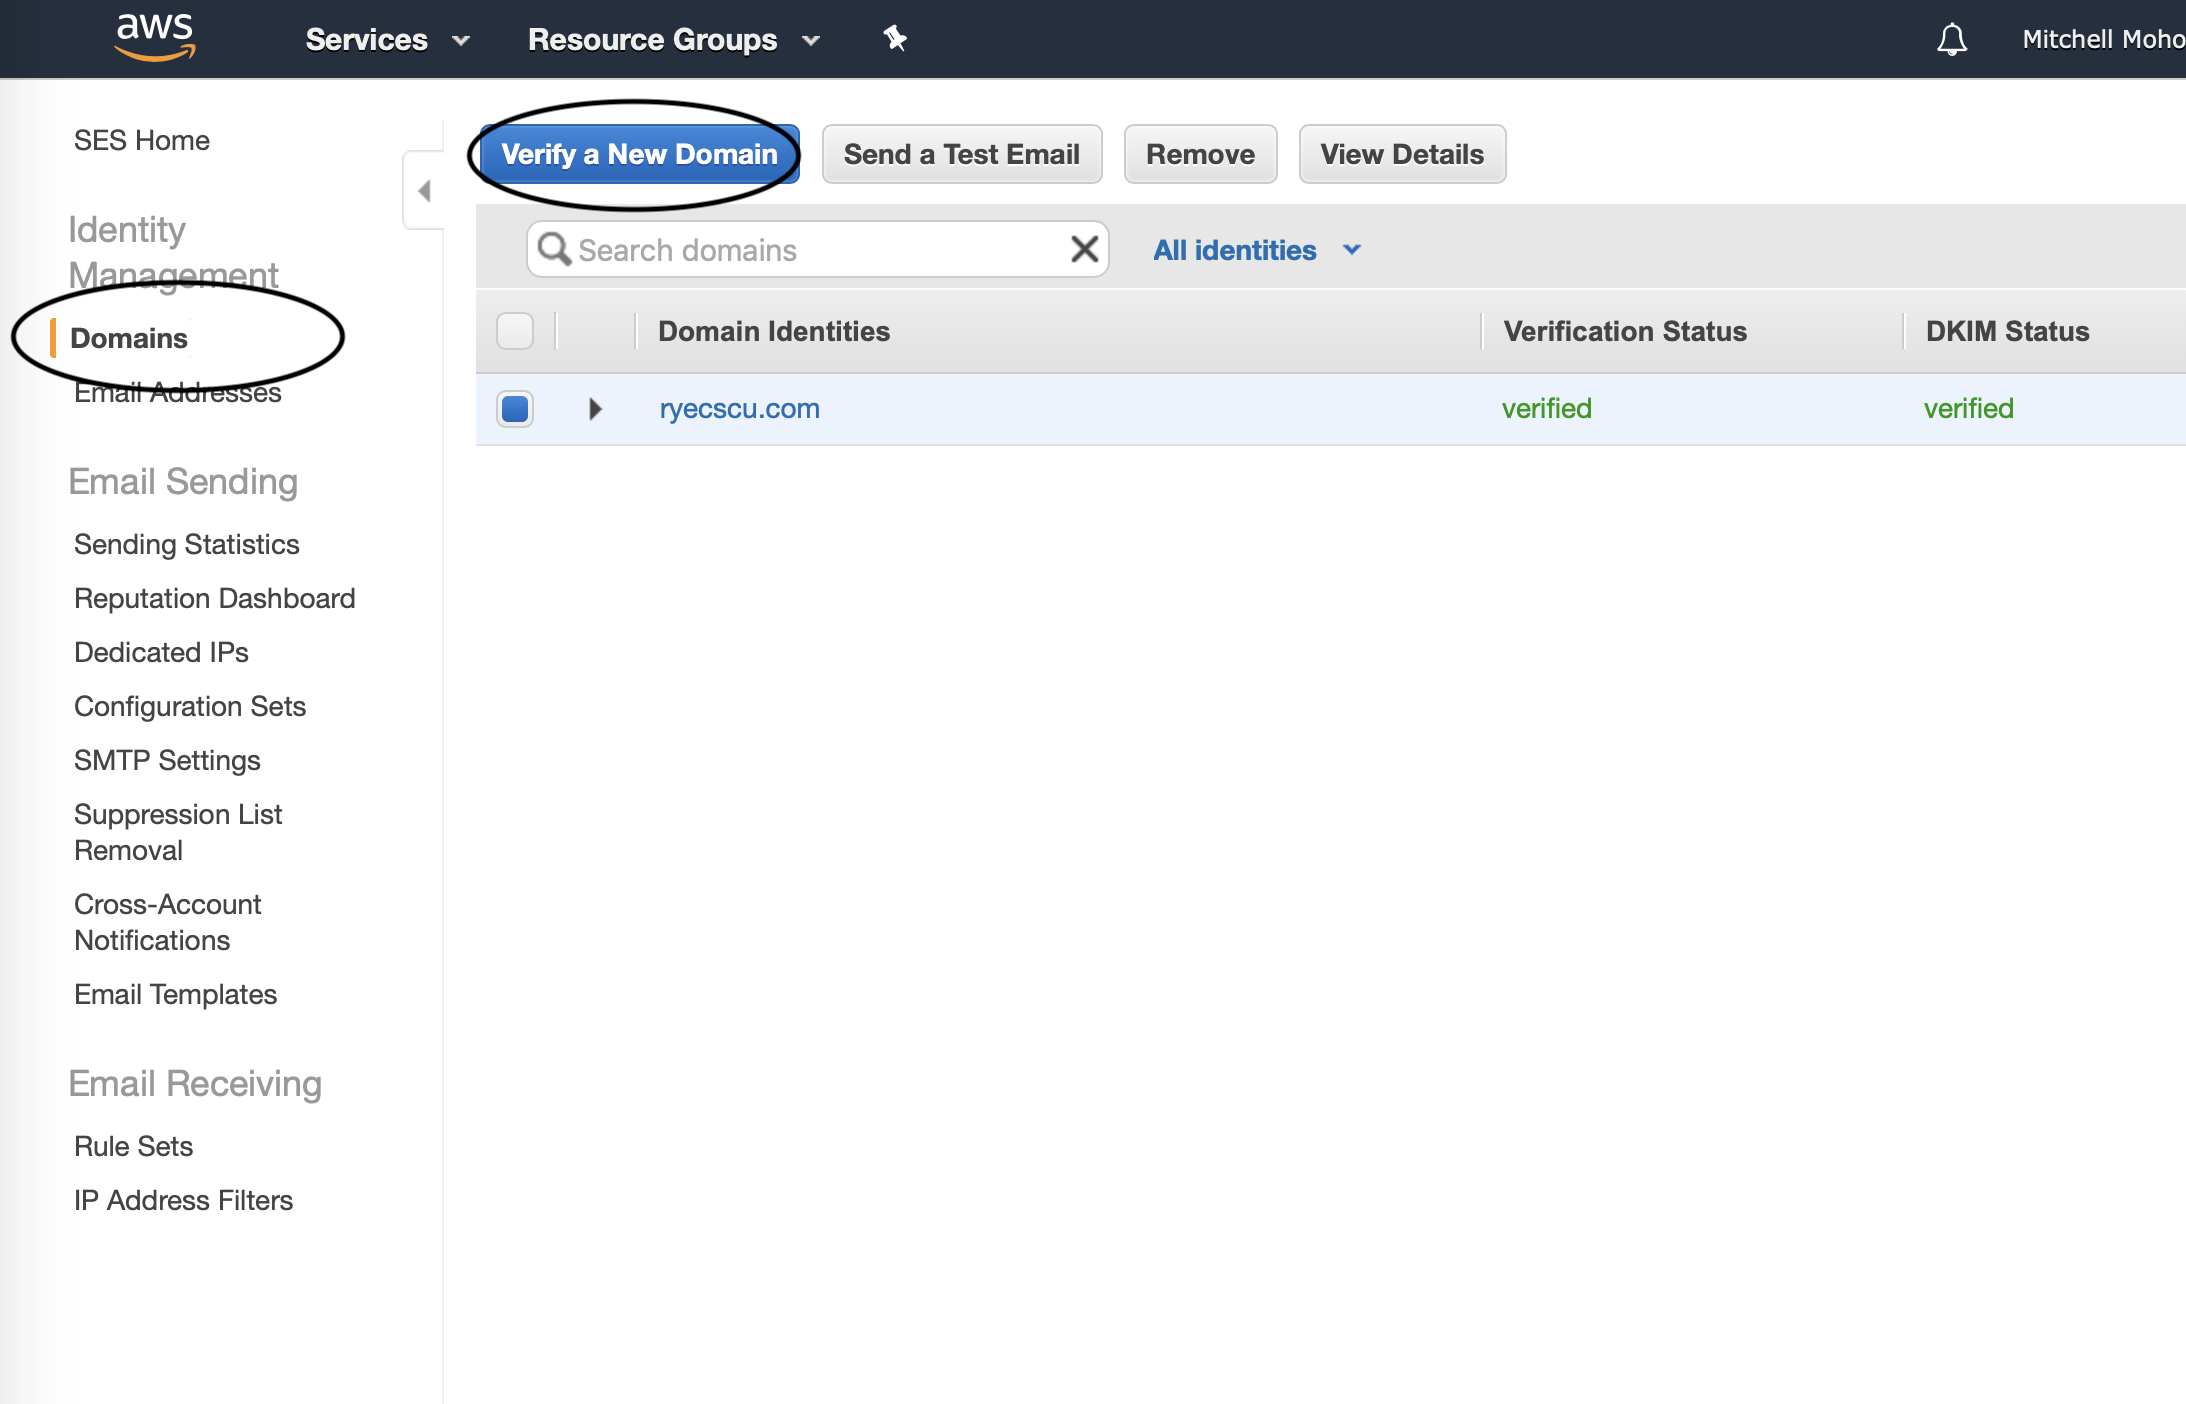
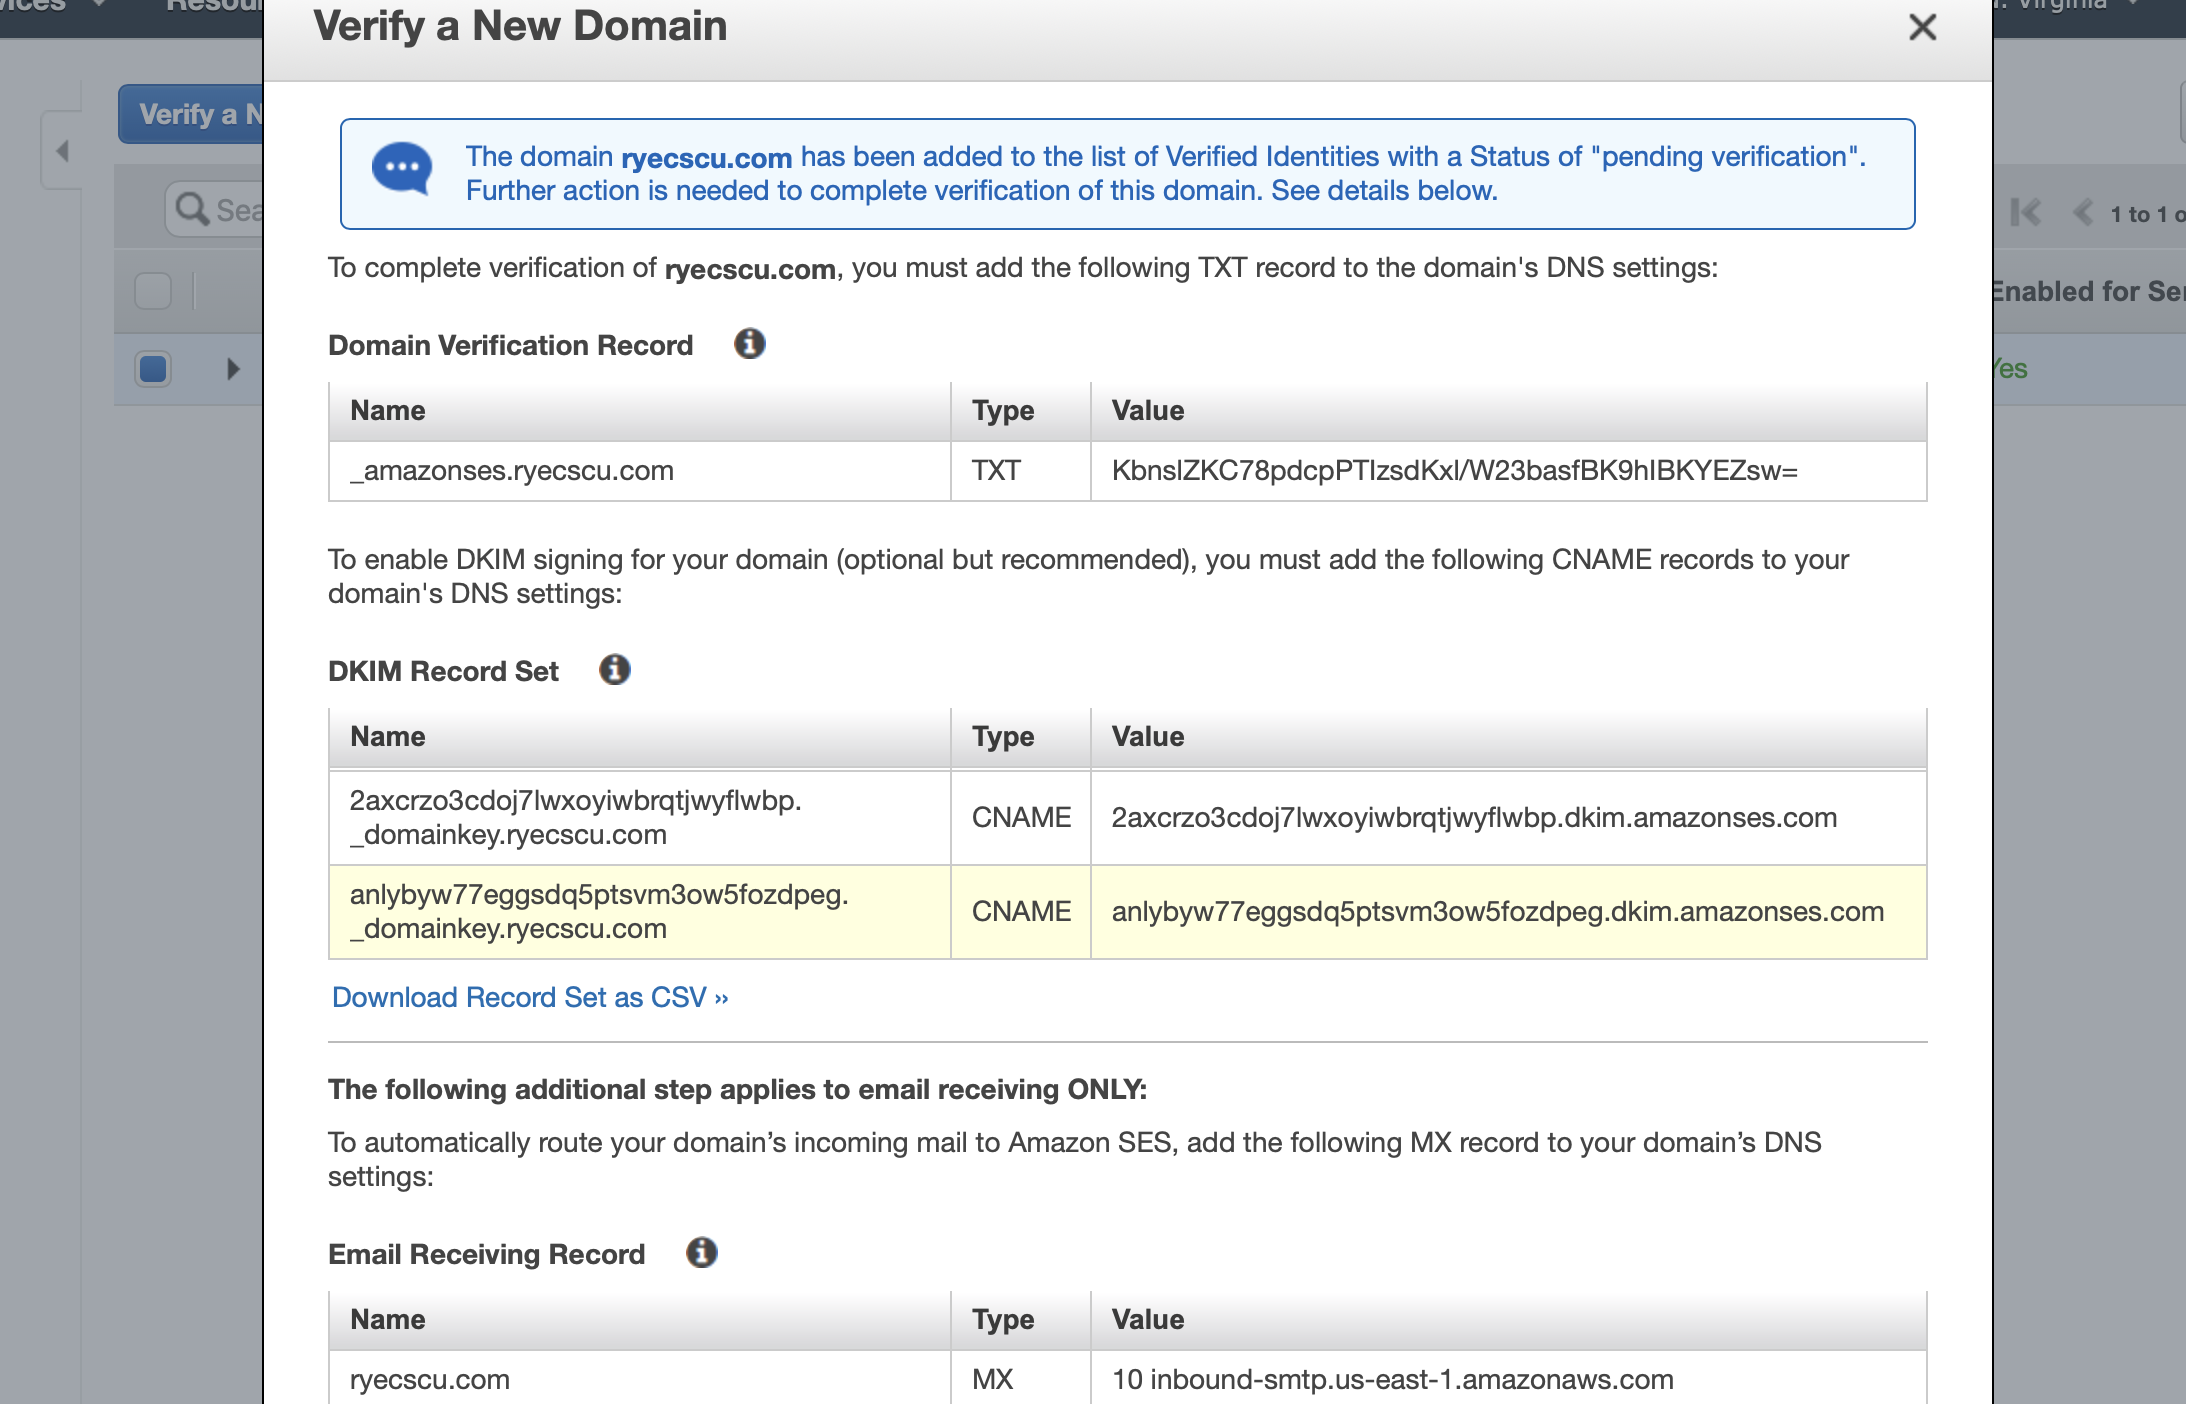
Navigate to SES, click on Domains (under Identity Management) and then click on Verify a New Domain.
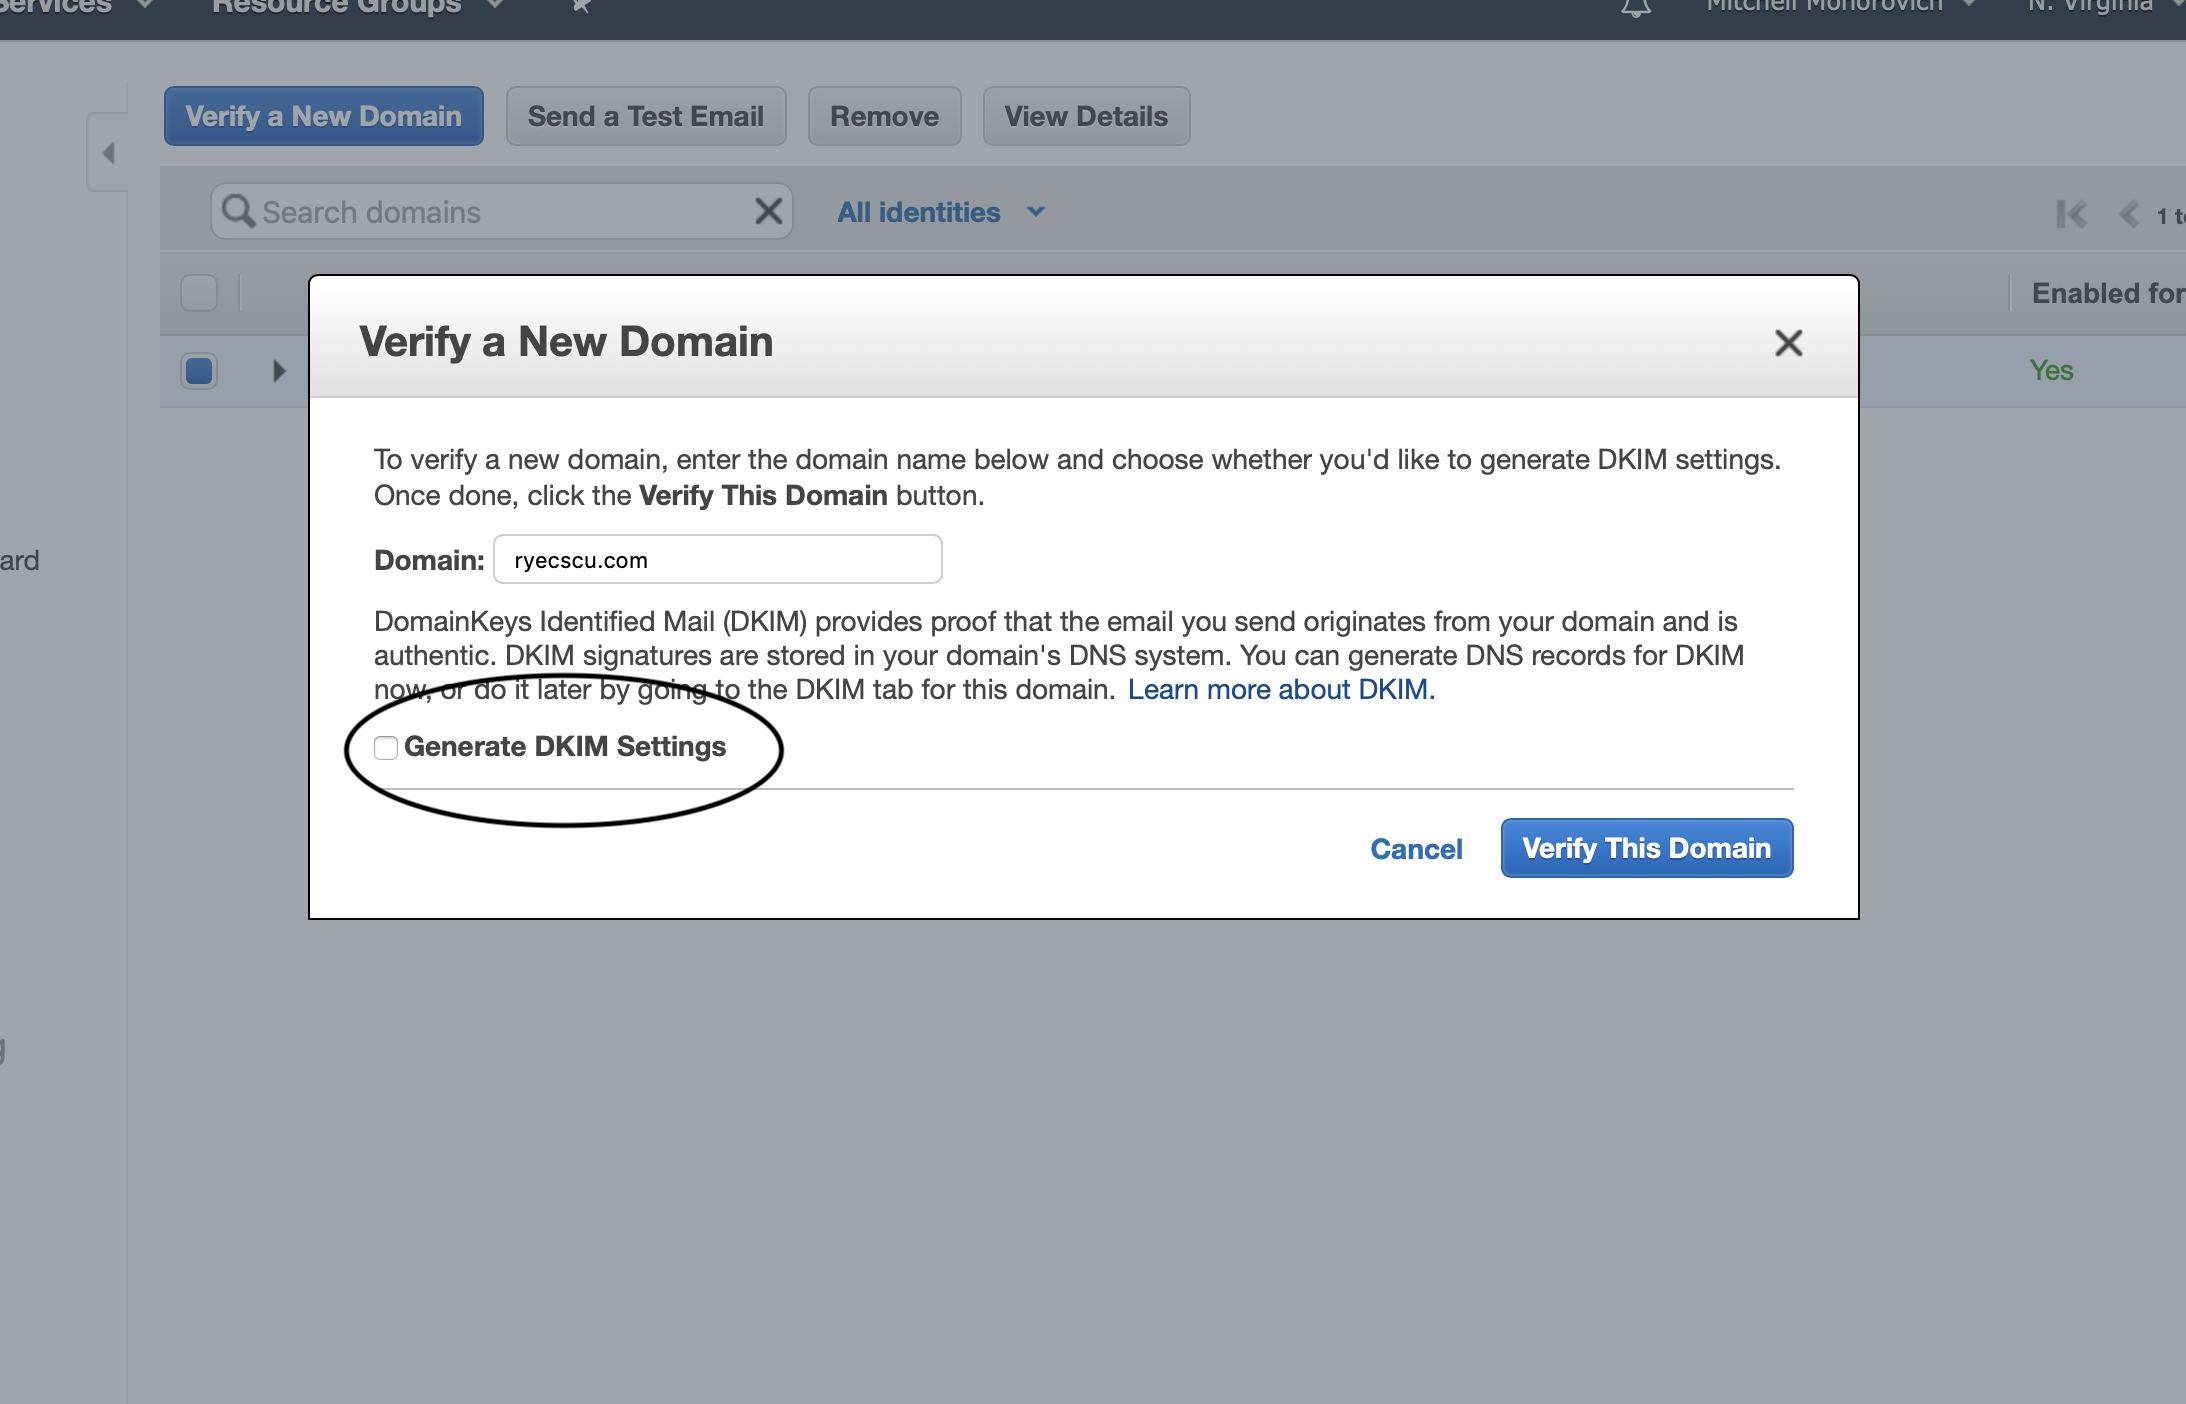
Fill out your domain, and make sure to check off that Generate DKIM Settings checkbox.
Given that your domain DNS is managed by AWS Route53, upon clicking the Verifiy This Domain button you’ll be greeted by the window below, which shows all of the records that have been generated for you:
Scroll to the bottom and behold the power of the AWS walled garden.
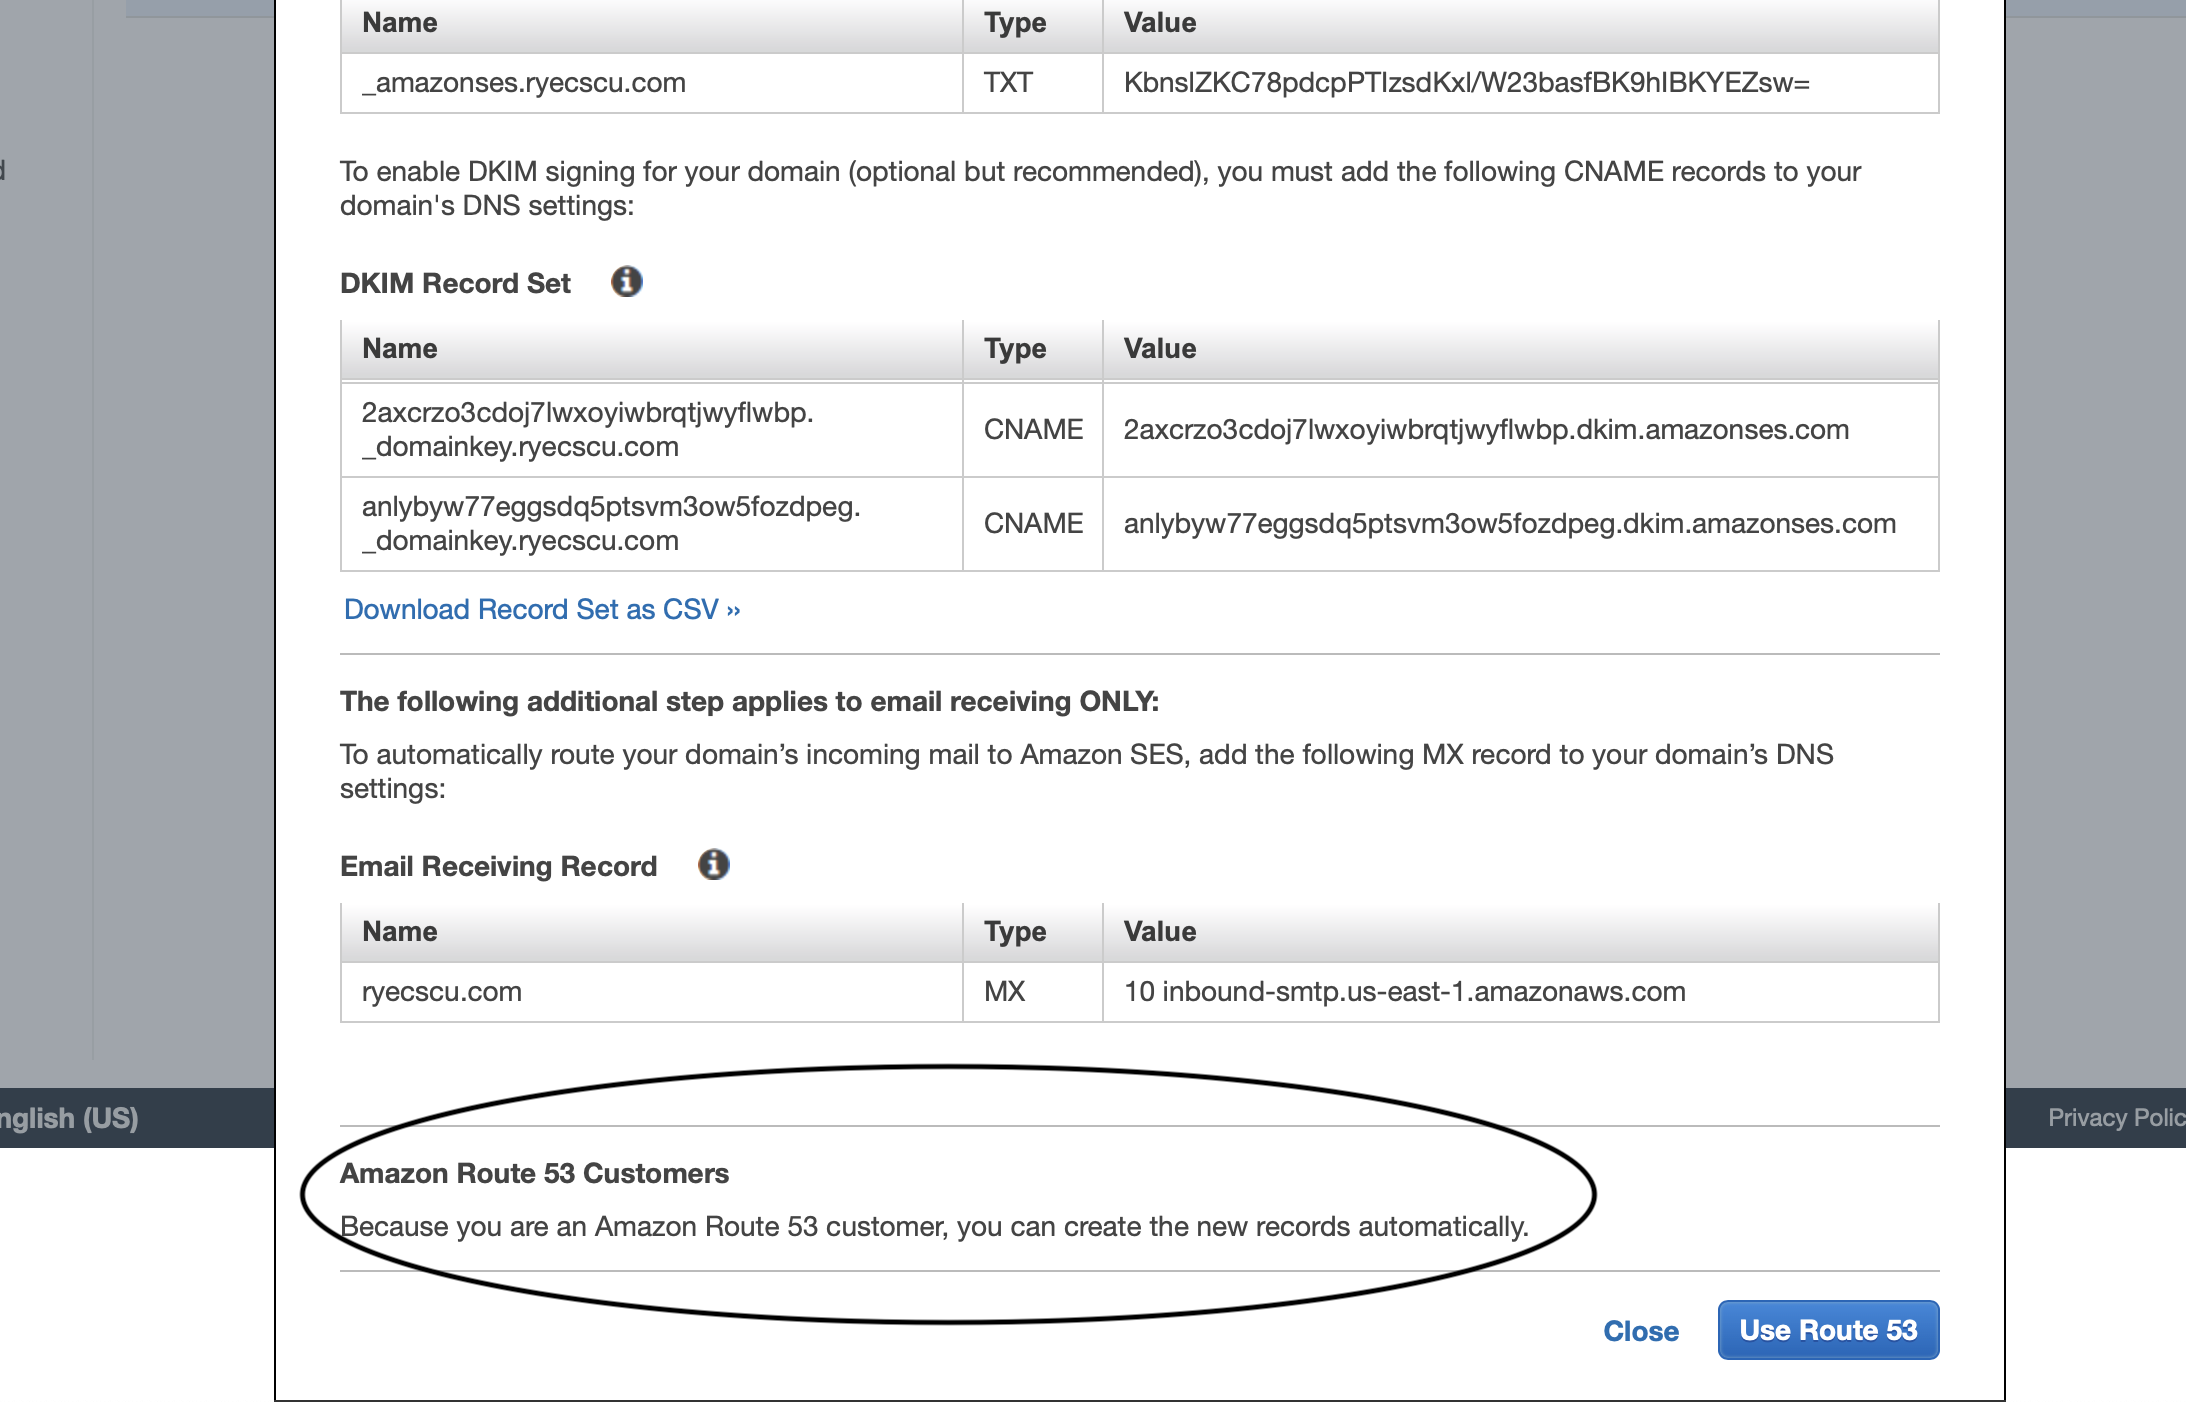
Click on Use Route 53 and your domain is now verified for email sending purposes.
Verify a New Email Address
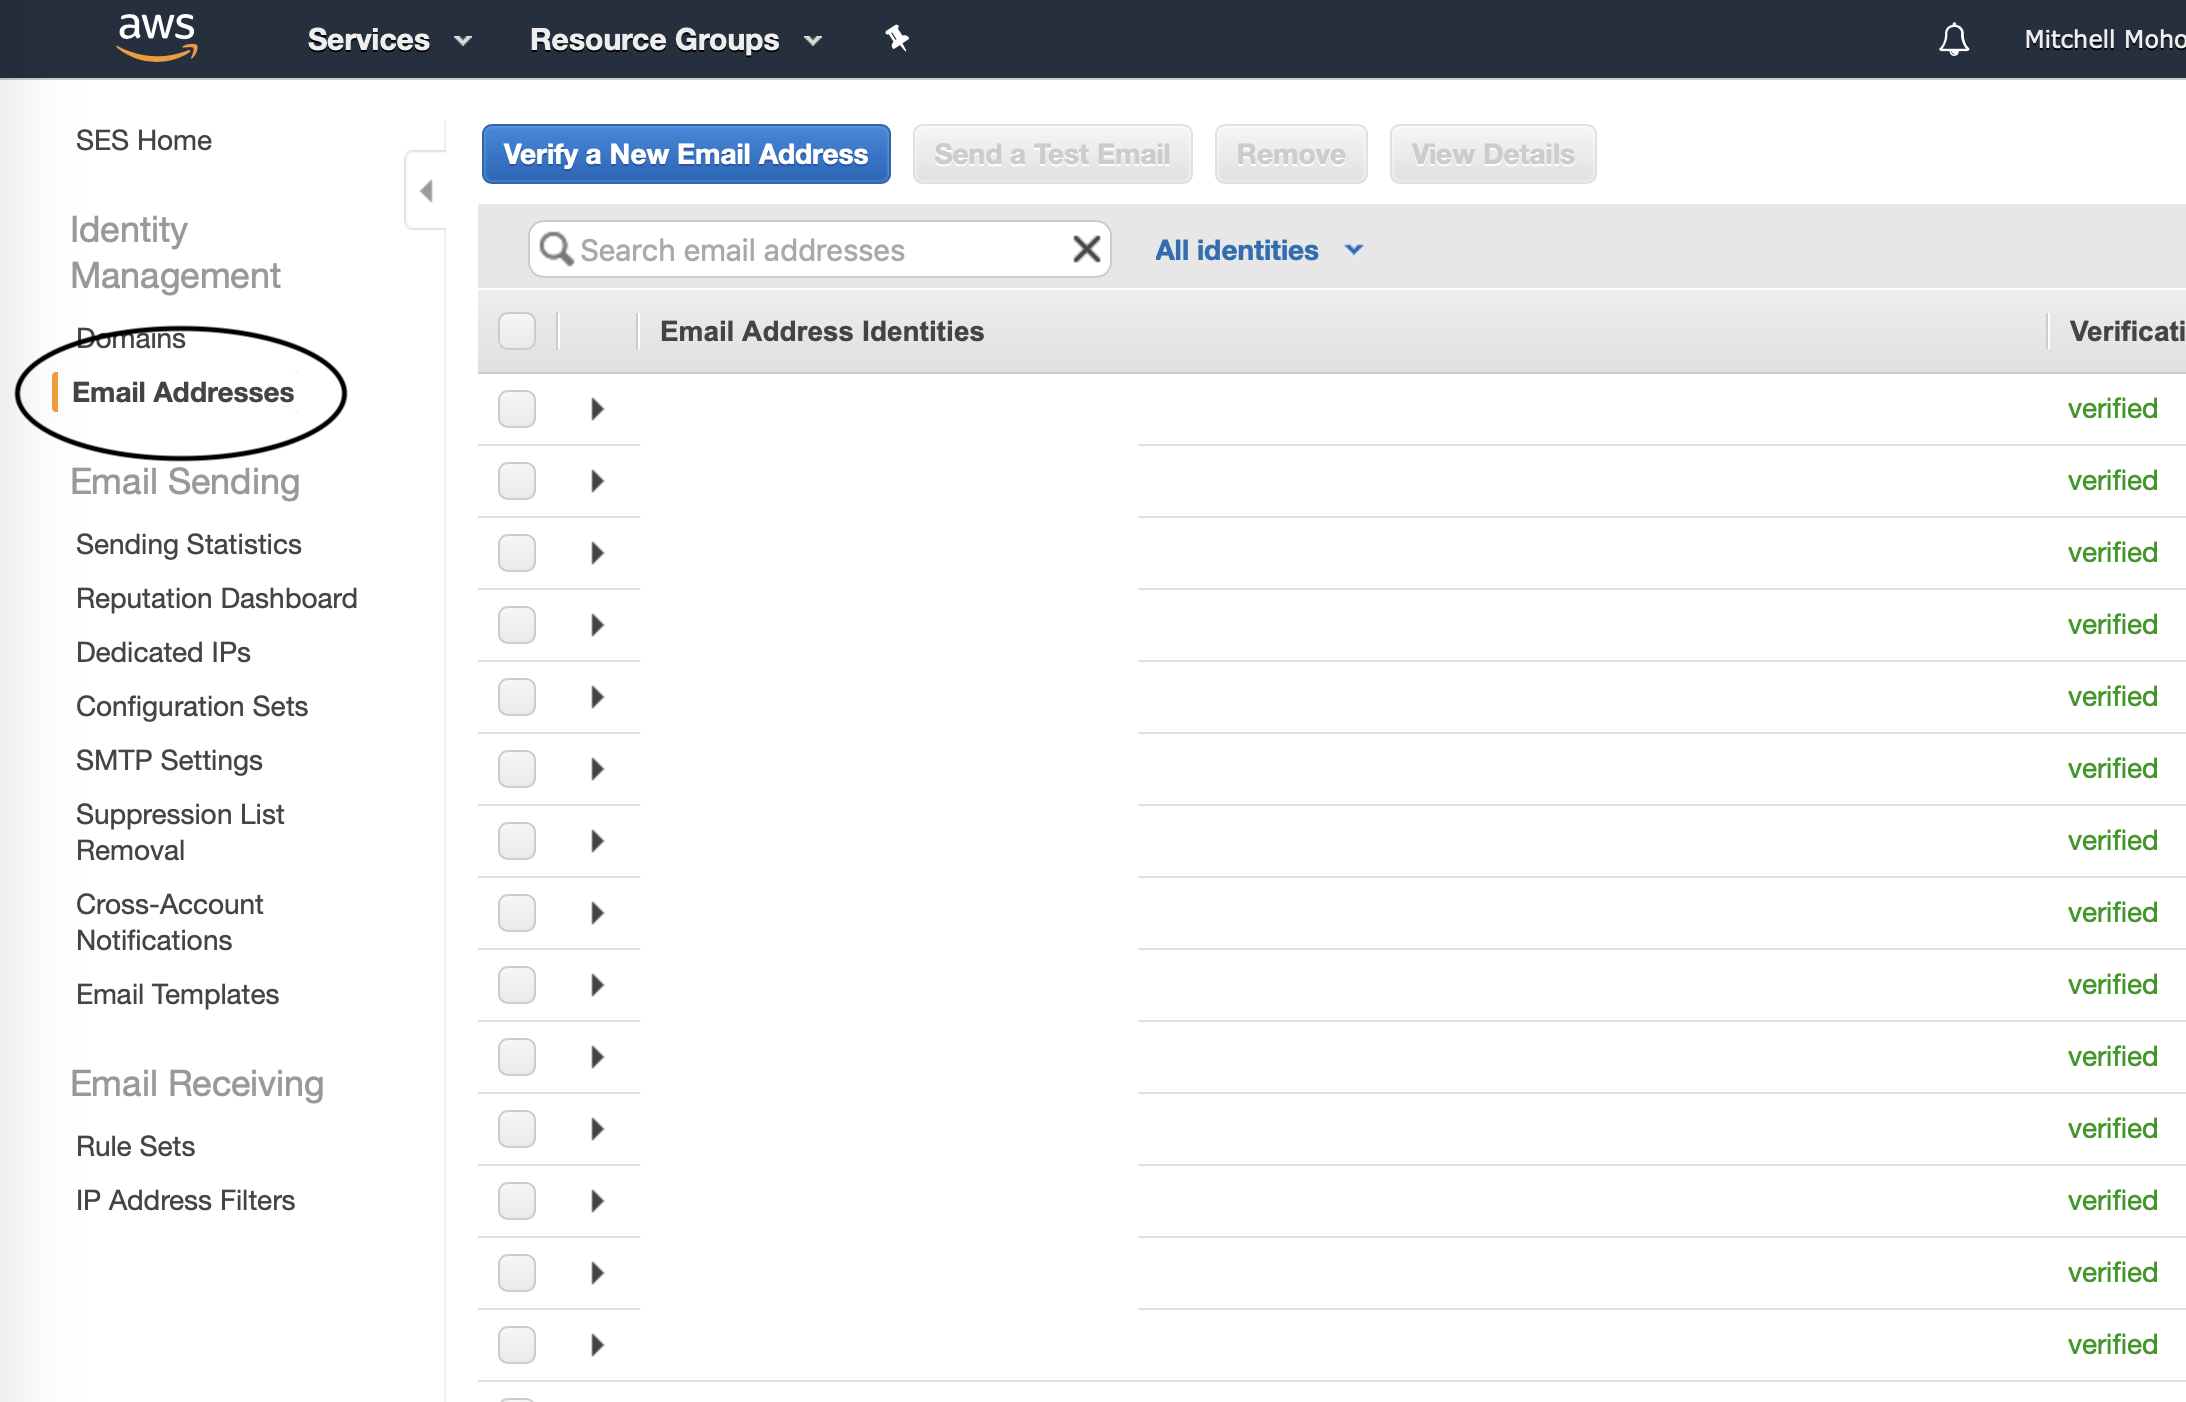
For future testing purposes, let’s set up a recipient email address. In SES, under identity management, click on Email Addresses.
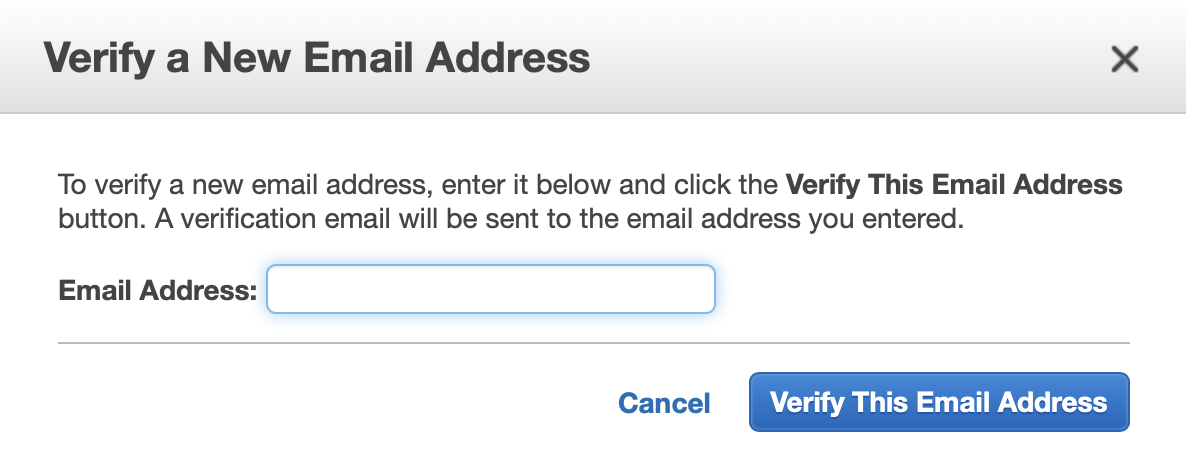
In the window that appears, enter an email address you will use to validate the mailing list works.
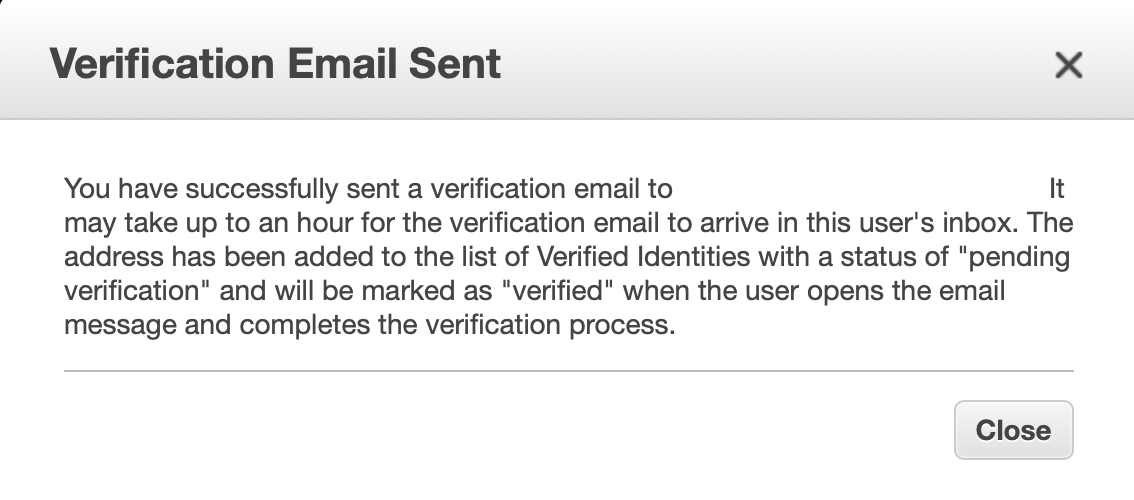
The email address will receive a message that looks like the following:
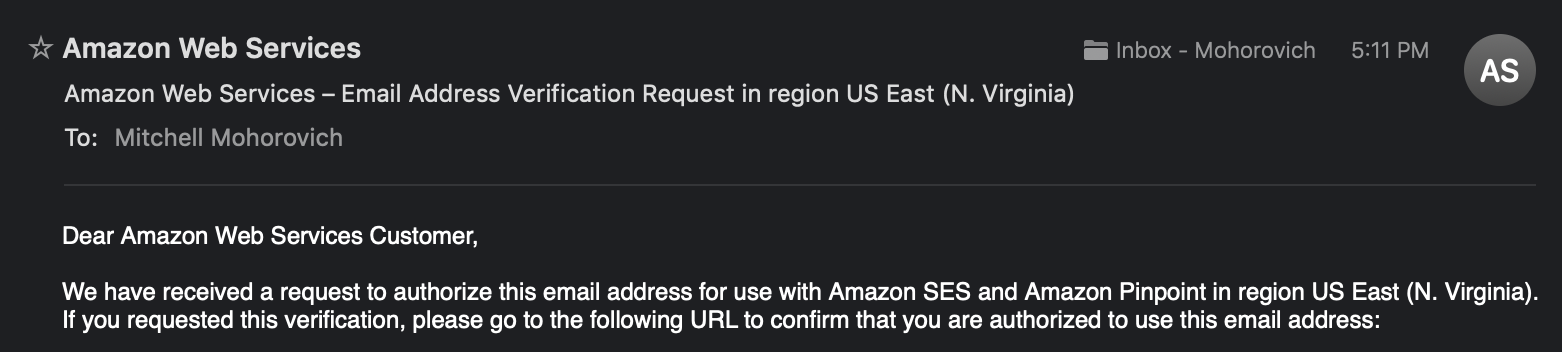
Click on the link that is in the email, and it will now be allowed for use by SES on this AWS account for email delivery. Note, make sure to check the spam directory if it doesn’t appear in your inbox after a couple minutes.
Lambda
Forwarder Function Setup
This step will set up the AWS Lambda function which will handle the SES Event that is passed to it (to be set up at a later step). This function will consume the event, read the message from S3, and then make a call to SES to send the message to the identified recipients. The code being used is arithmetric/aws-lambda-ses-forwarder.
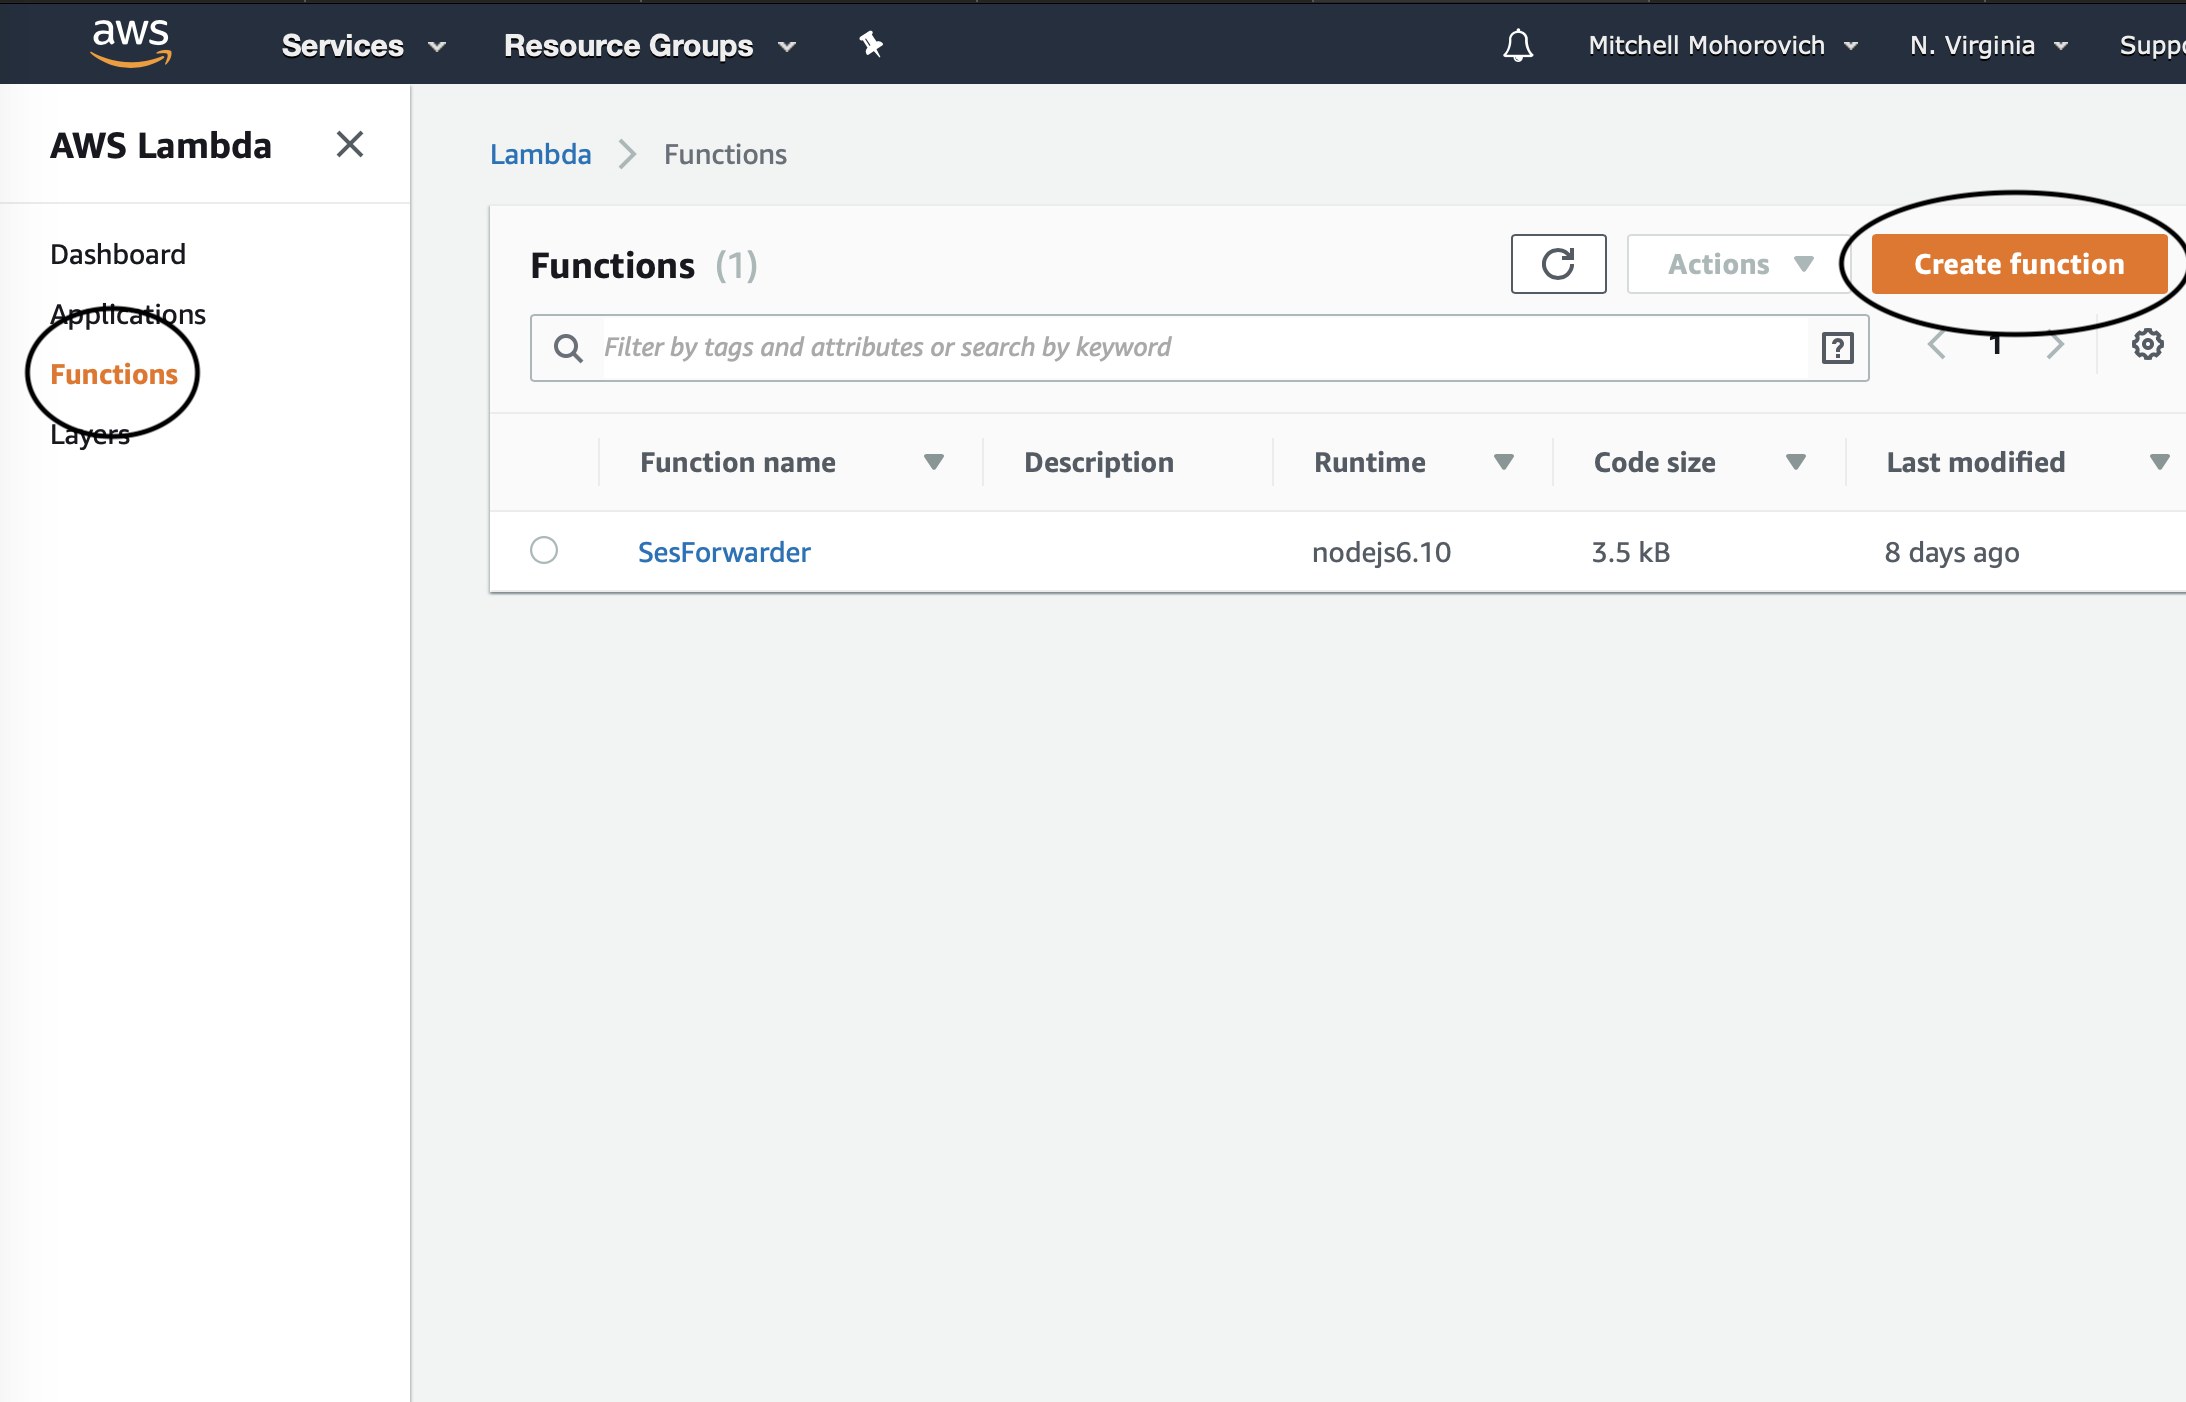
First thing’s first, navigate to Lambda and create a new function.
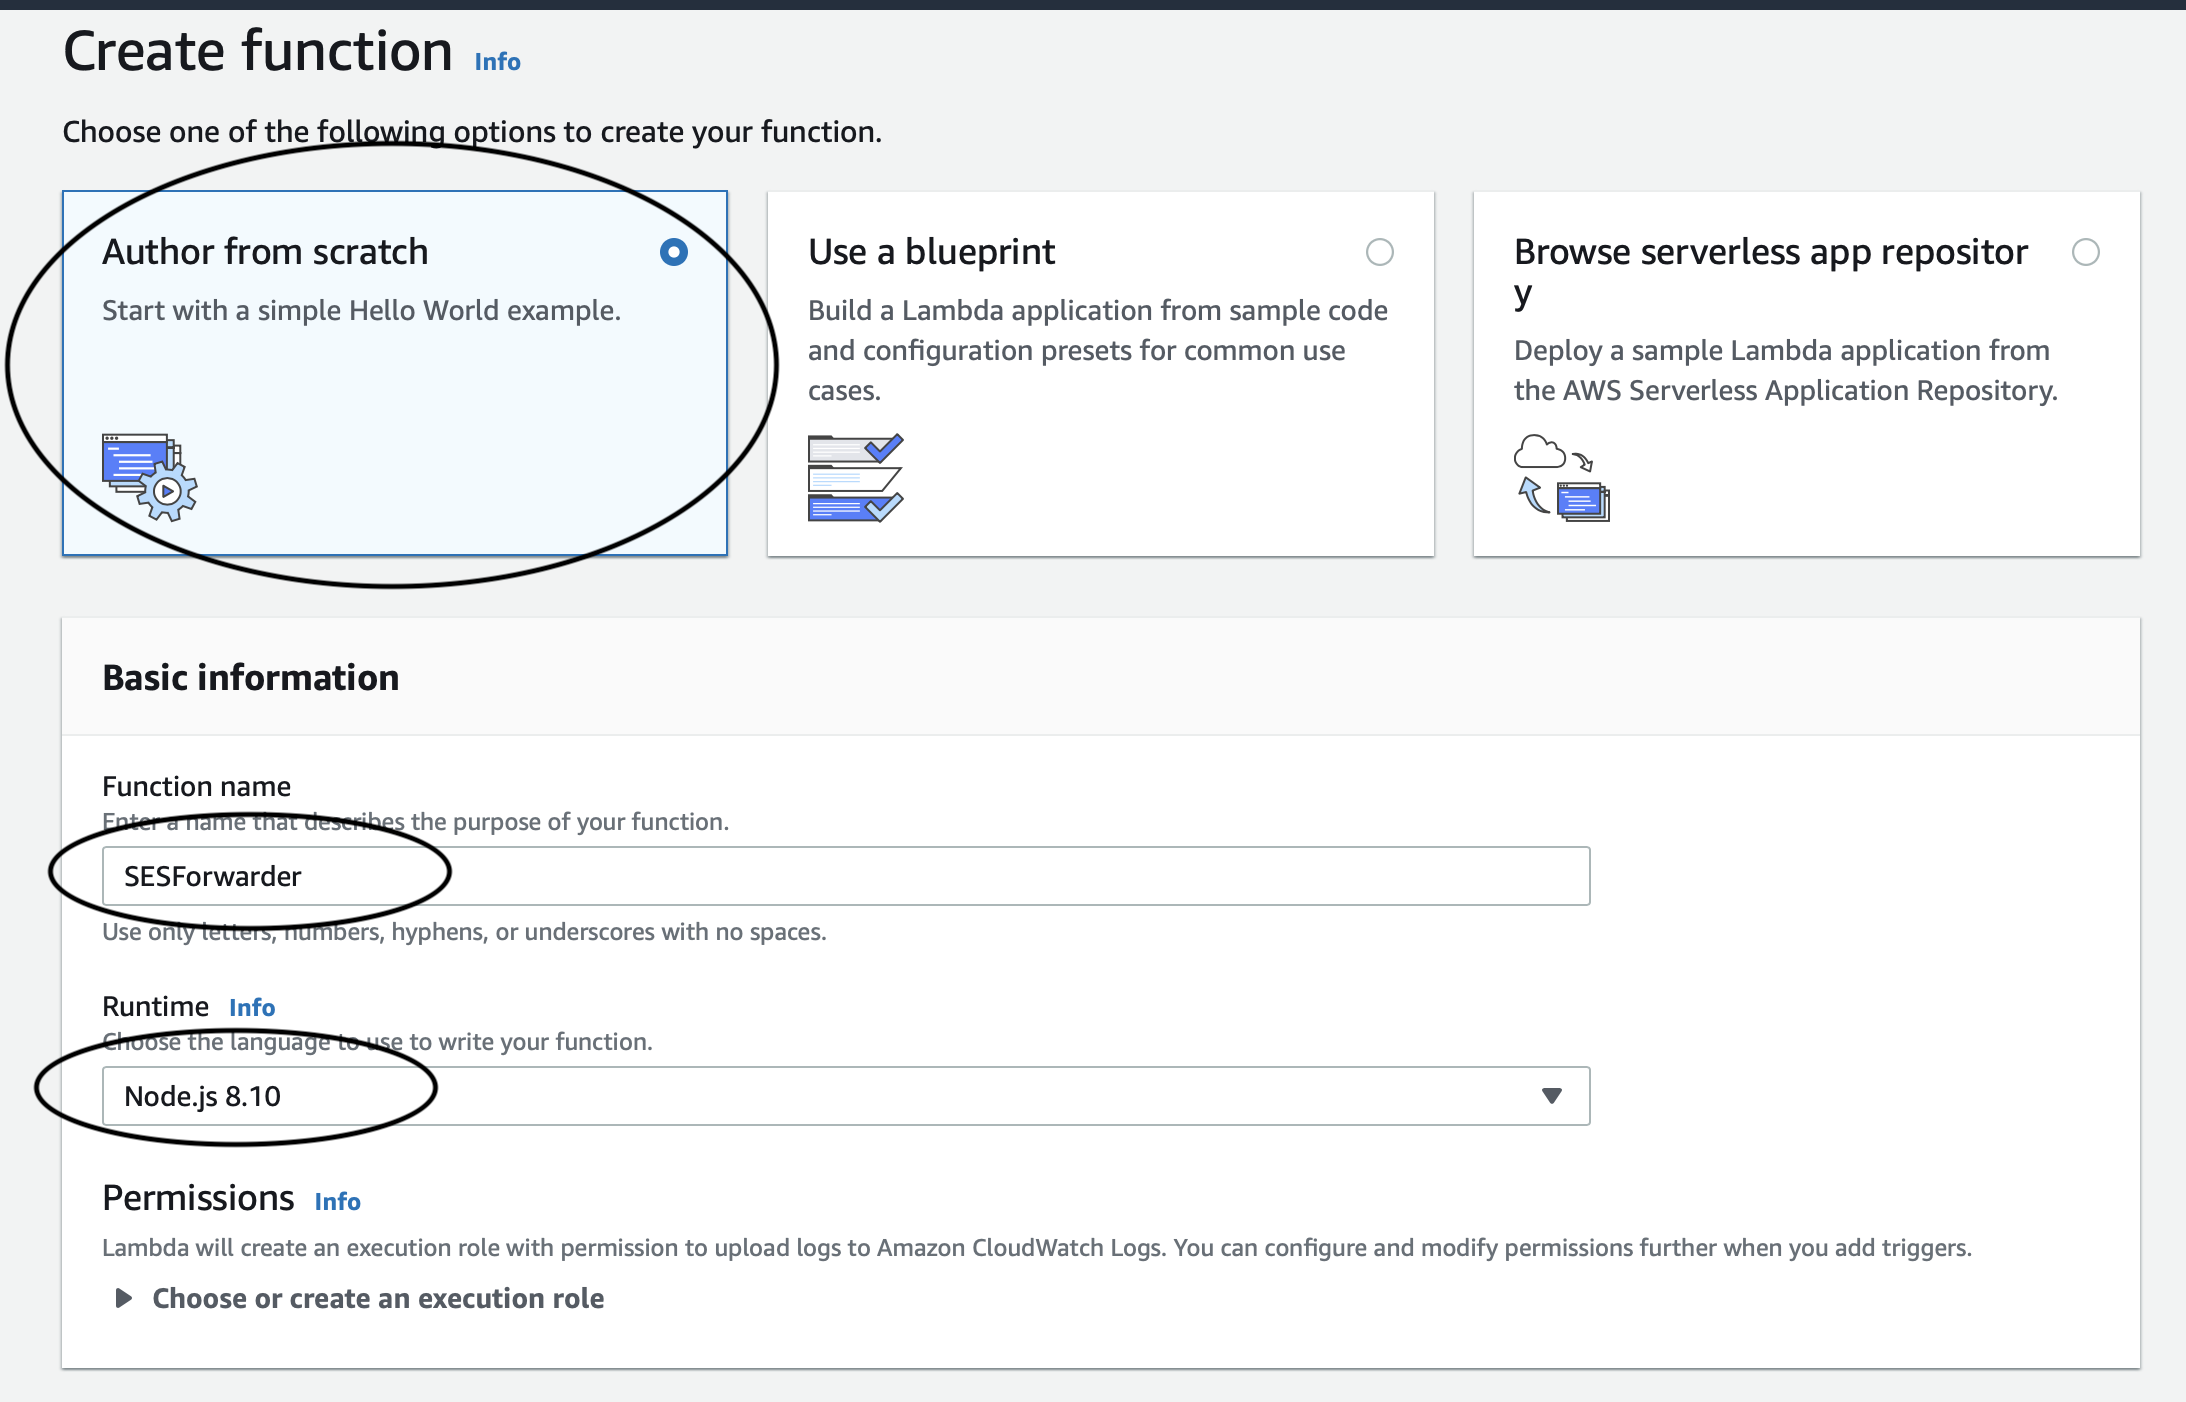
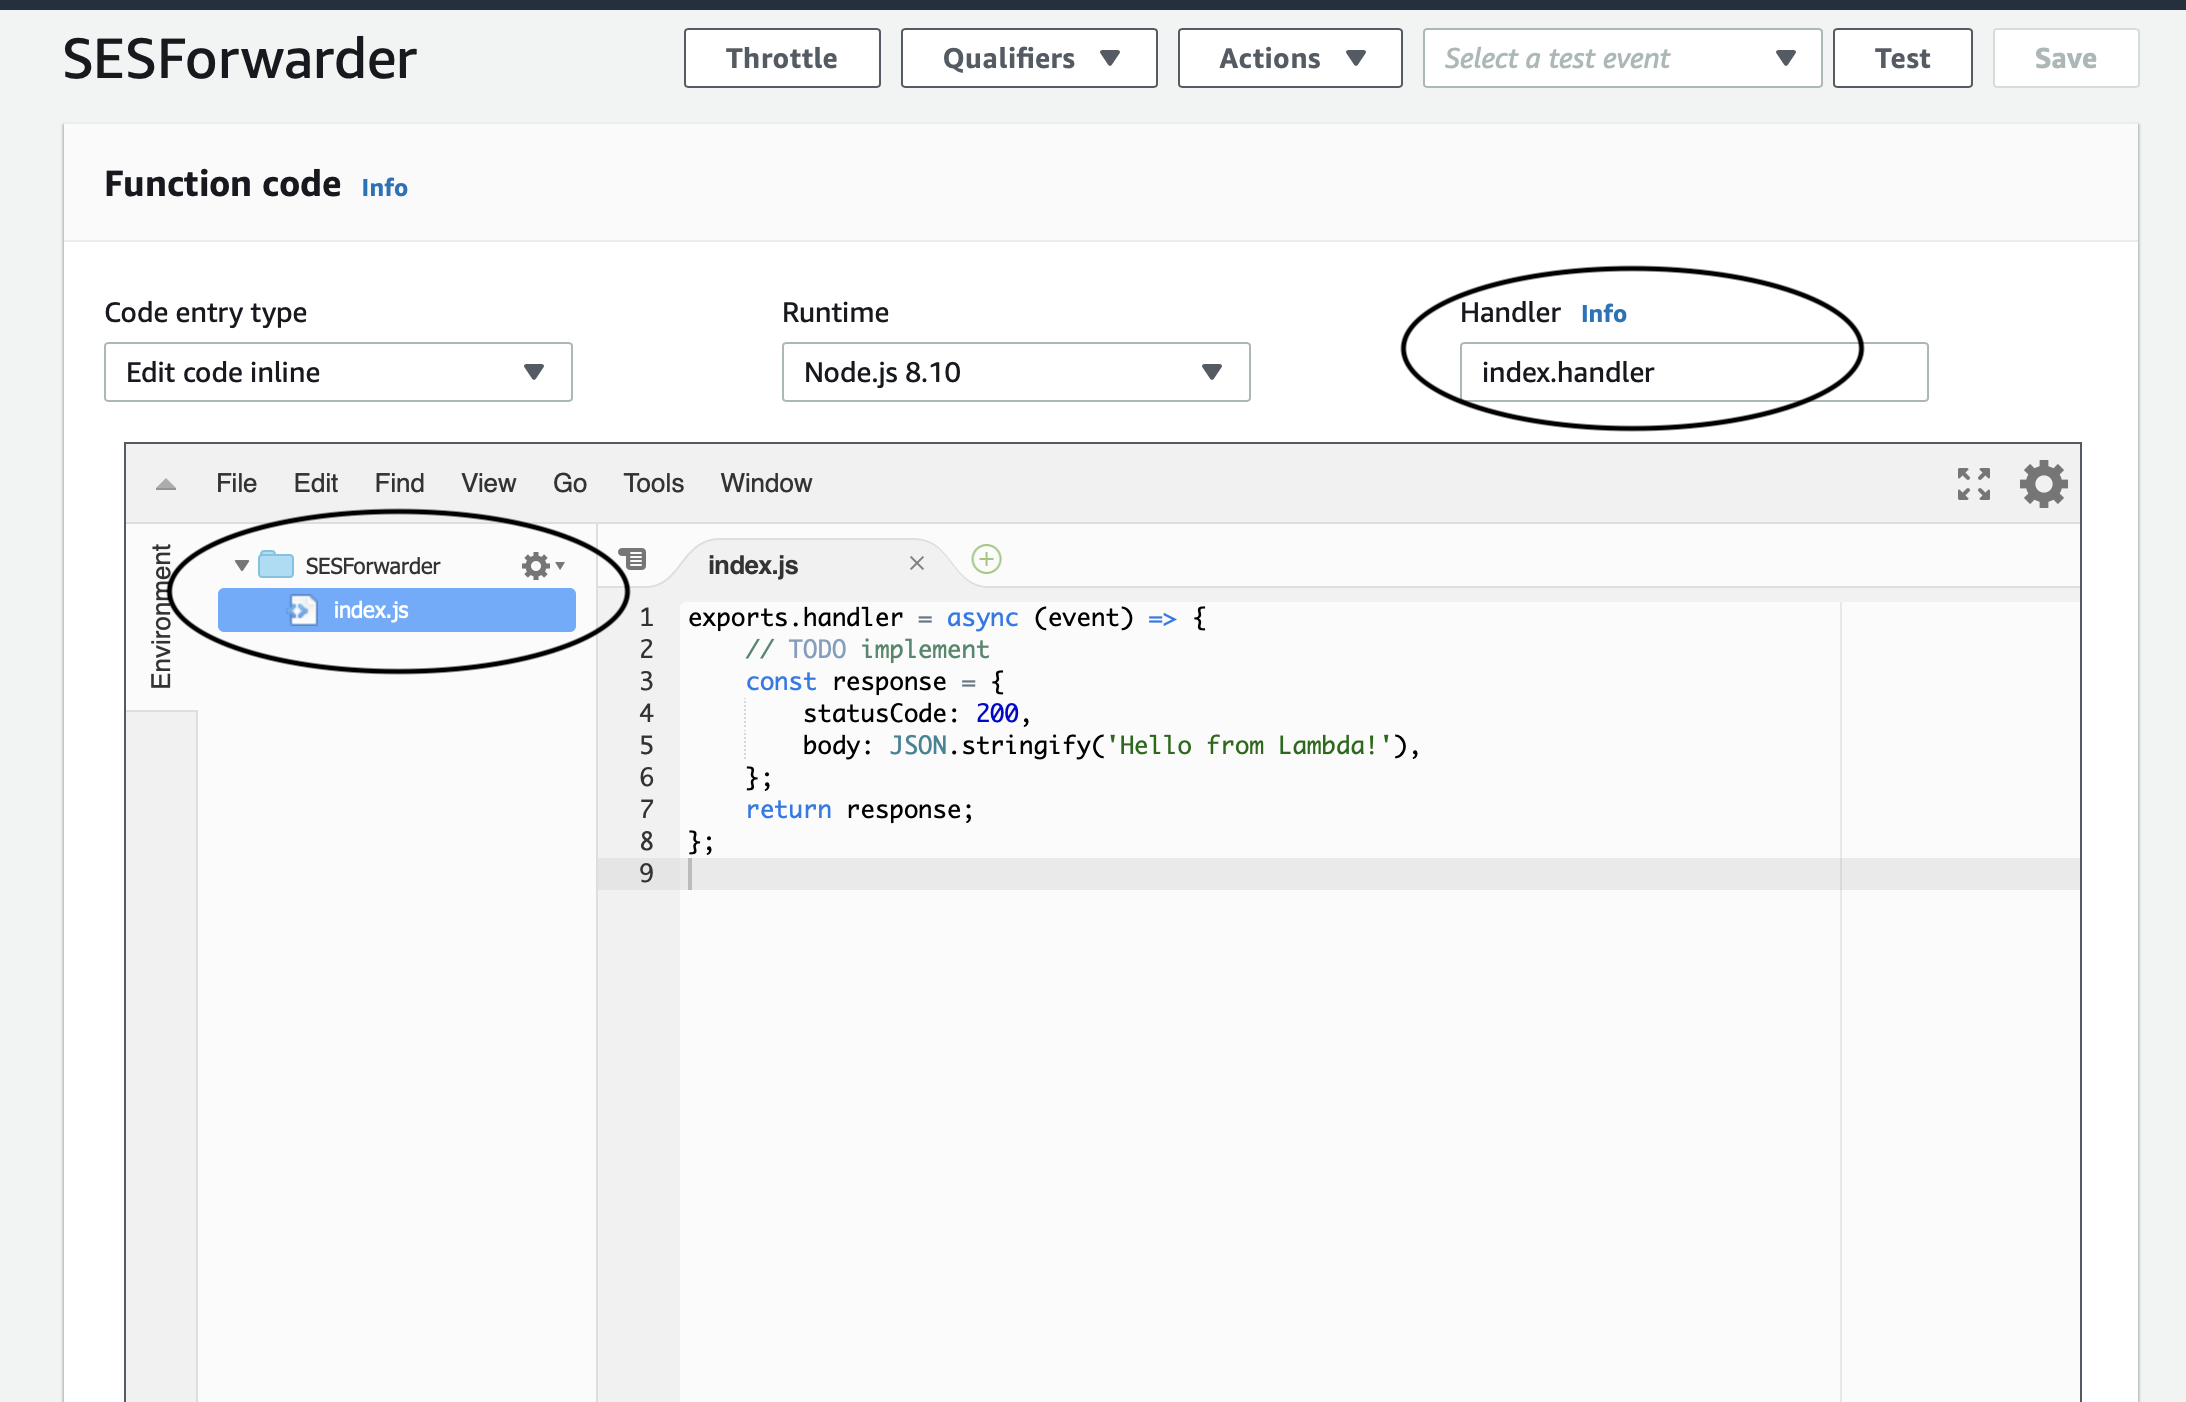
Make sure Author from scratch is enabled, then fill out the Function name and select Node.js 8.10 from the Runtime dropdown.
In the function code window that appears, make sure that the Handler is set to index.handler, then select index.js and paste the aws-lambda-ses-forwarder code into it.
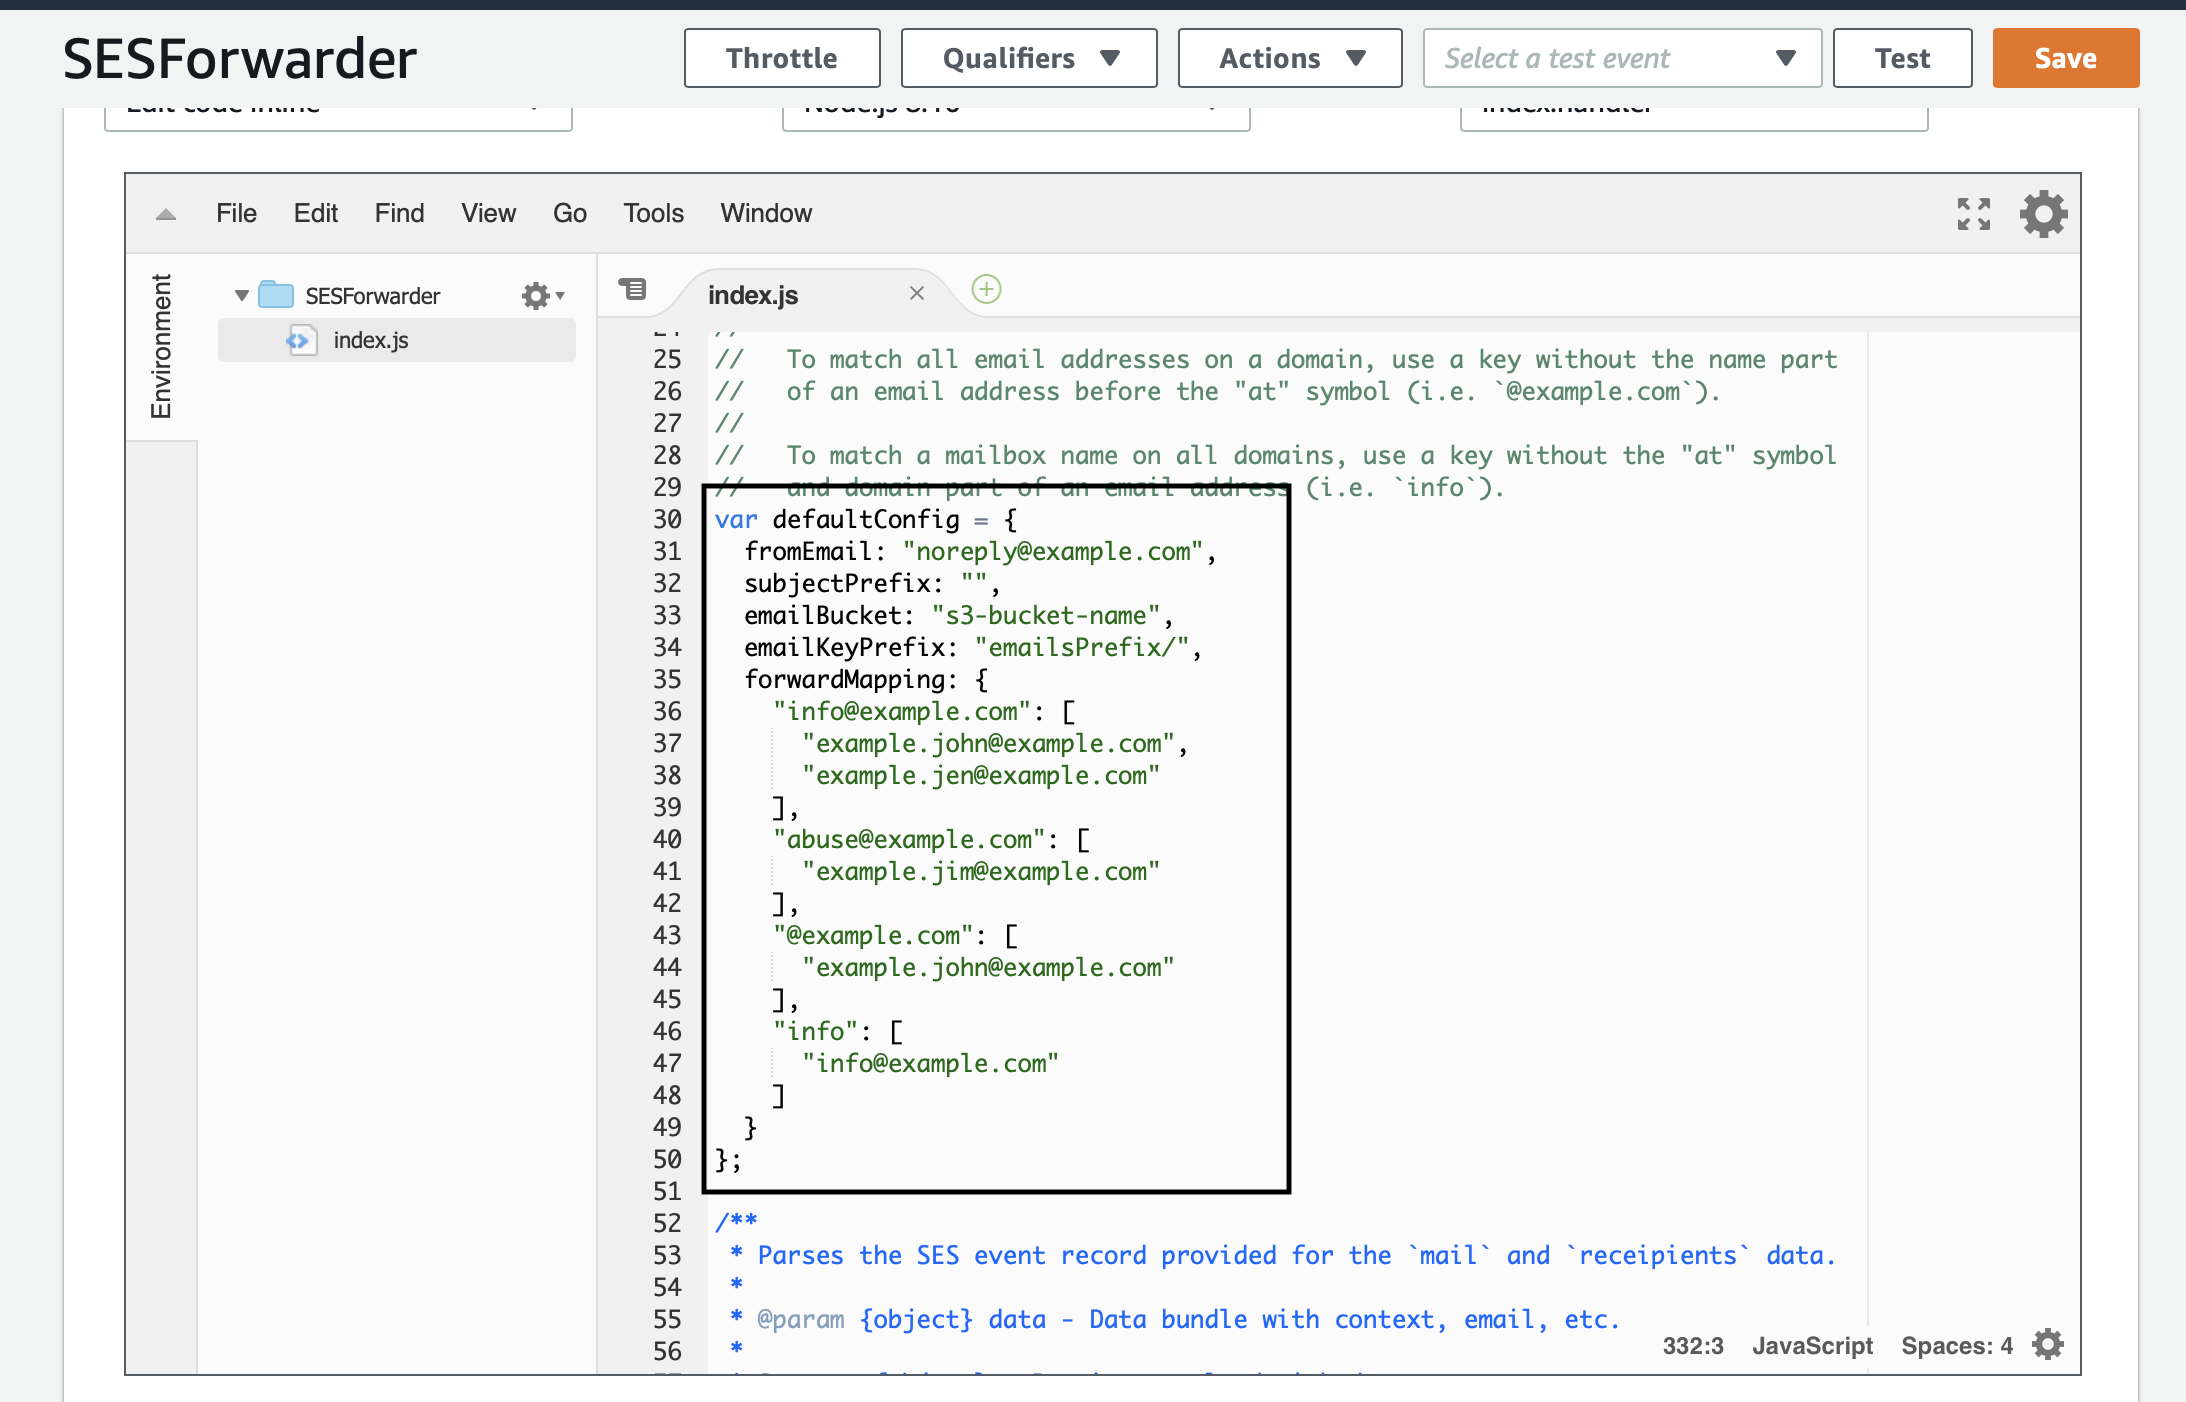
Then, scroll down to the defaultConfig variable and make the following modifications:
- fromEmail: you can change this to anything you want, I suggest something like [email protected]
- subjectPrefix: change this if you’d like to prepend the sender’s subject with something ex.
[ORG-MAILING-LIST]for easy identification or mail rule filtering. - emailBucket: the name of the S3 bucket created earlier
- emailKeyPrefix: I set this to
mailer/messages/ - forwardMapping: this is up to you, for testing purposes map [email protected] to the email validated earlier.
Function Permissions
Taking a look at the Lambda function that was created, there is one service that it currently communicates with, CloudWatch logs.
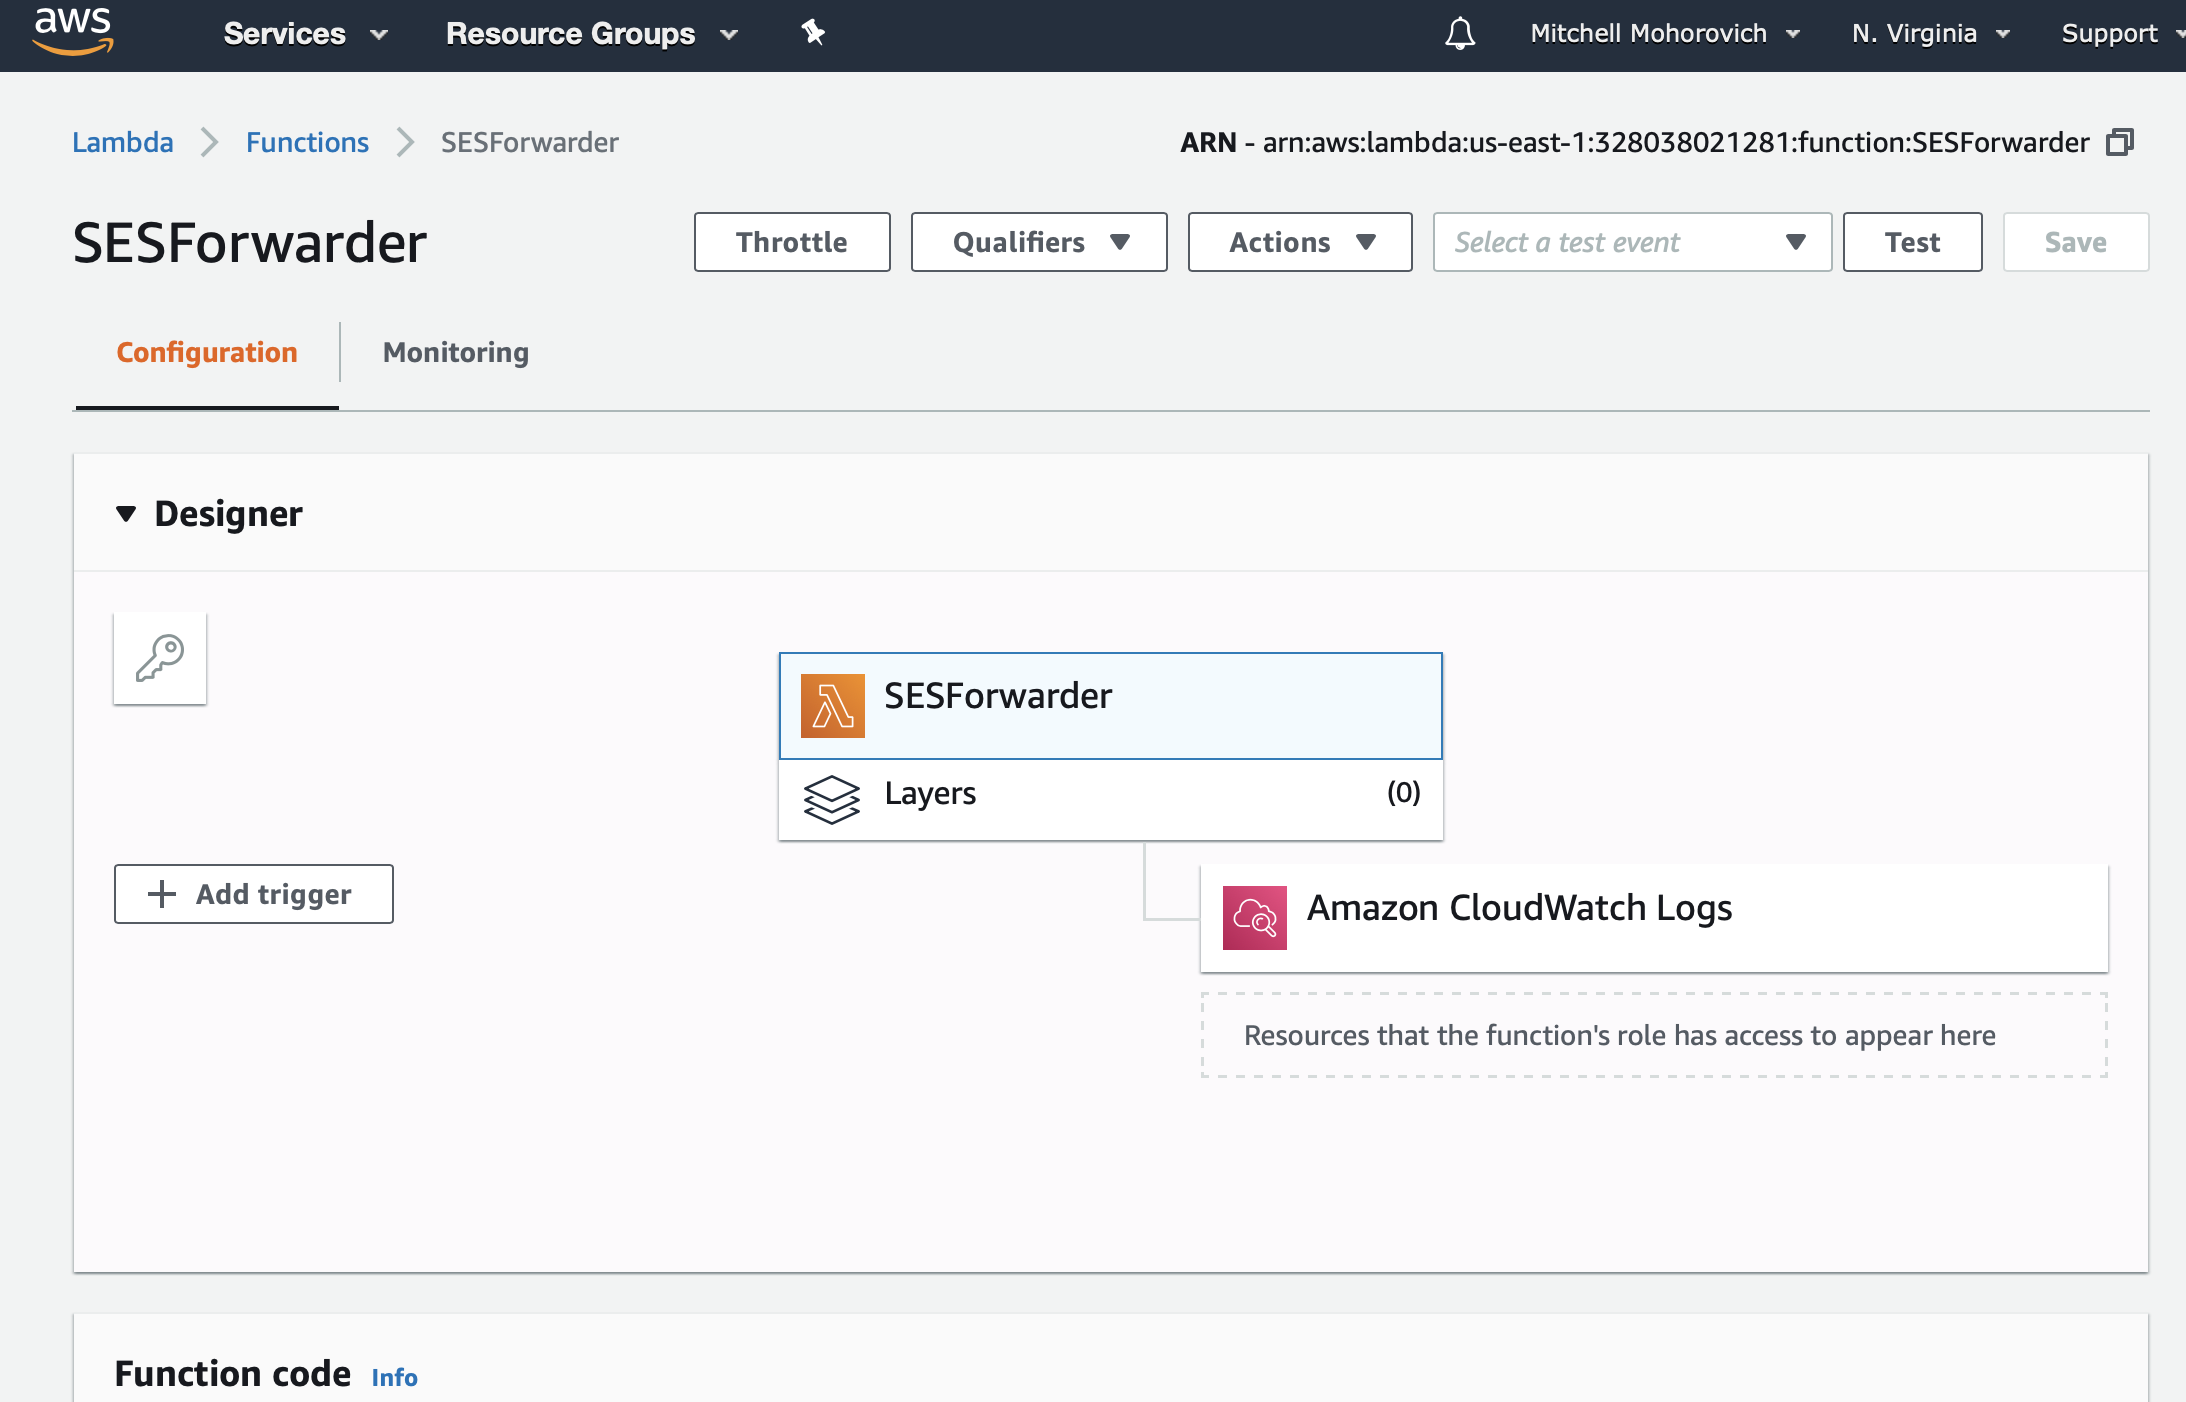
Taking a look at the architecture diagram, when Lambda receives an event (ie. incoming email) it needs to be able to read the email from the S3 bucket, and then request SES to forward that message to the mapped recipients. To enable this, IAM permissions will be set up to allow Lambda permission to read the specified S3 bucket and use the SES service.
S3
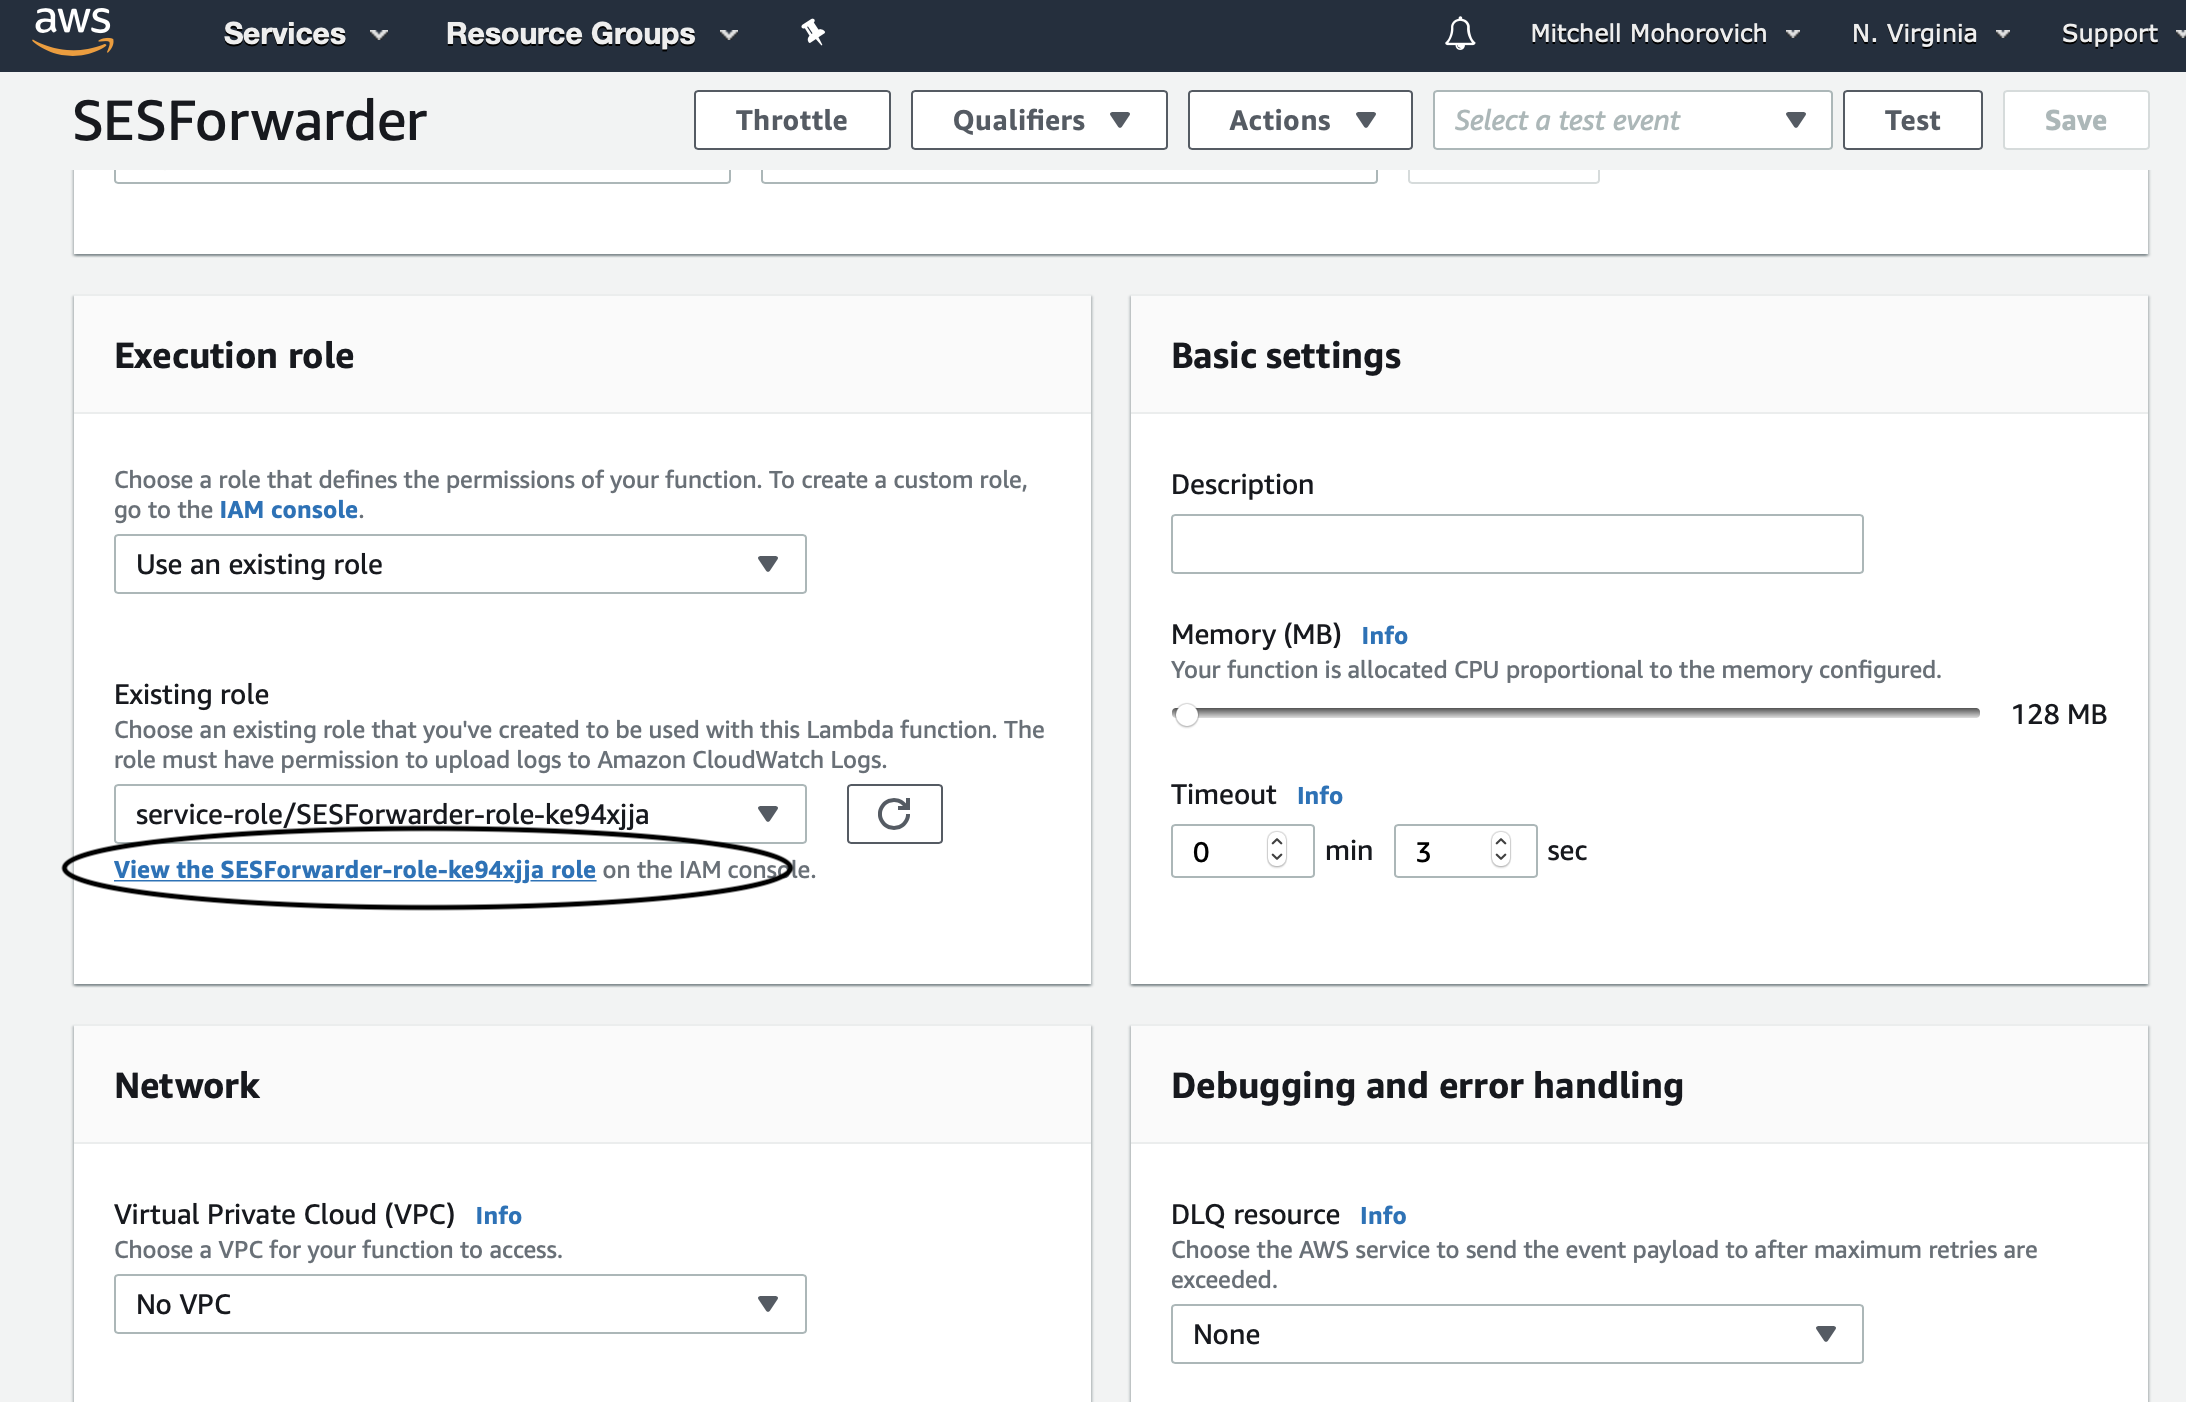
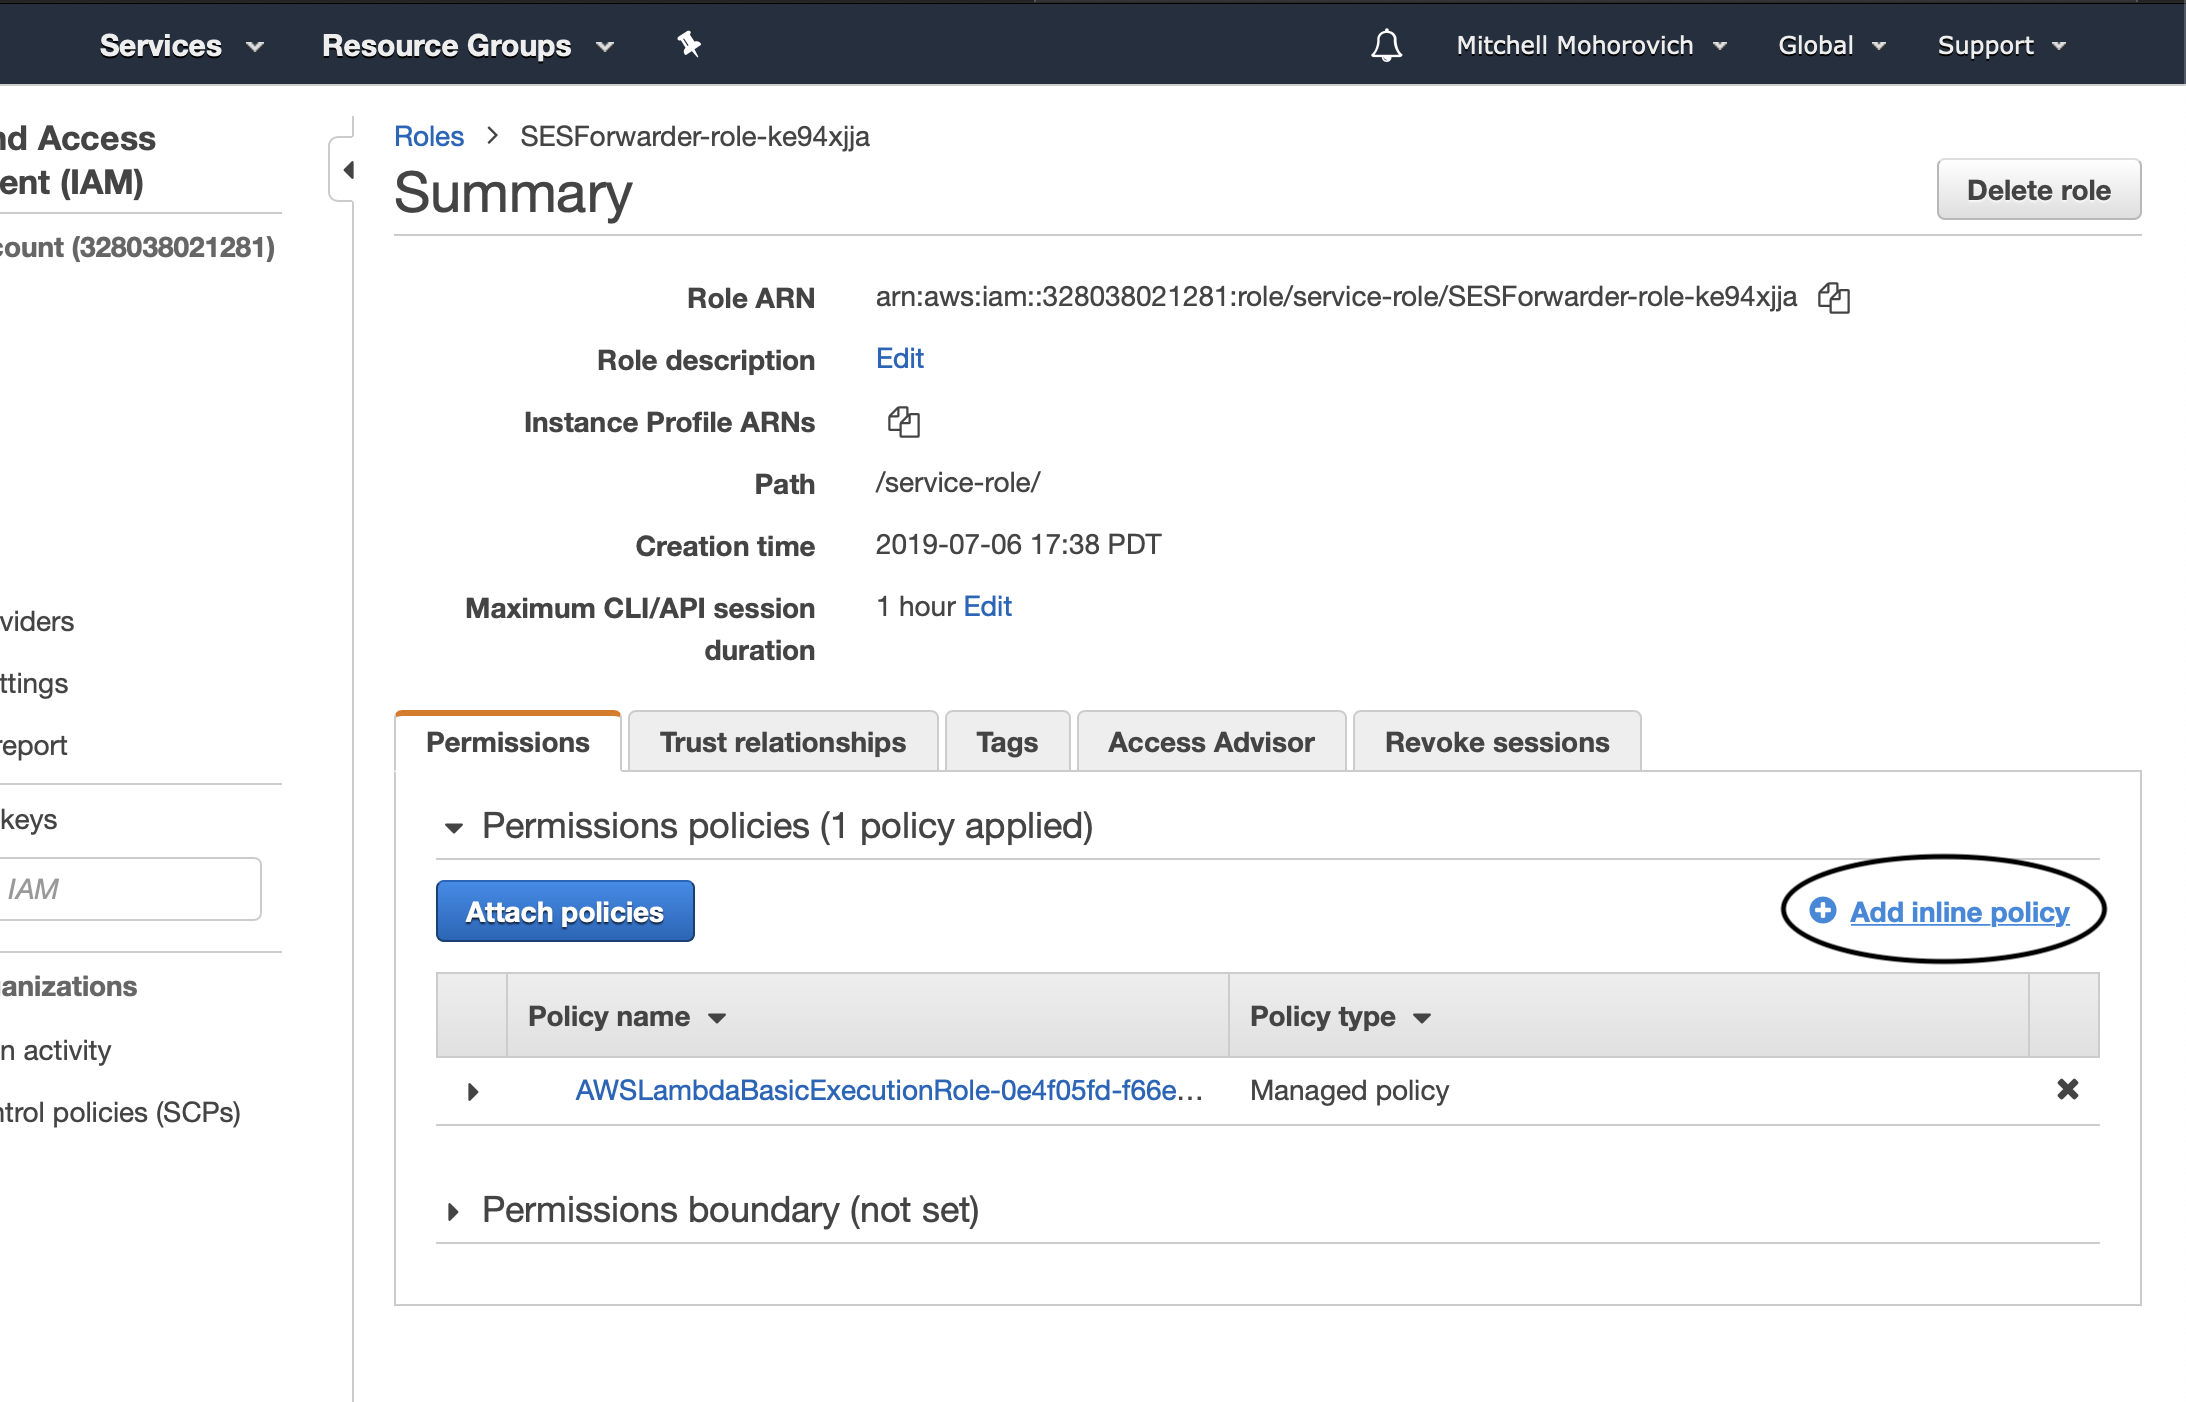
Open up the Lambda function, and scroll down to the Execution role section of the interface. When the lambda function was initially created AWS automatically created an IAM role for the service. IAM is the identity and access permission management system within AWS. Click on the View the X role on the IAM console link._
Click on the Add inline policy link.
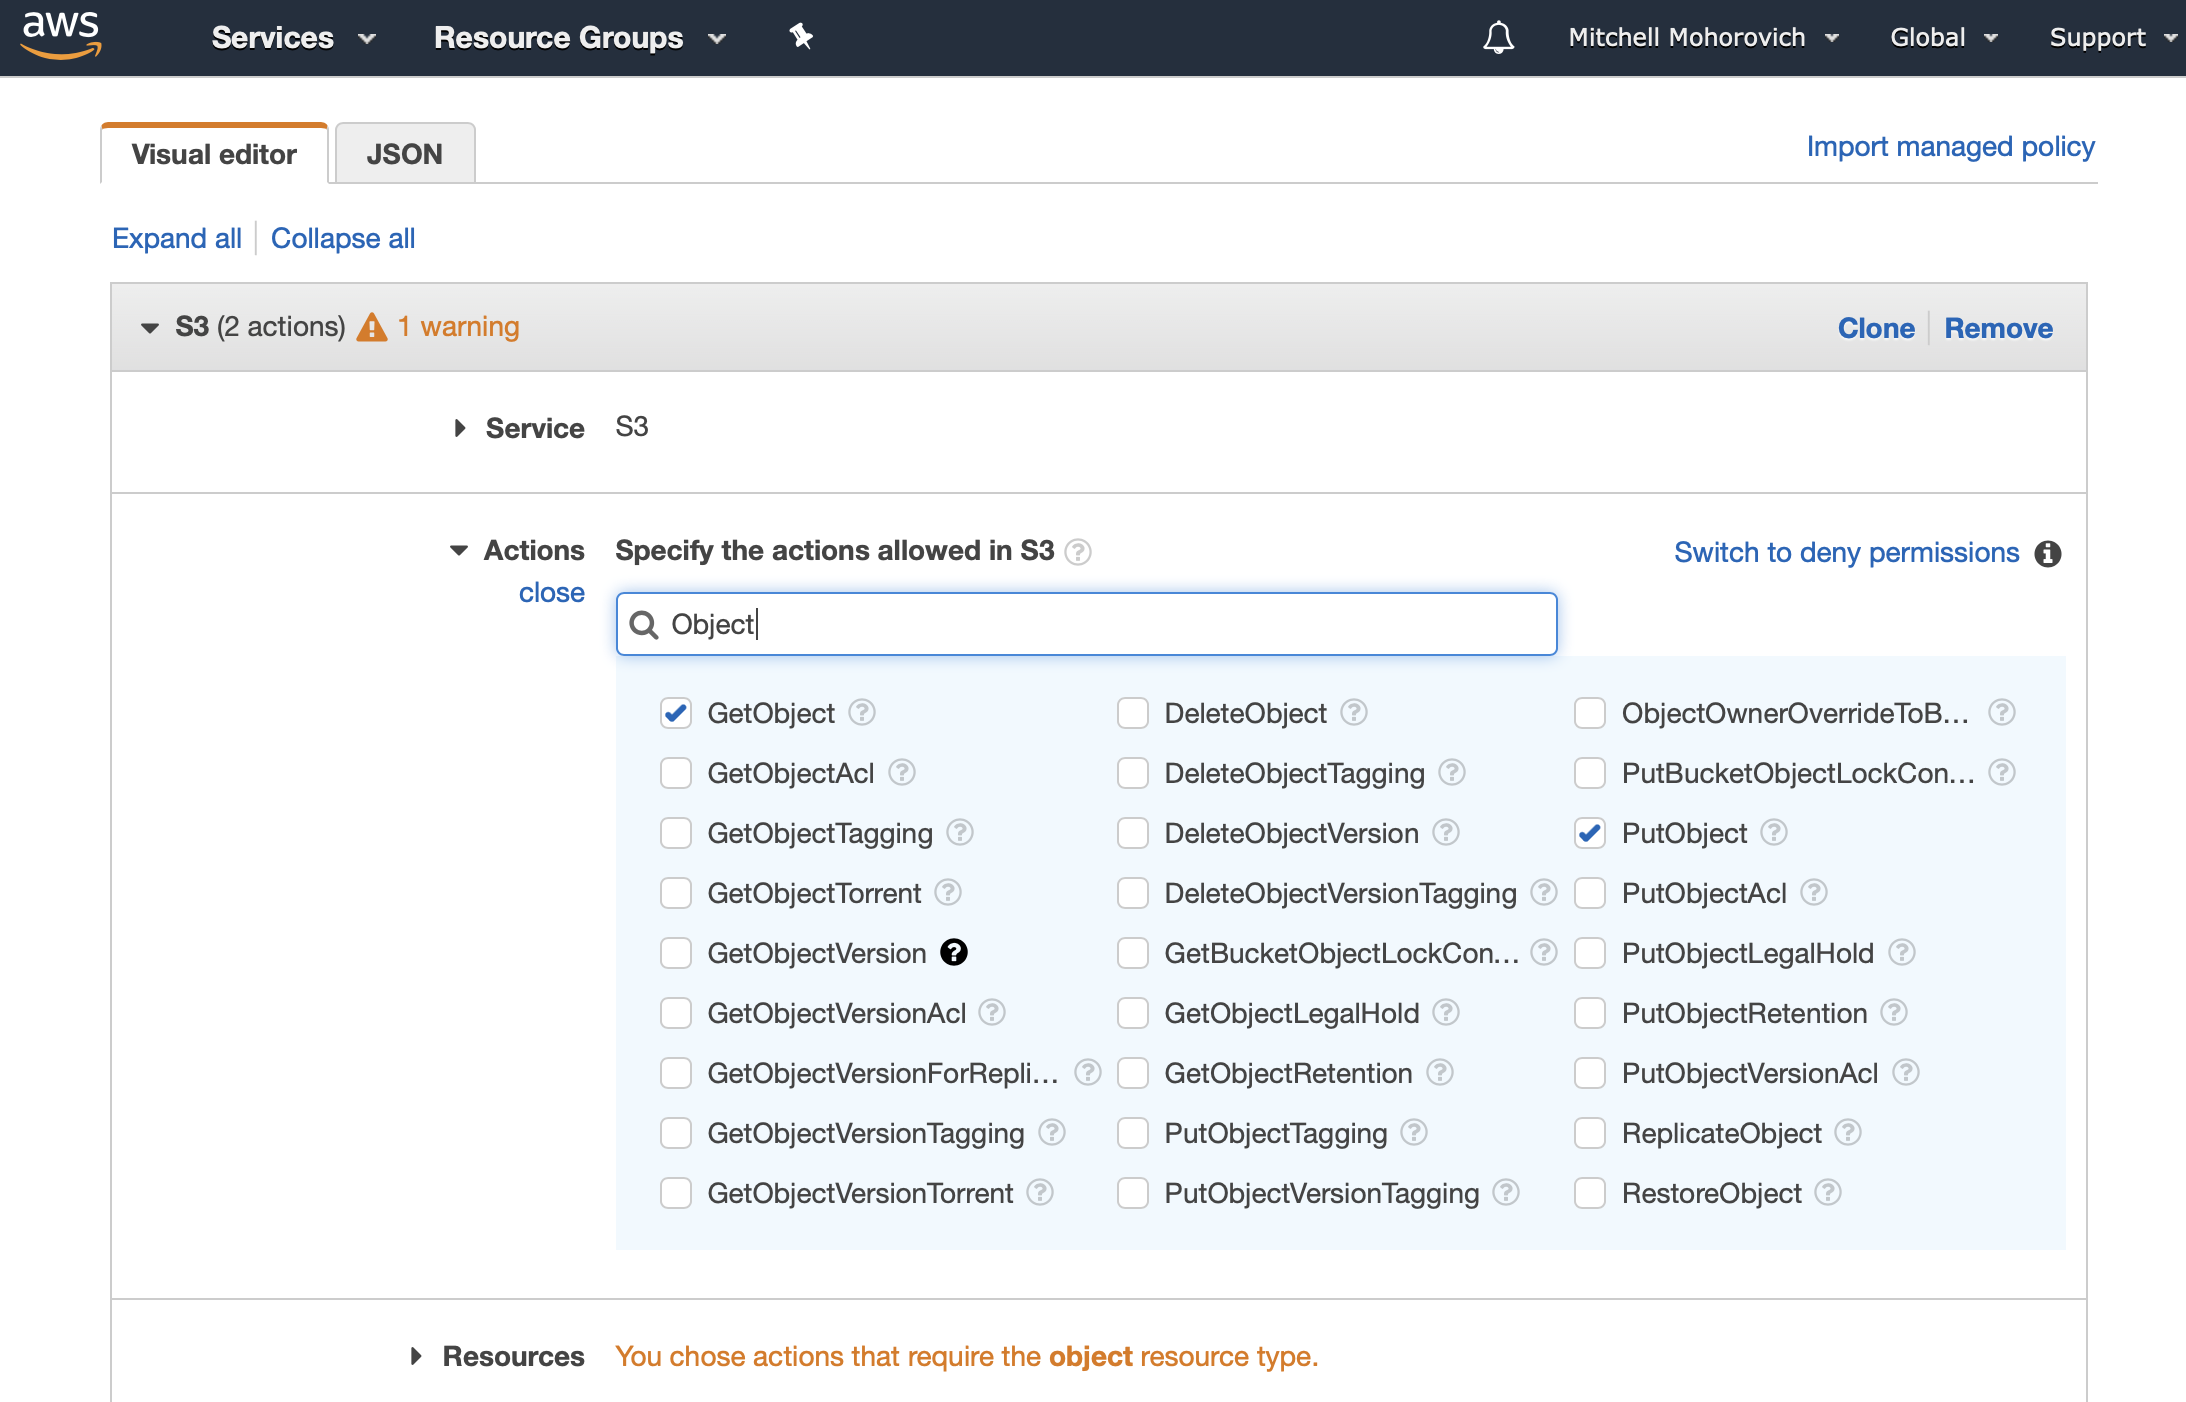
First, add permissions for S3. Select S3 from the Service menu, and then from the Actions section, select GetObject and PutObject.
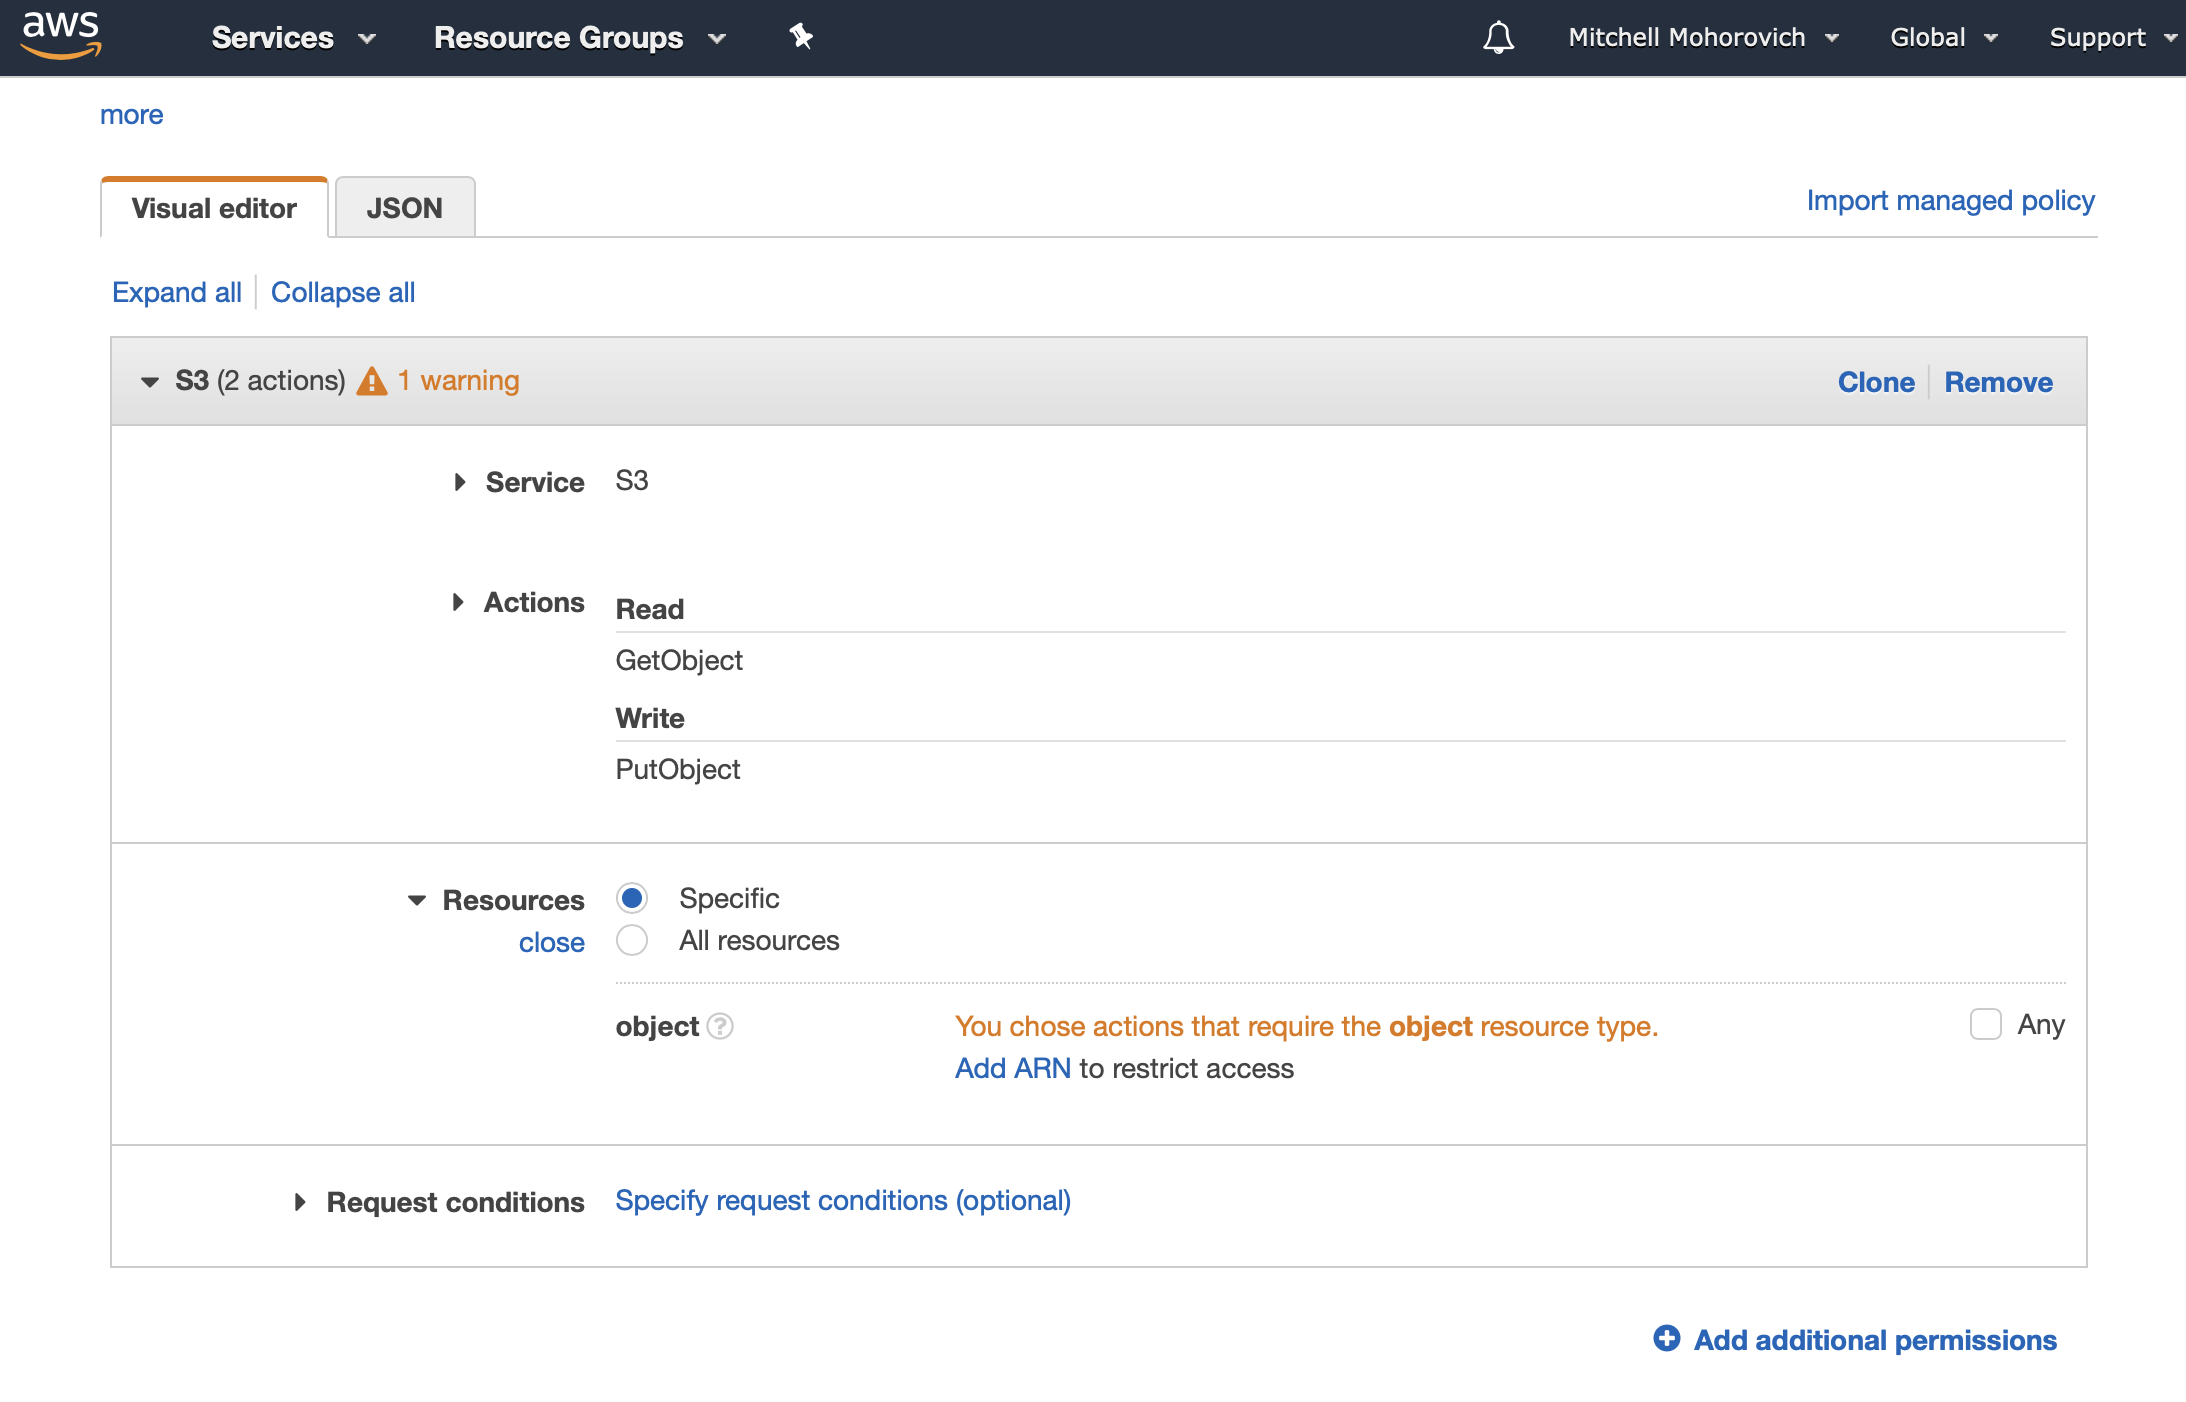
Then, in the resources section select Specific, and then click on Add ARN. You could also select All Resources and skip the following step.
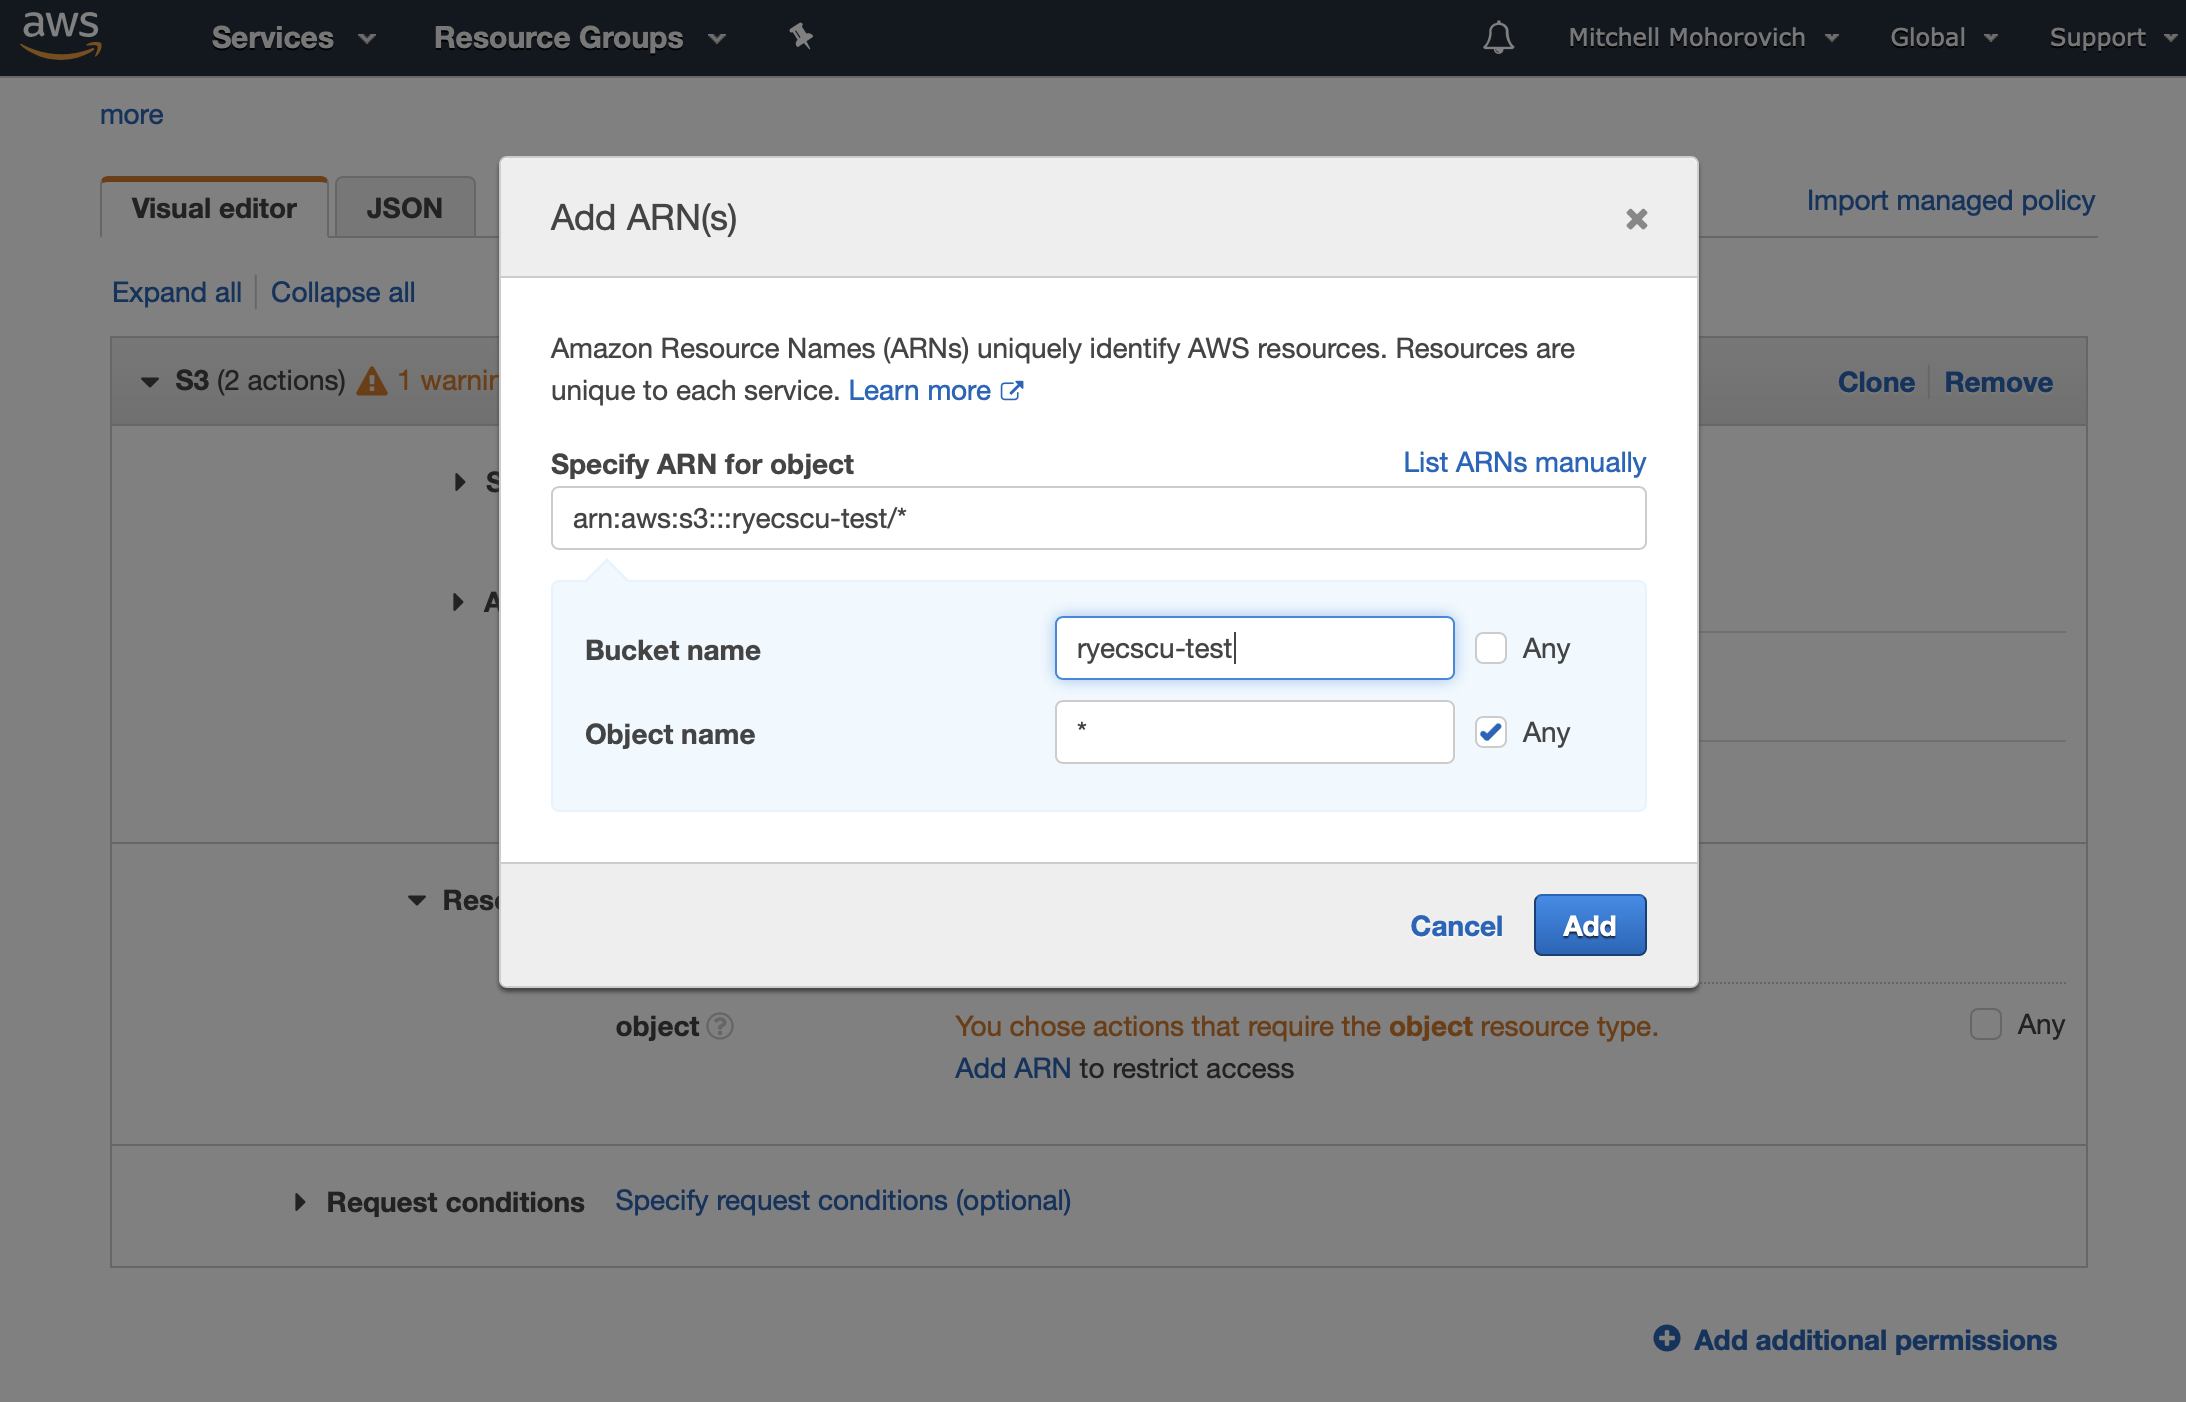
A dialogue will appear. In it, fill in the Bucket name field with the the S3 bucket you created earlier, and for the Object name, click on the Any checkbox.
SES
Now to set up the SES permissions. Click on the Add additional permission link.
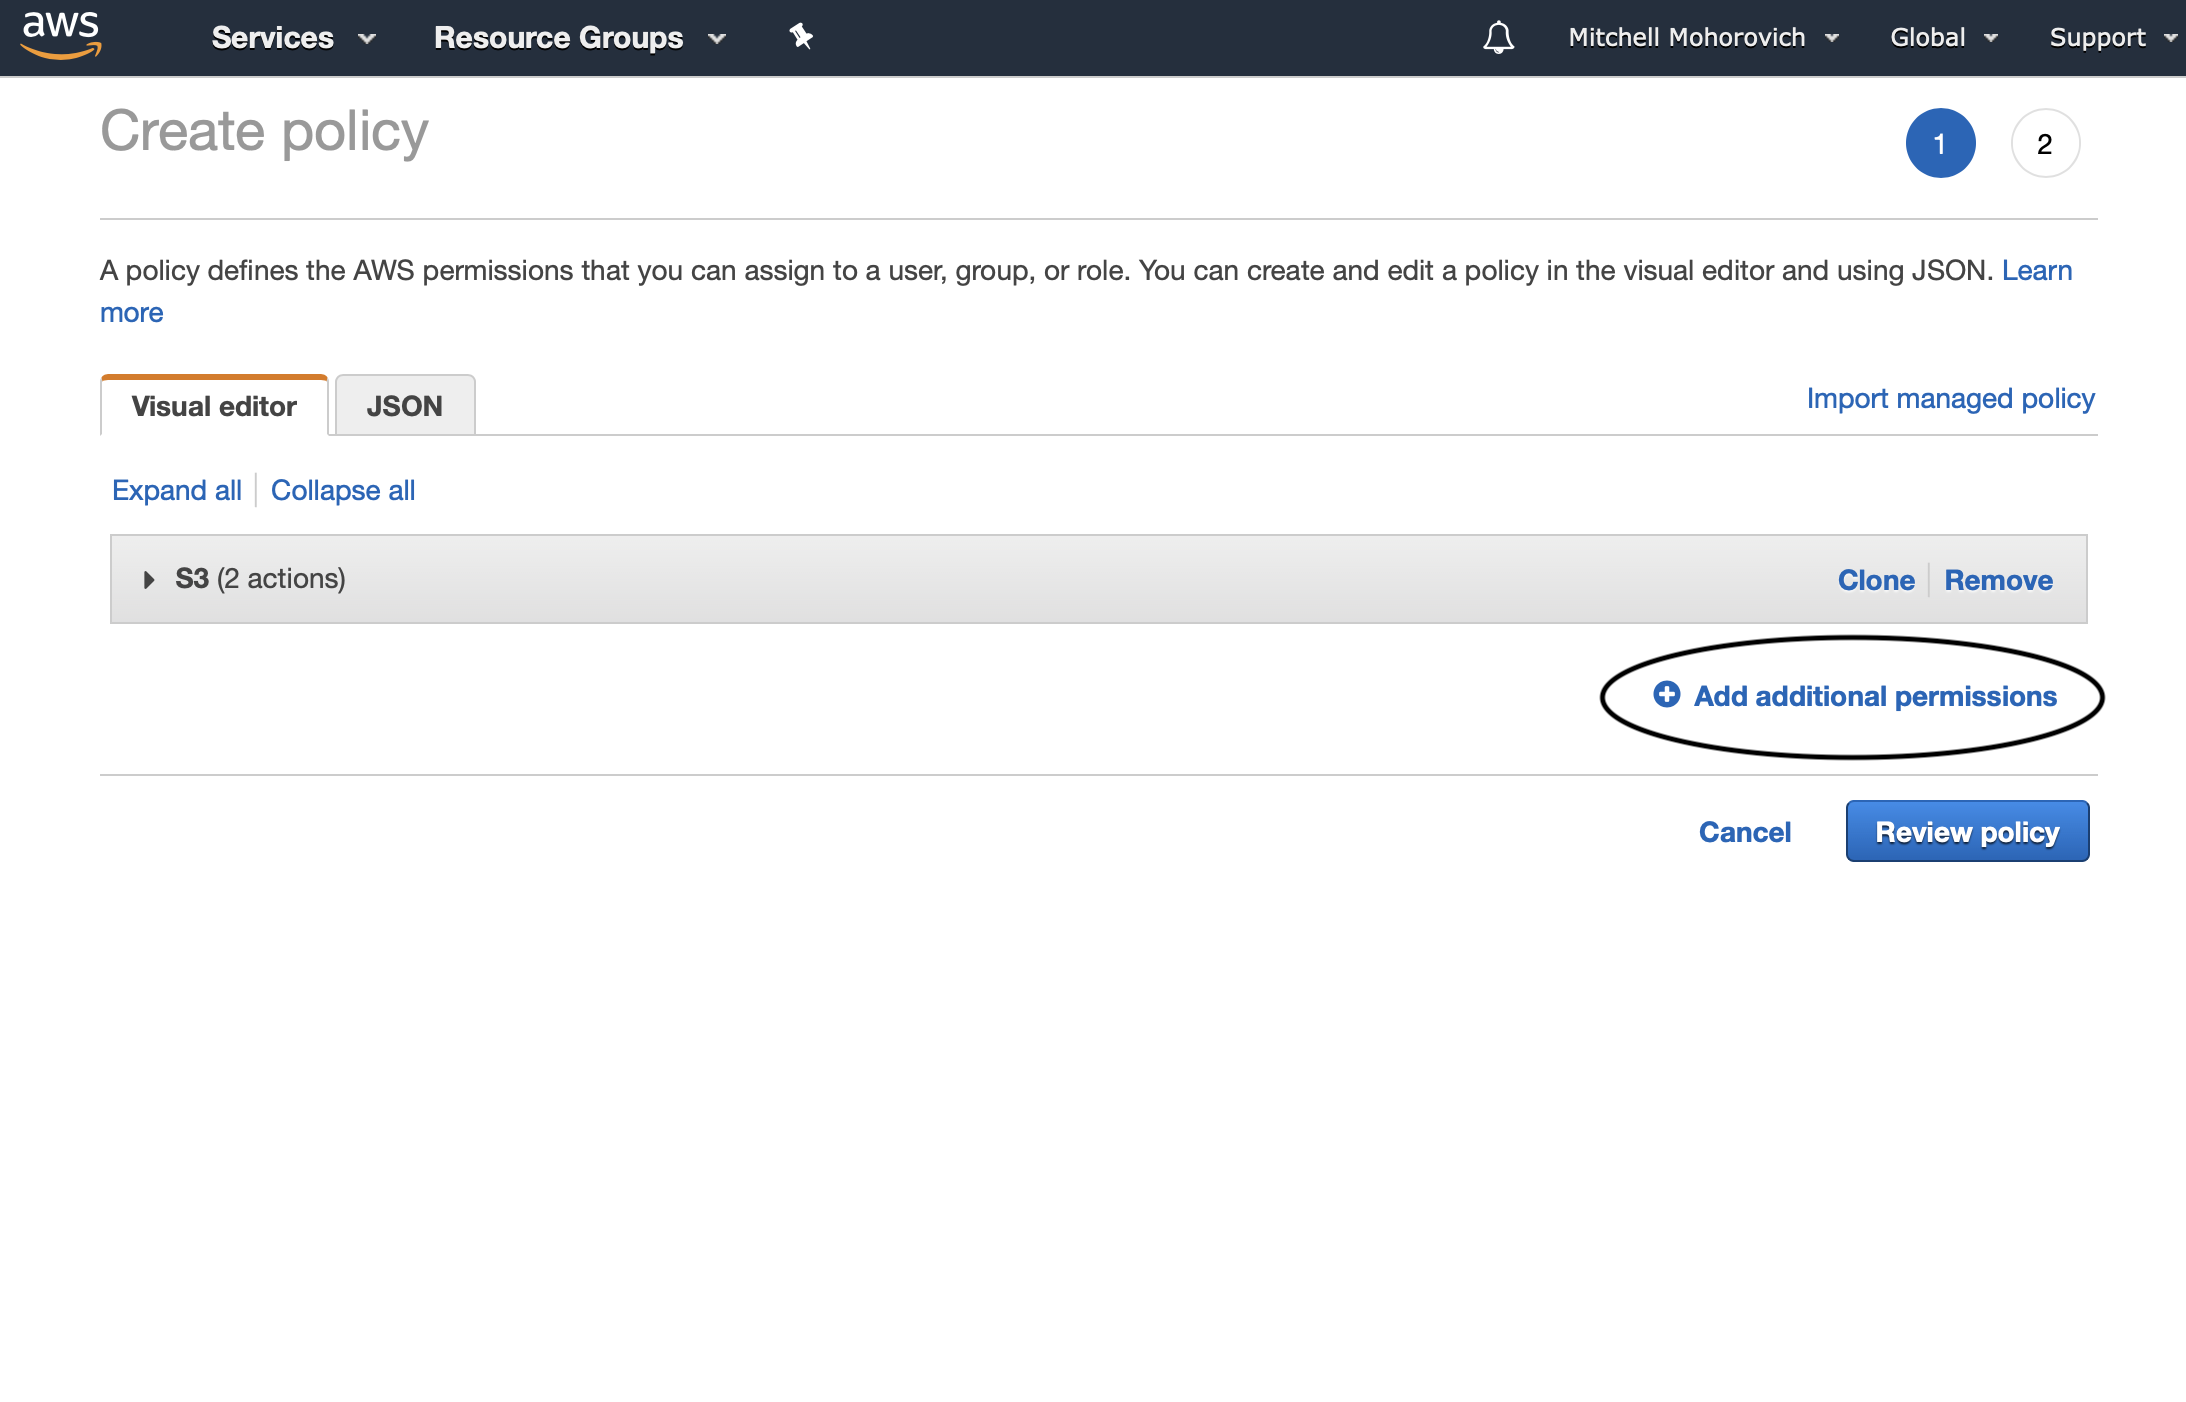
Select SES for the service.

For the Actions select SendRawEmail from the list.

For this, either select Specific resource and supply the ARN from the SES domain created earlier, or make it easier for yourself and choose All resources. The screenshot below shows the latter since there was only one SES domain on my account which was running with an email whitelist, so minimal potential for spam.

Click on the Review policy button and then name your policy.
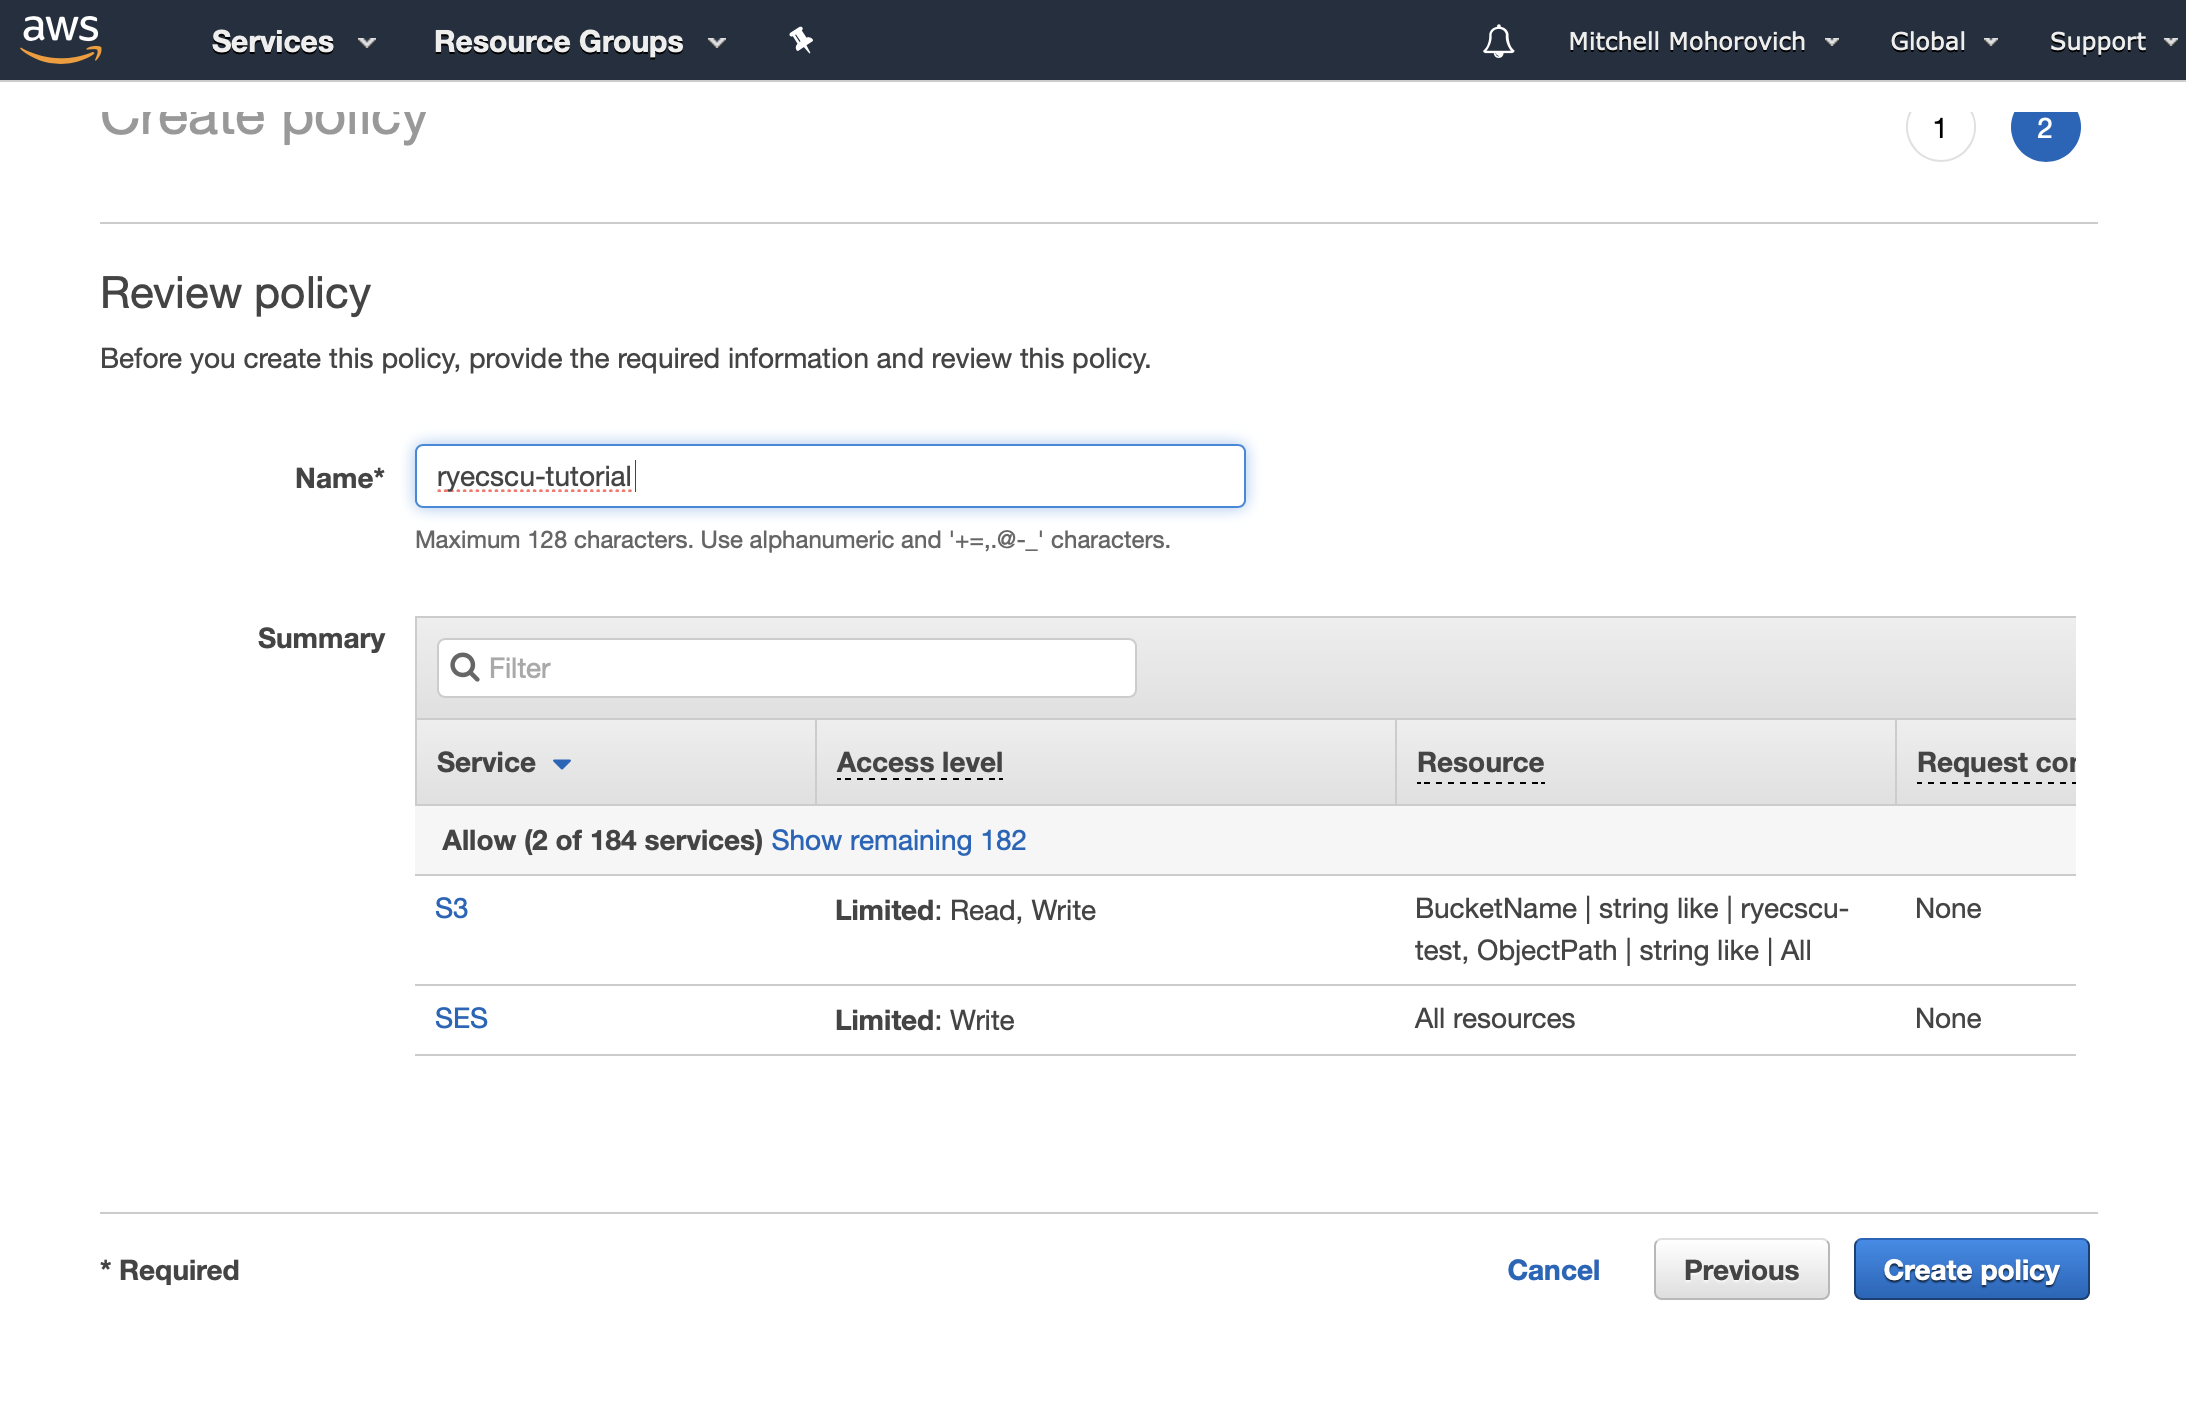
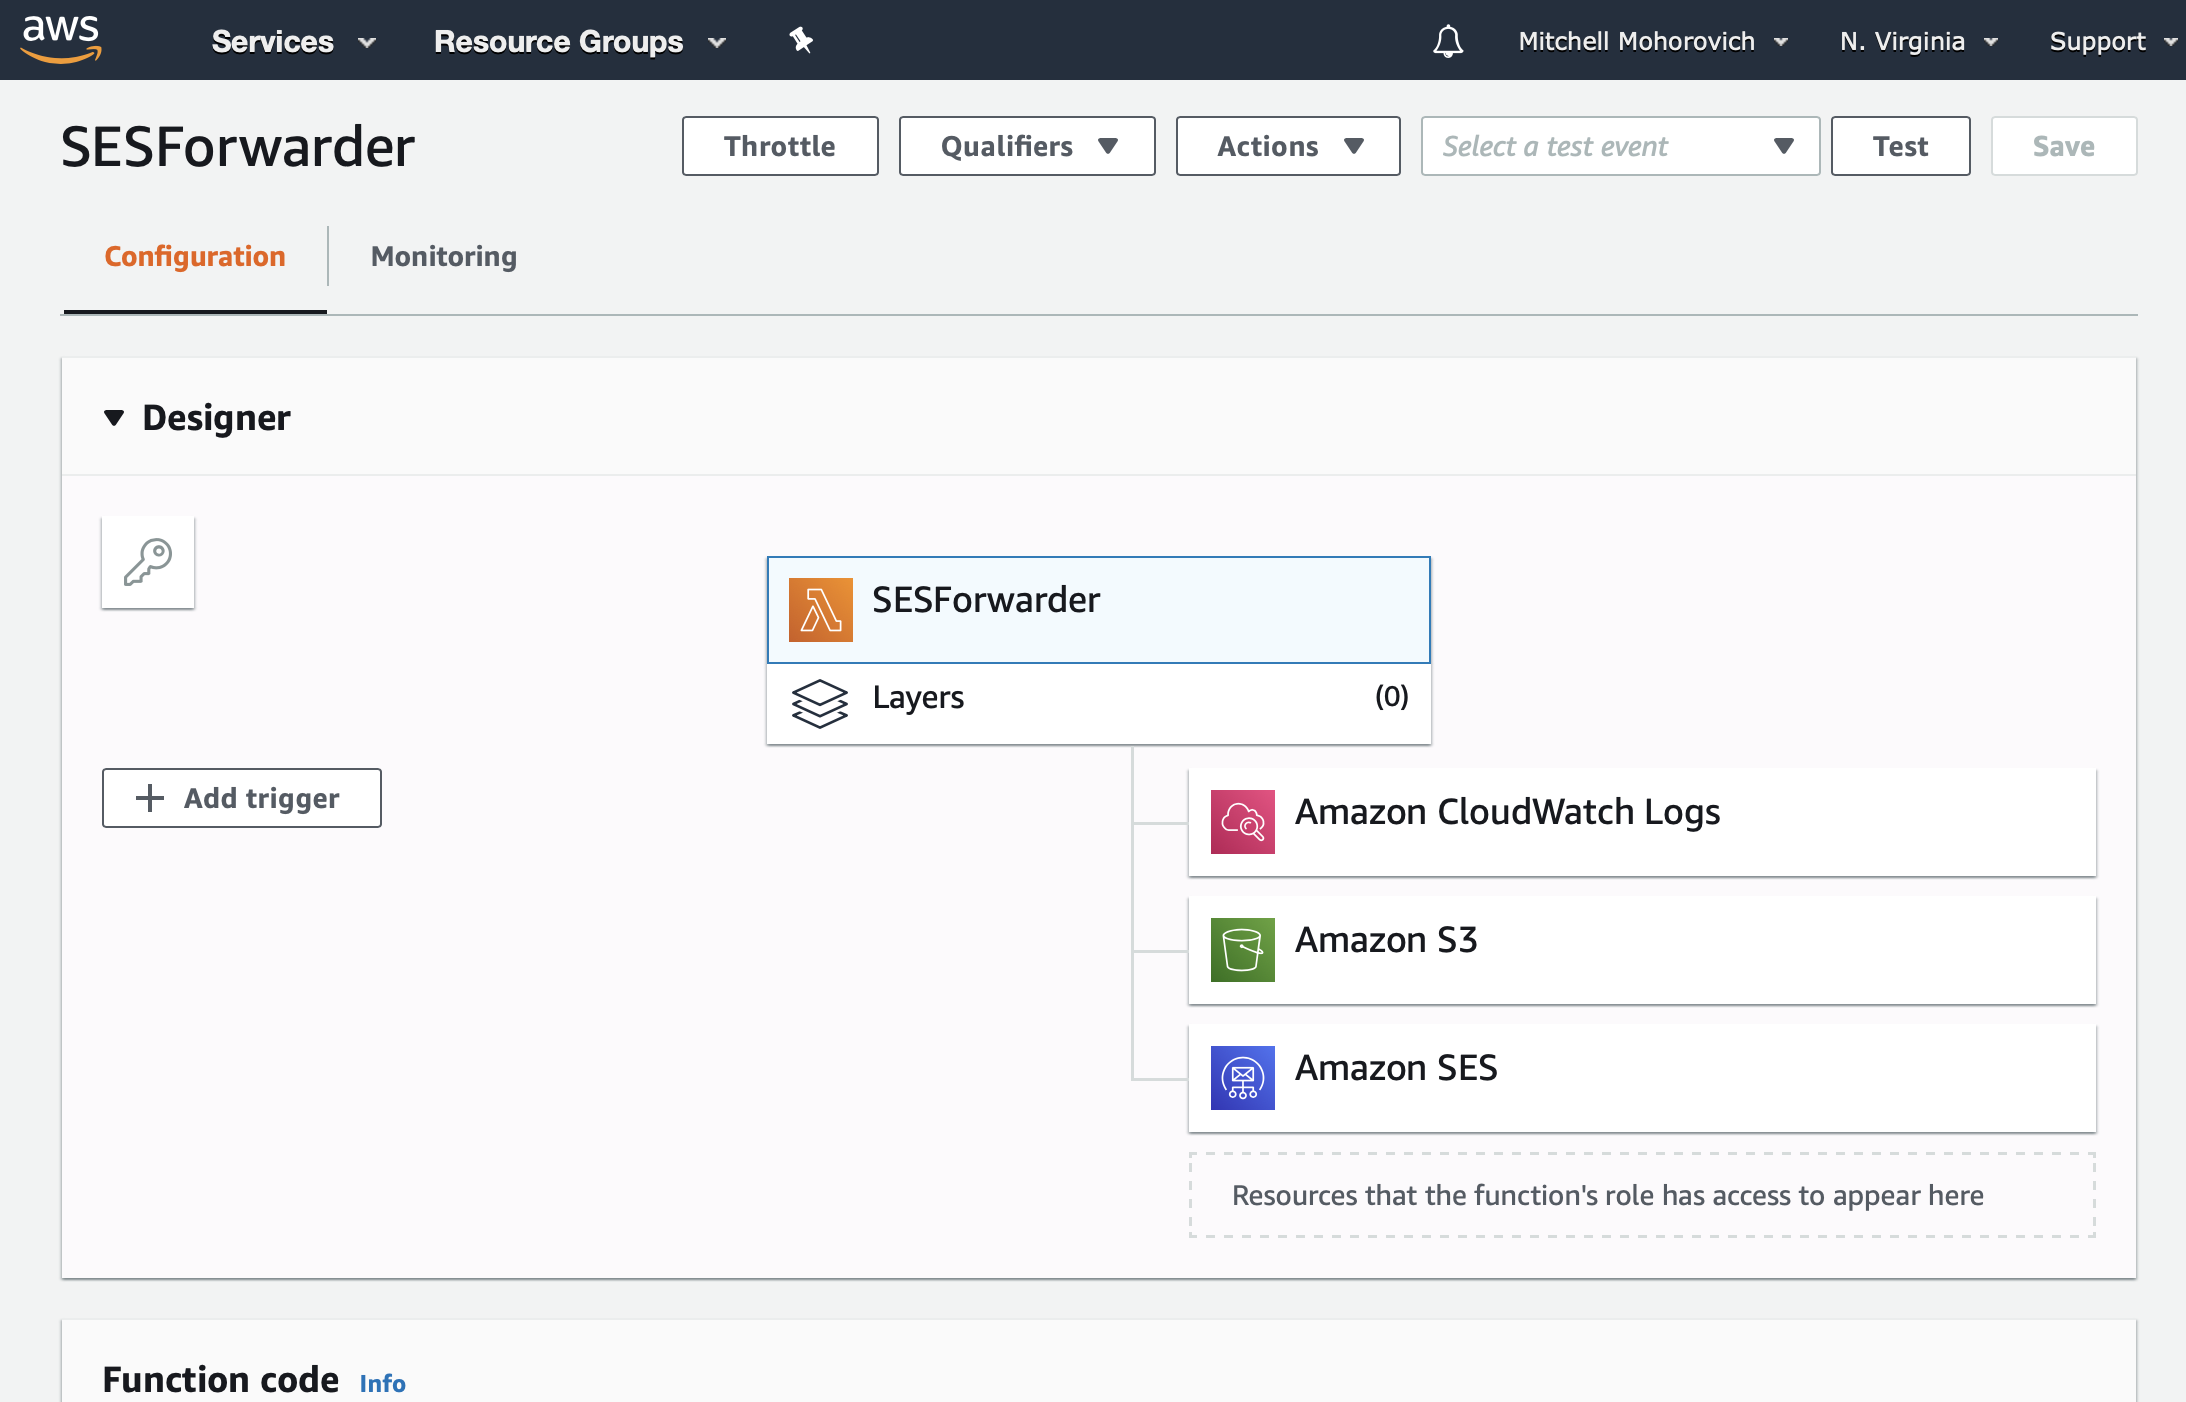
Click on the Create policy button. Now, navigate back to the Lambda function, and take a look at the Designer diagram. If everything was done correctly, the diagram will now show not just CloudWatch logs as an accessed service, but S3 and SES as well.
Triggering Lambda
This step will set up the actions that are taken when SES receives an email. For our purposes when SES receives an email, the email will first be stored by being written into an S3 bucket. Afterwards the lambda function will be triggered by having SES send it an event to notify that an email was received, stored and ready to process.
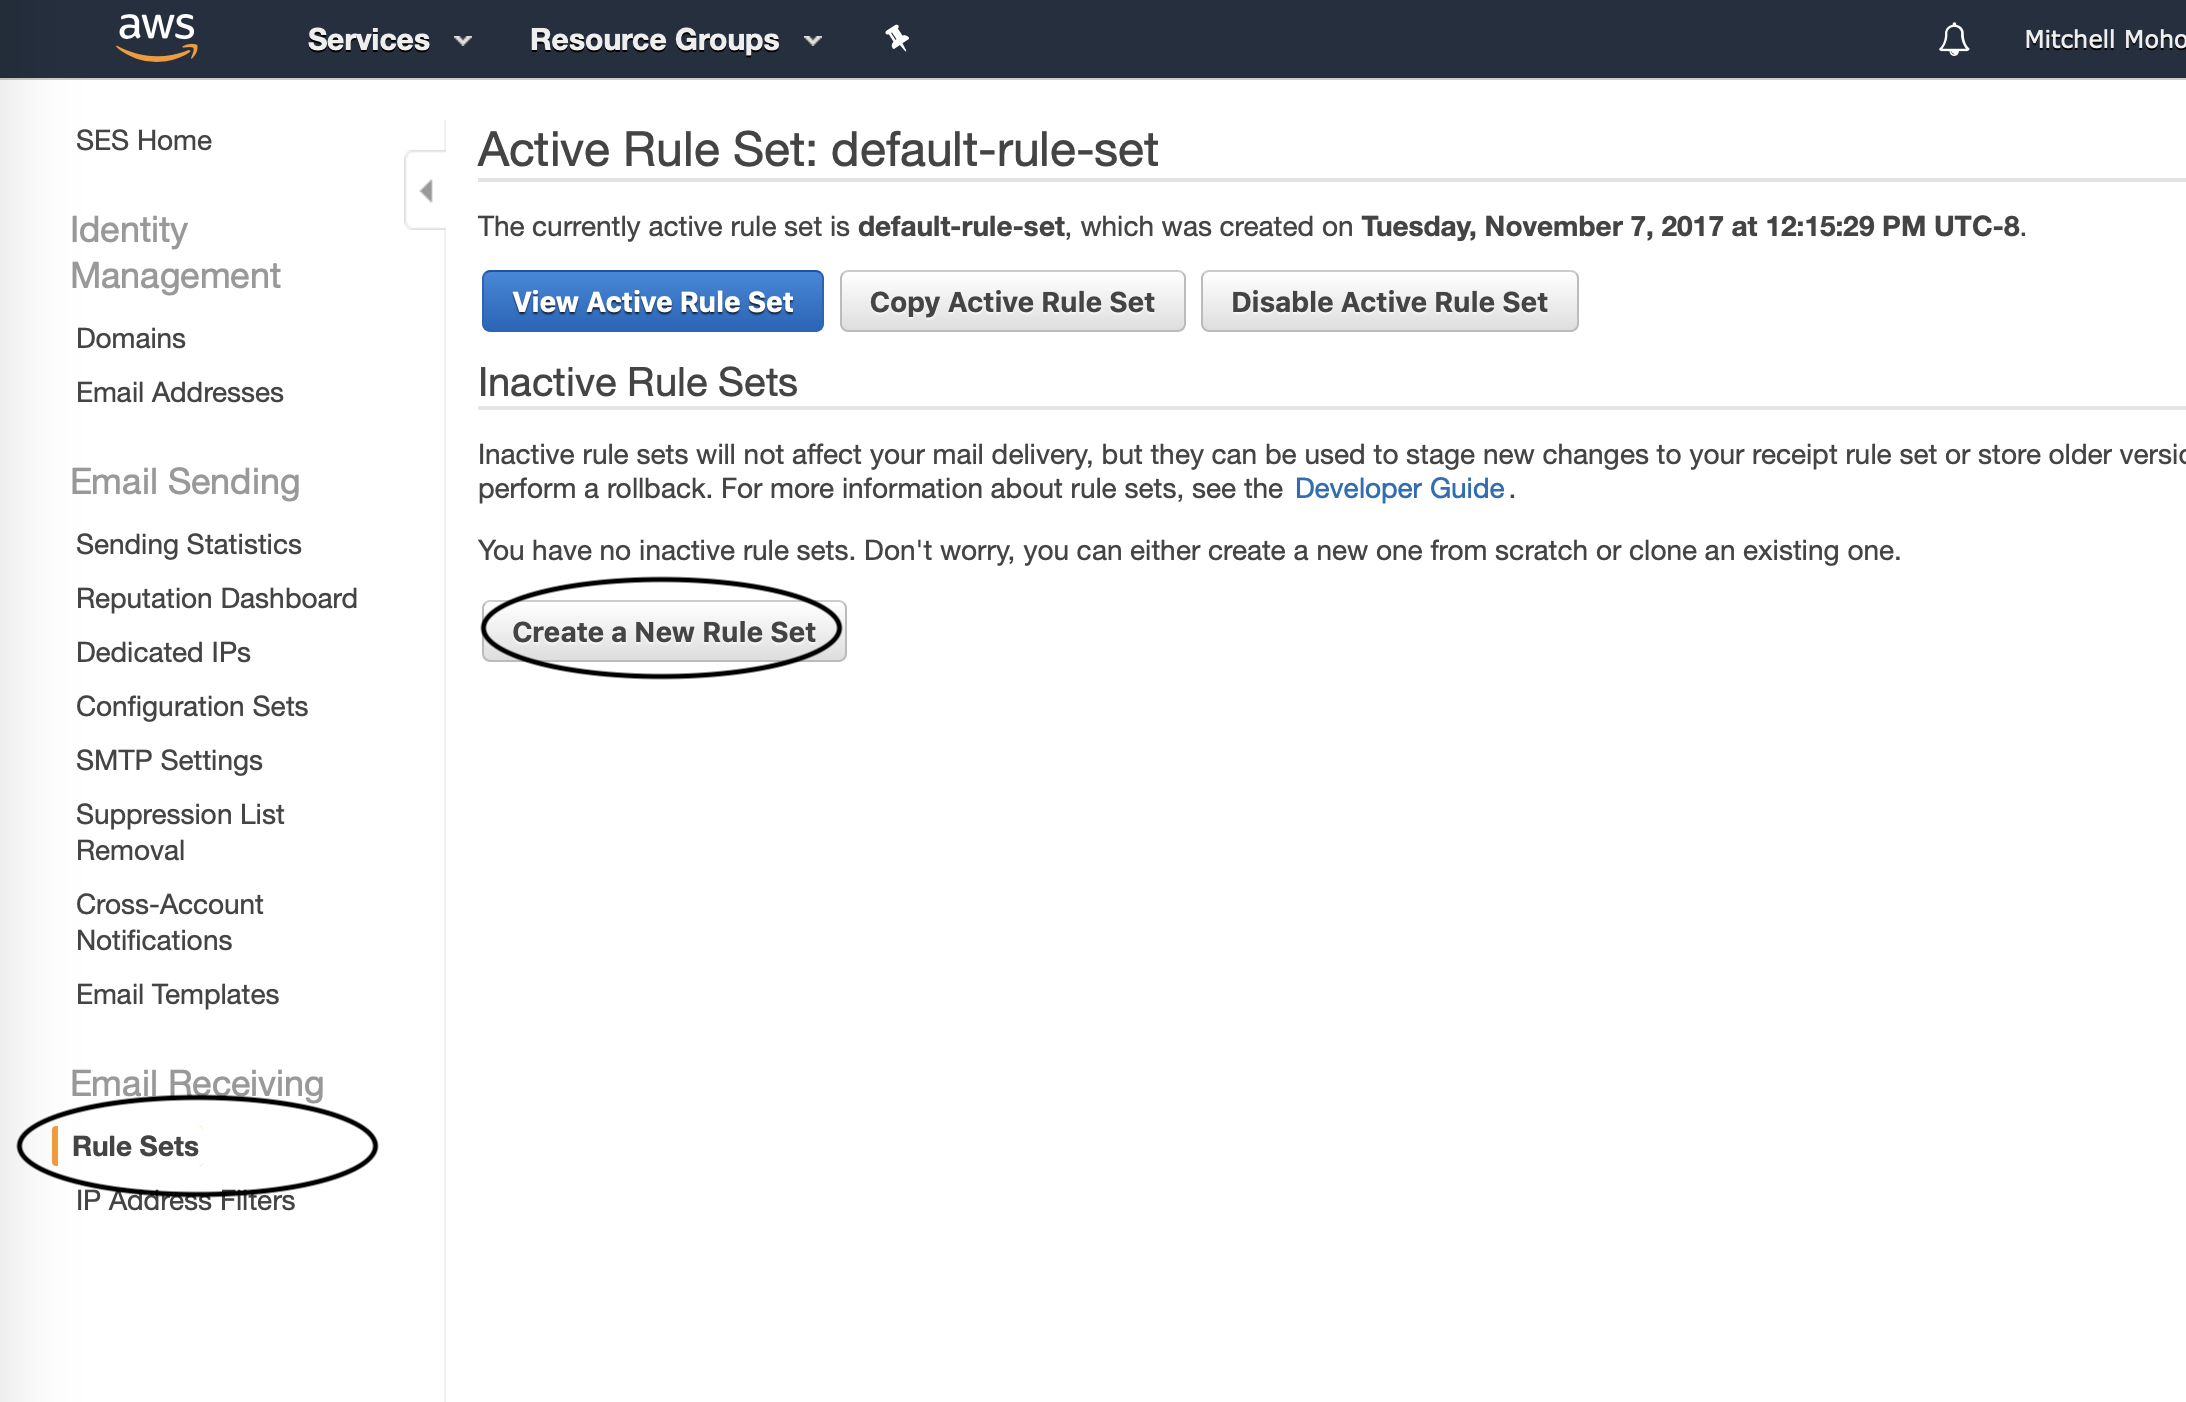
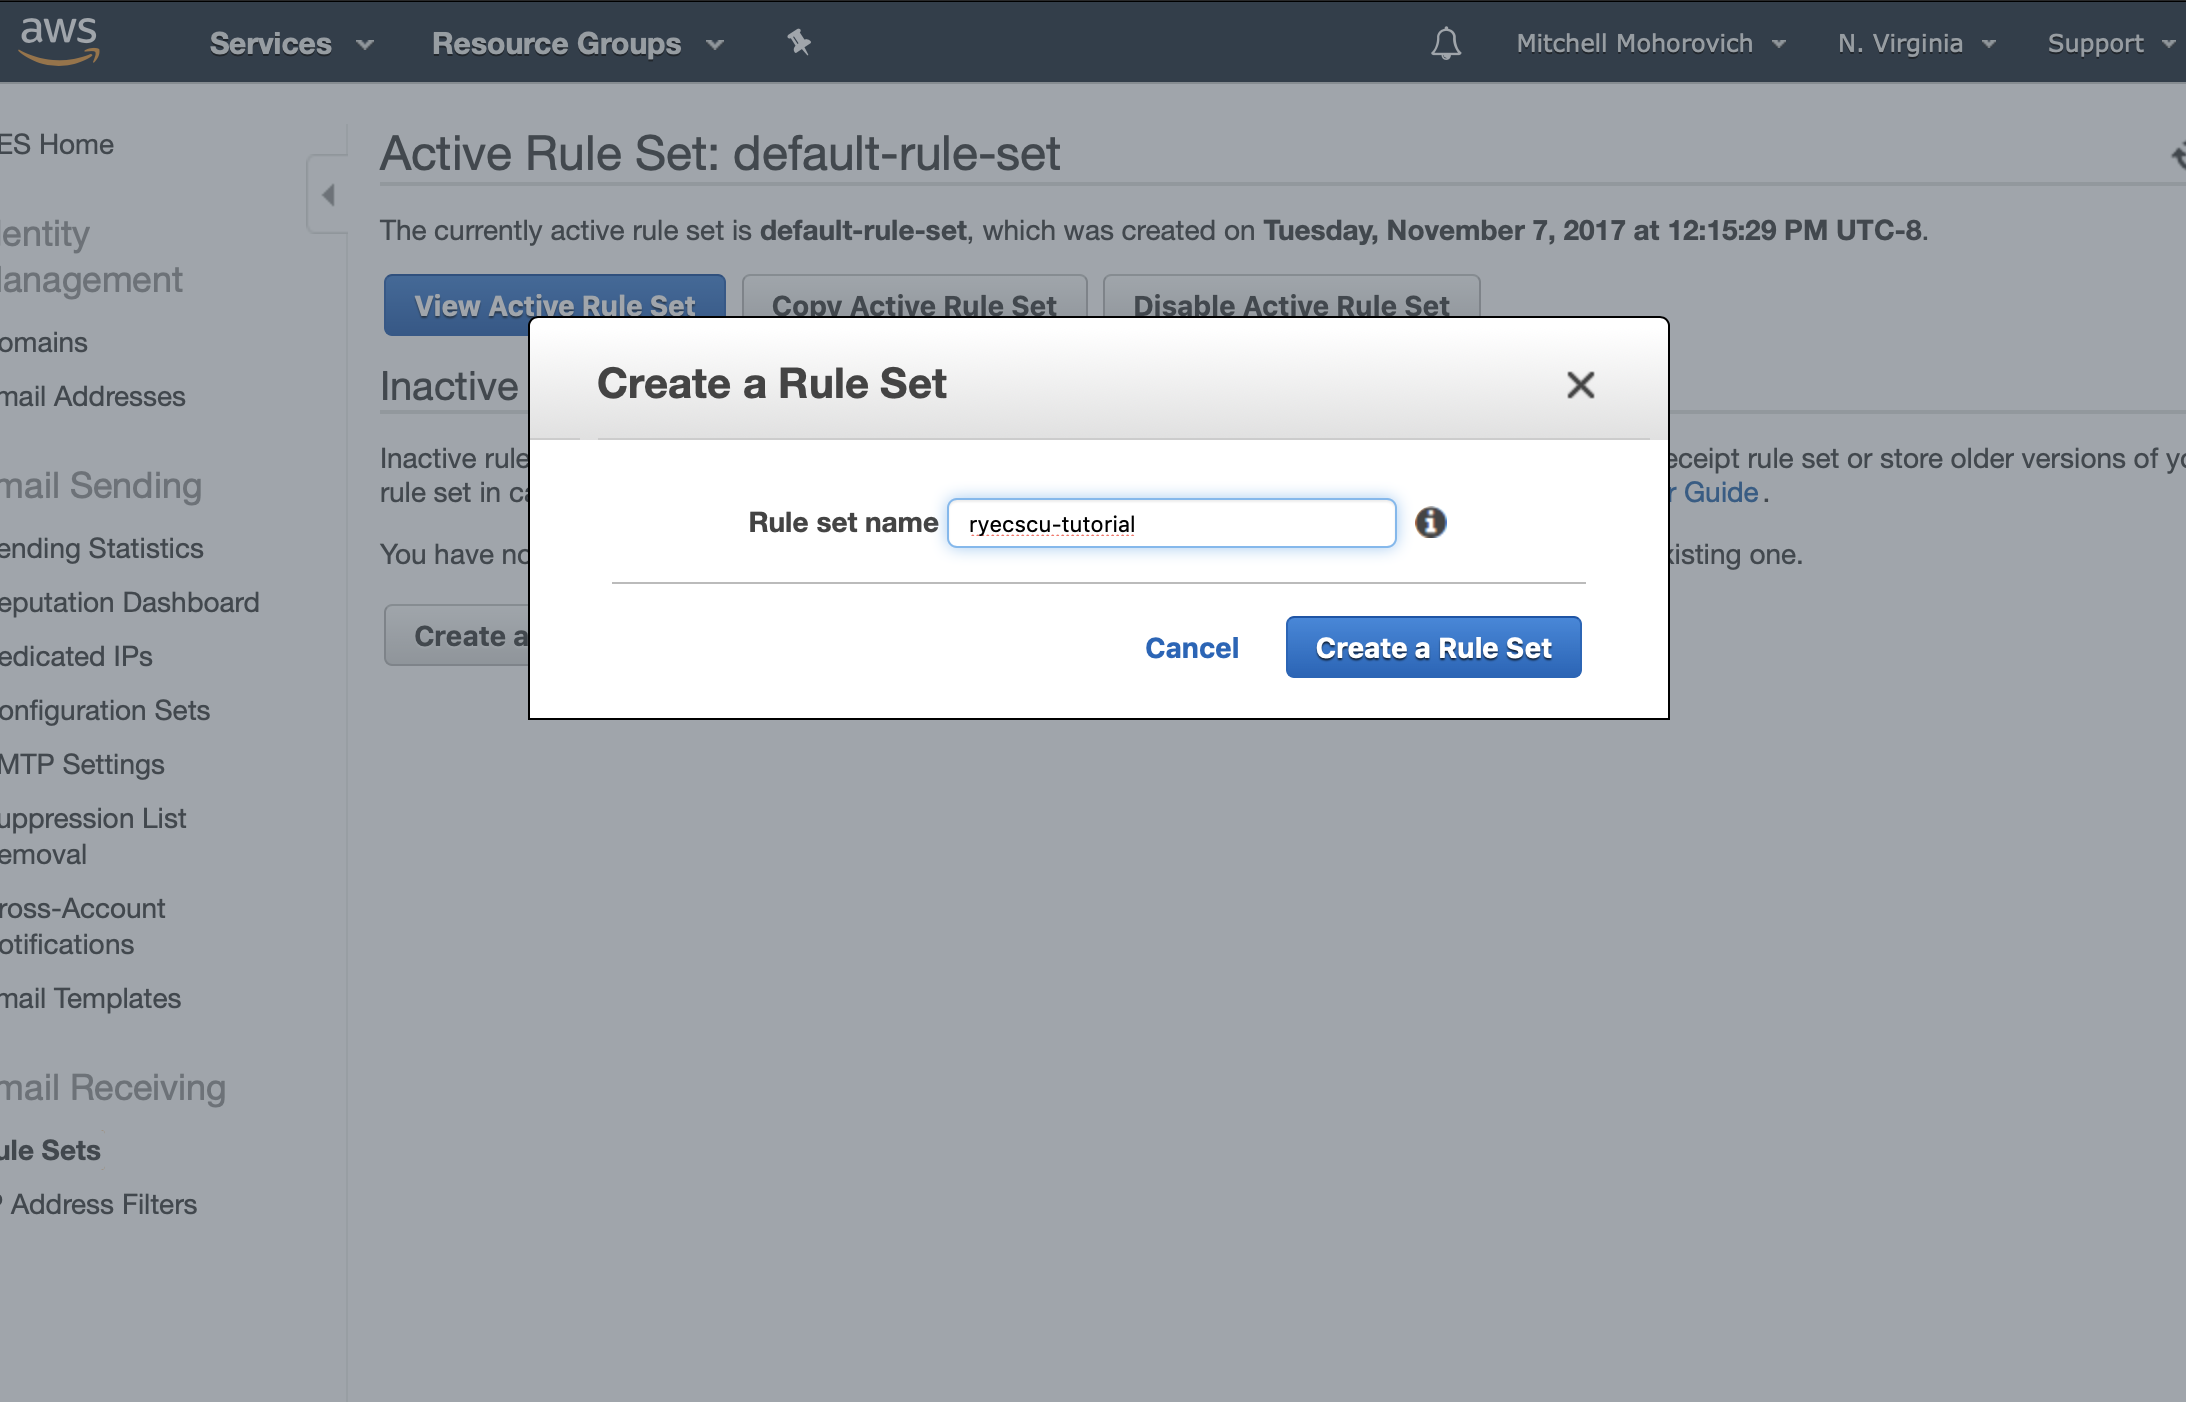
Start by navigating to SES. In the sidebar, under Email Receiving click on Rule Sets and then click on Create a New Rule Set.
In the dialogue that appears, name your Rule Set.
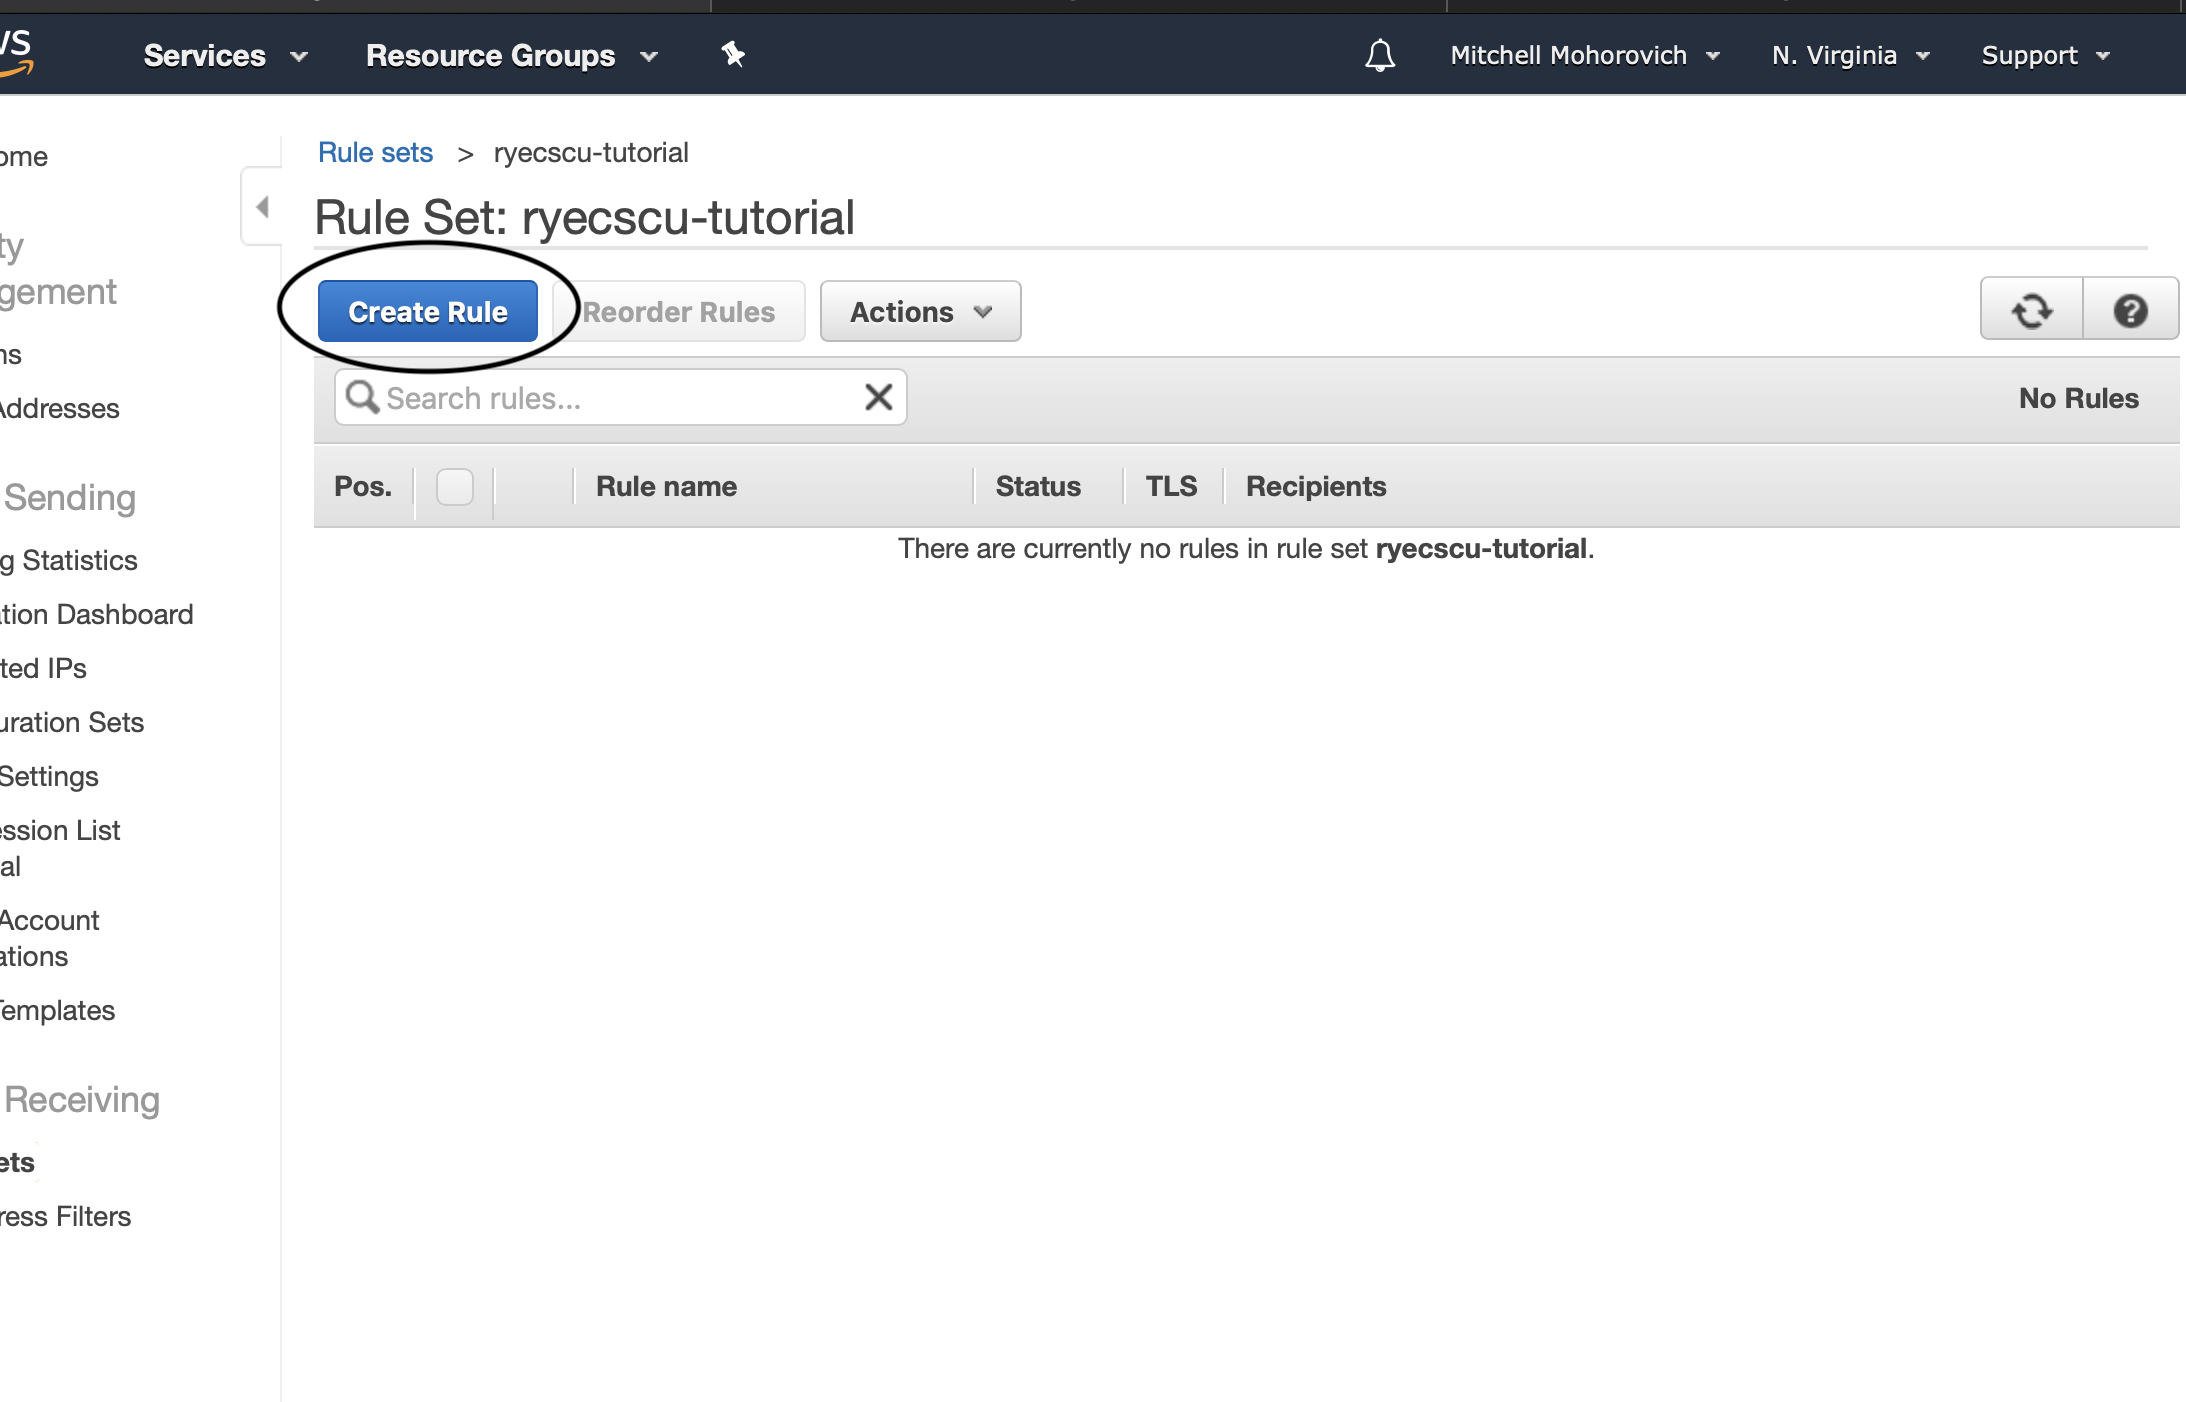
Open the rule set and when viewing the rule table, click on the Create Rule button.
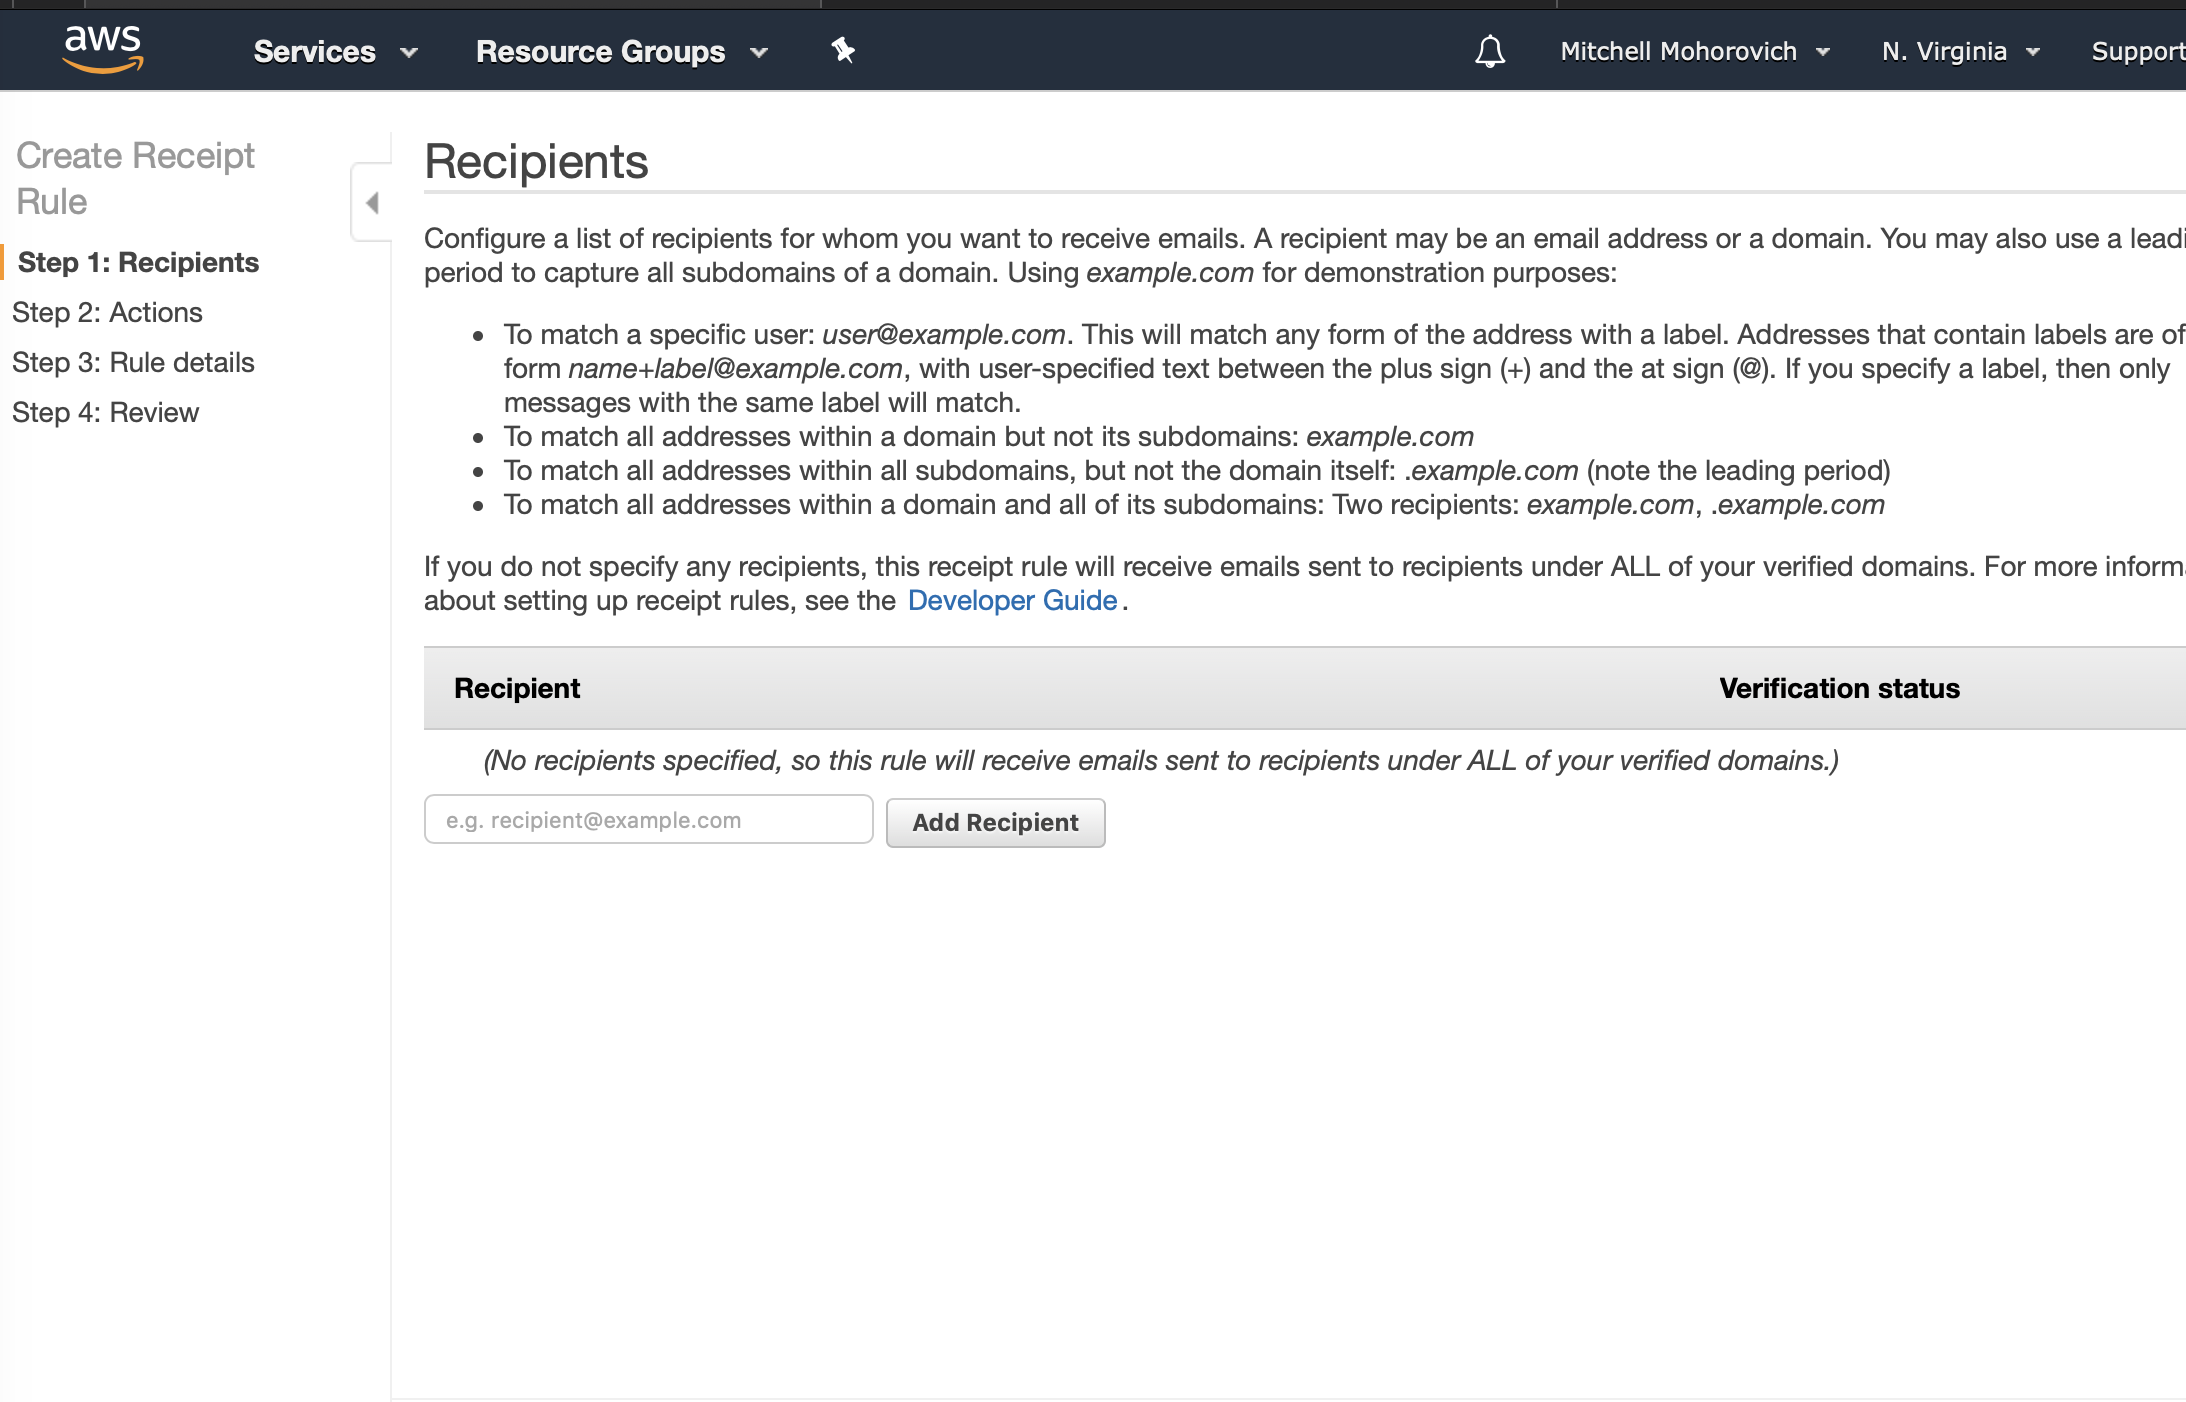
For Step 1: Recipients, for the purposes of this mailing list it will handle all messages sent to the domains. So as stated in the step description this field can be left blank, which acts as a wildcard option.
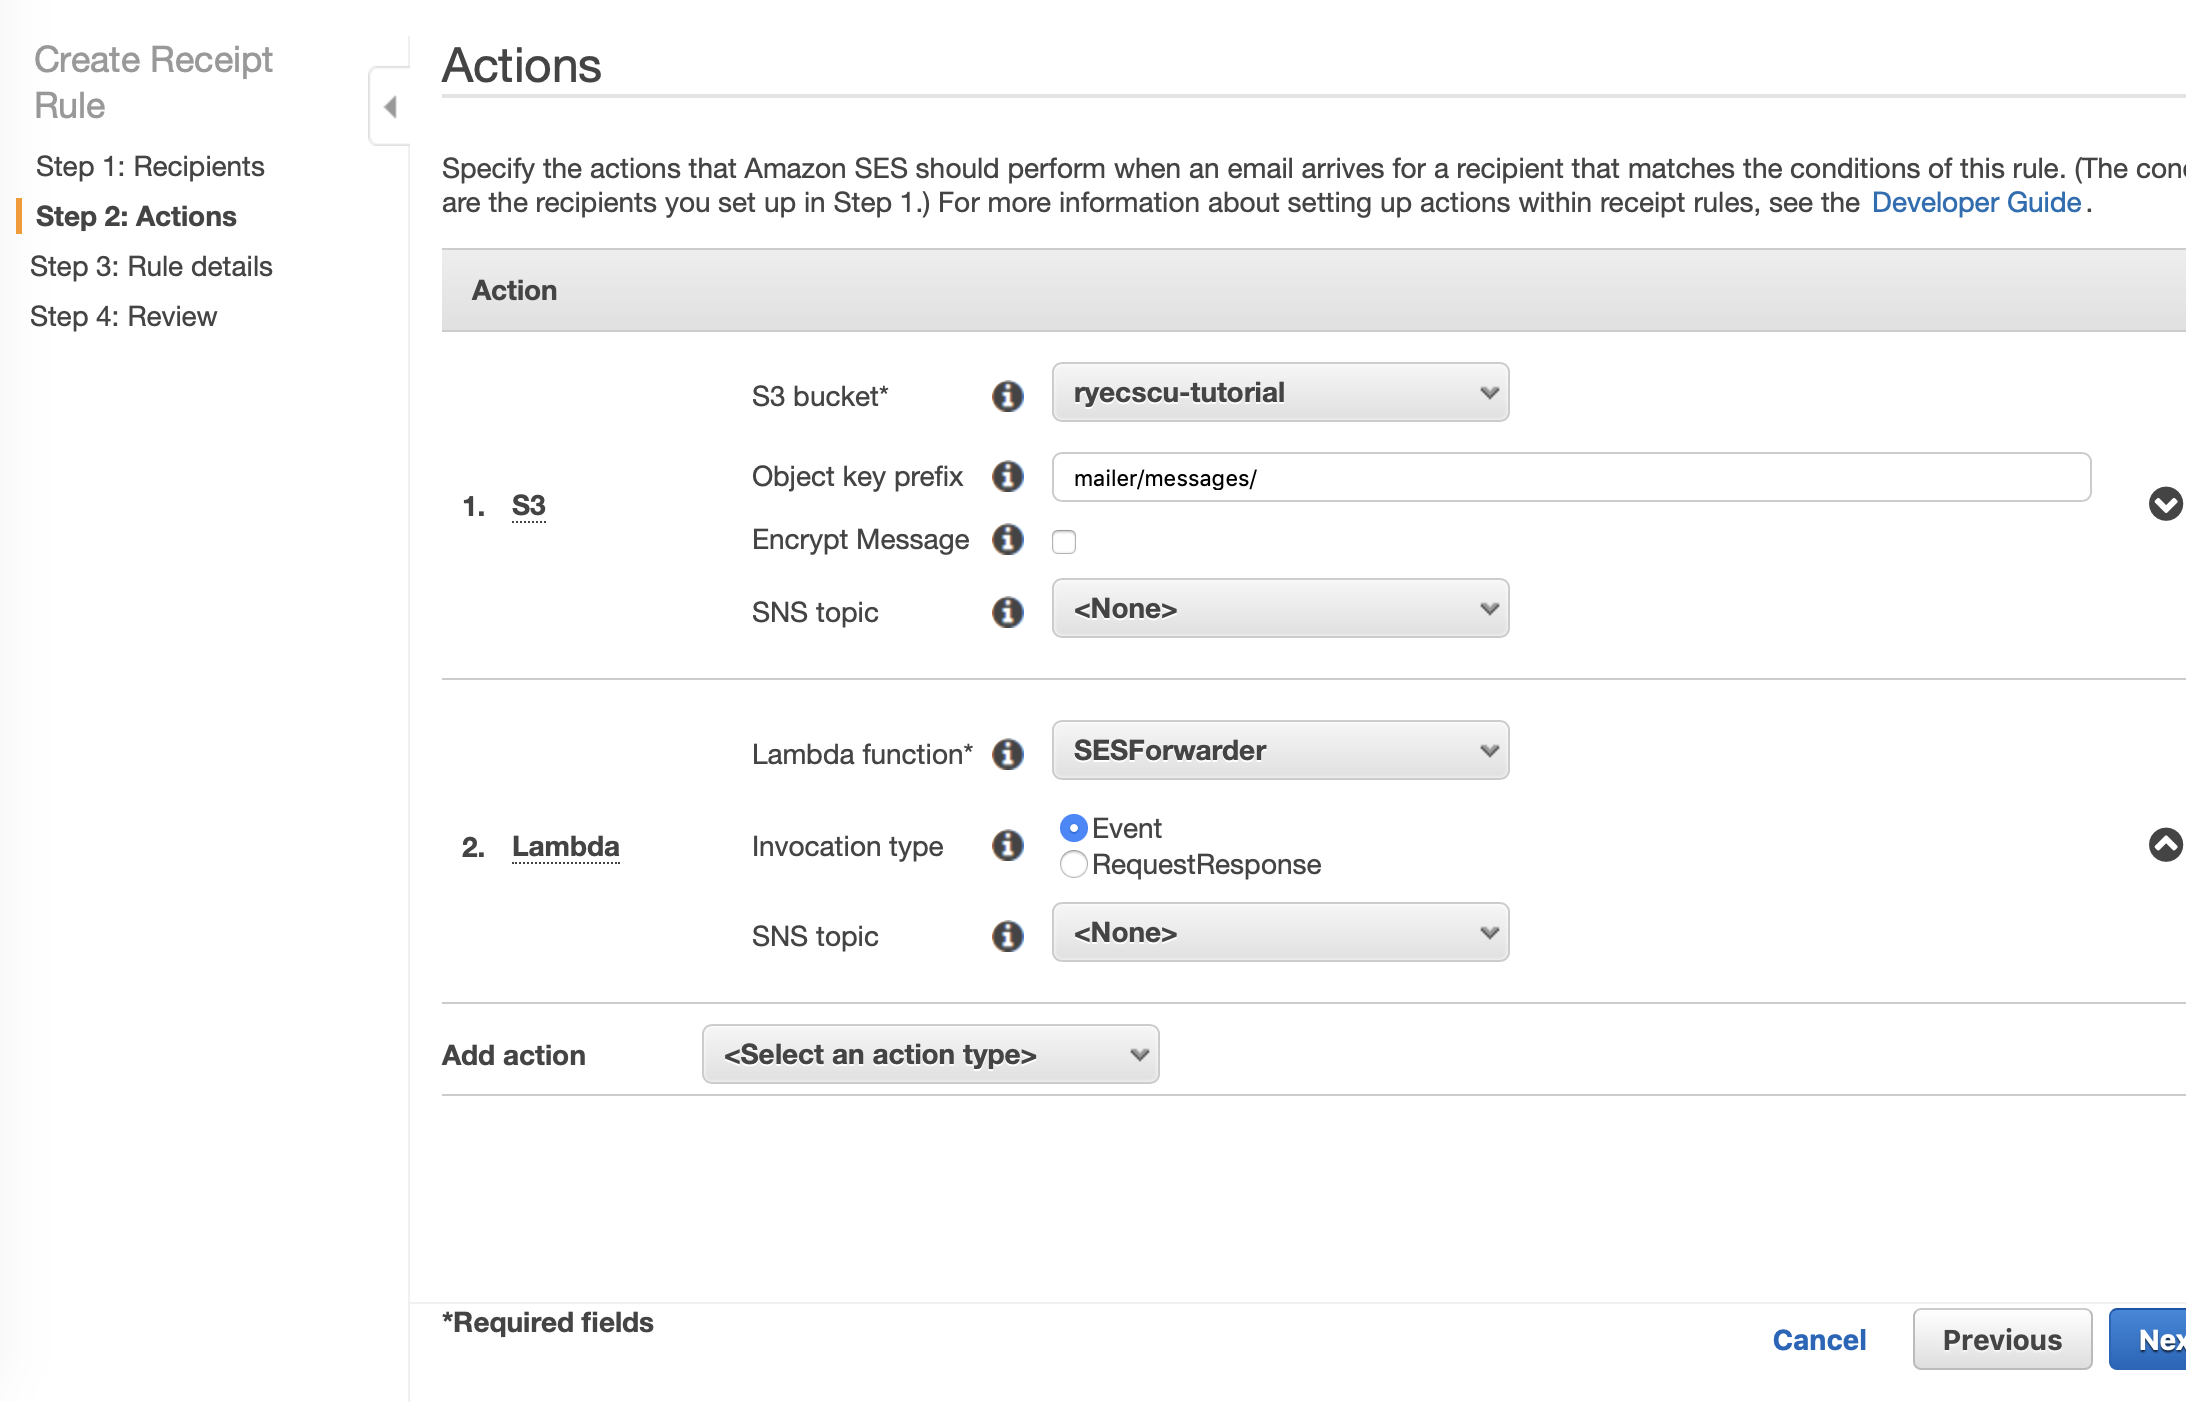
For Step 2: Actions, two will be added.
The first will be writing the message to S3. Click on Add action and select S3. The S3 bucket to choose will be the one created in the earlier S3 step. The Object key prefix will be the path specified in the forwarder function configuration, the suggestion was mailer/messages. No SNS Topic will be selected.
The second action will be triggering the forwarder lambda. Again, click on Add action and select Lambda. For the Lambda function choose the function created earlier. Select Event for the Invocation type. Again, no SNS Topic will be select.
Then, if your actions look similar to the ones below, click Next Step.
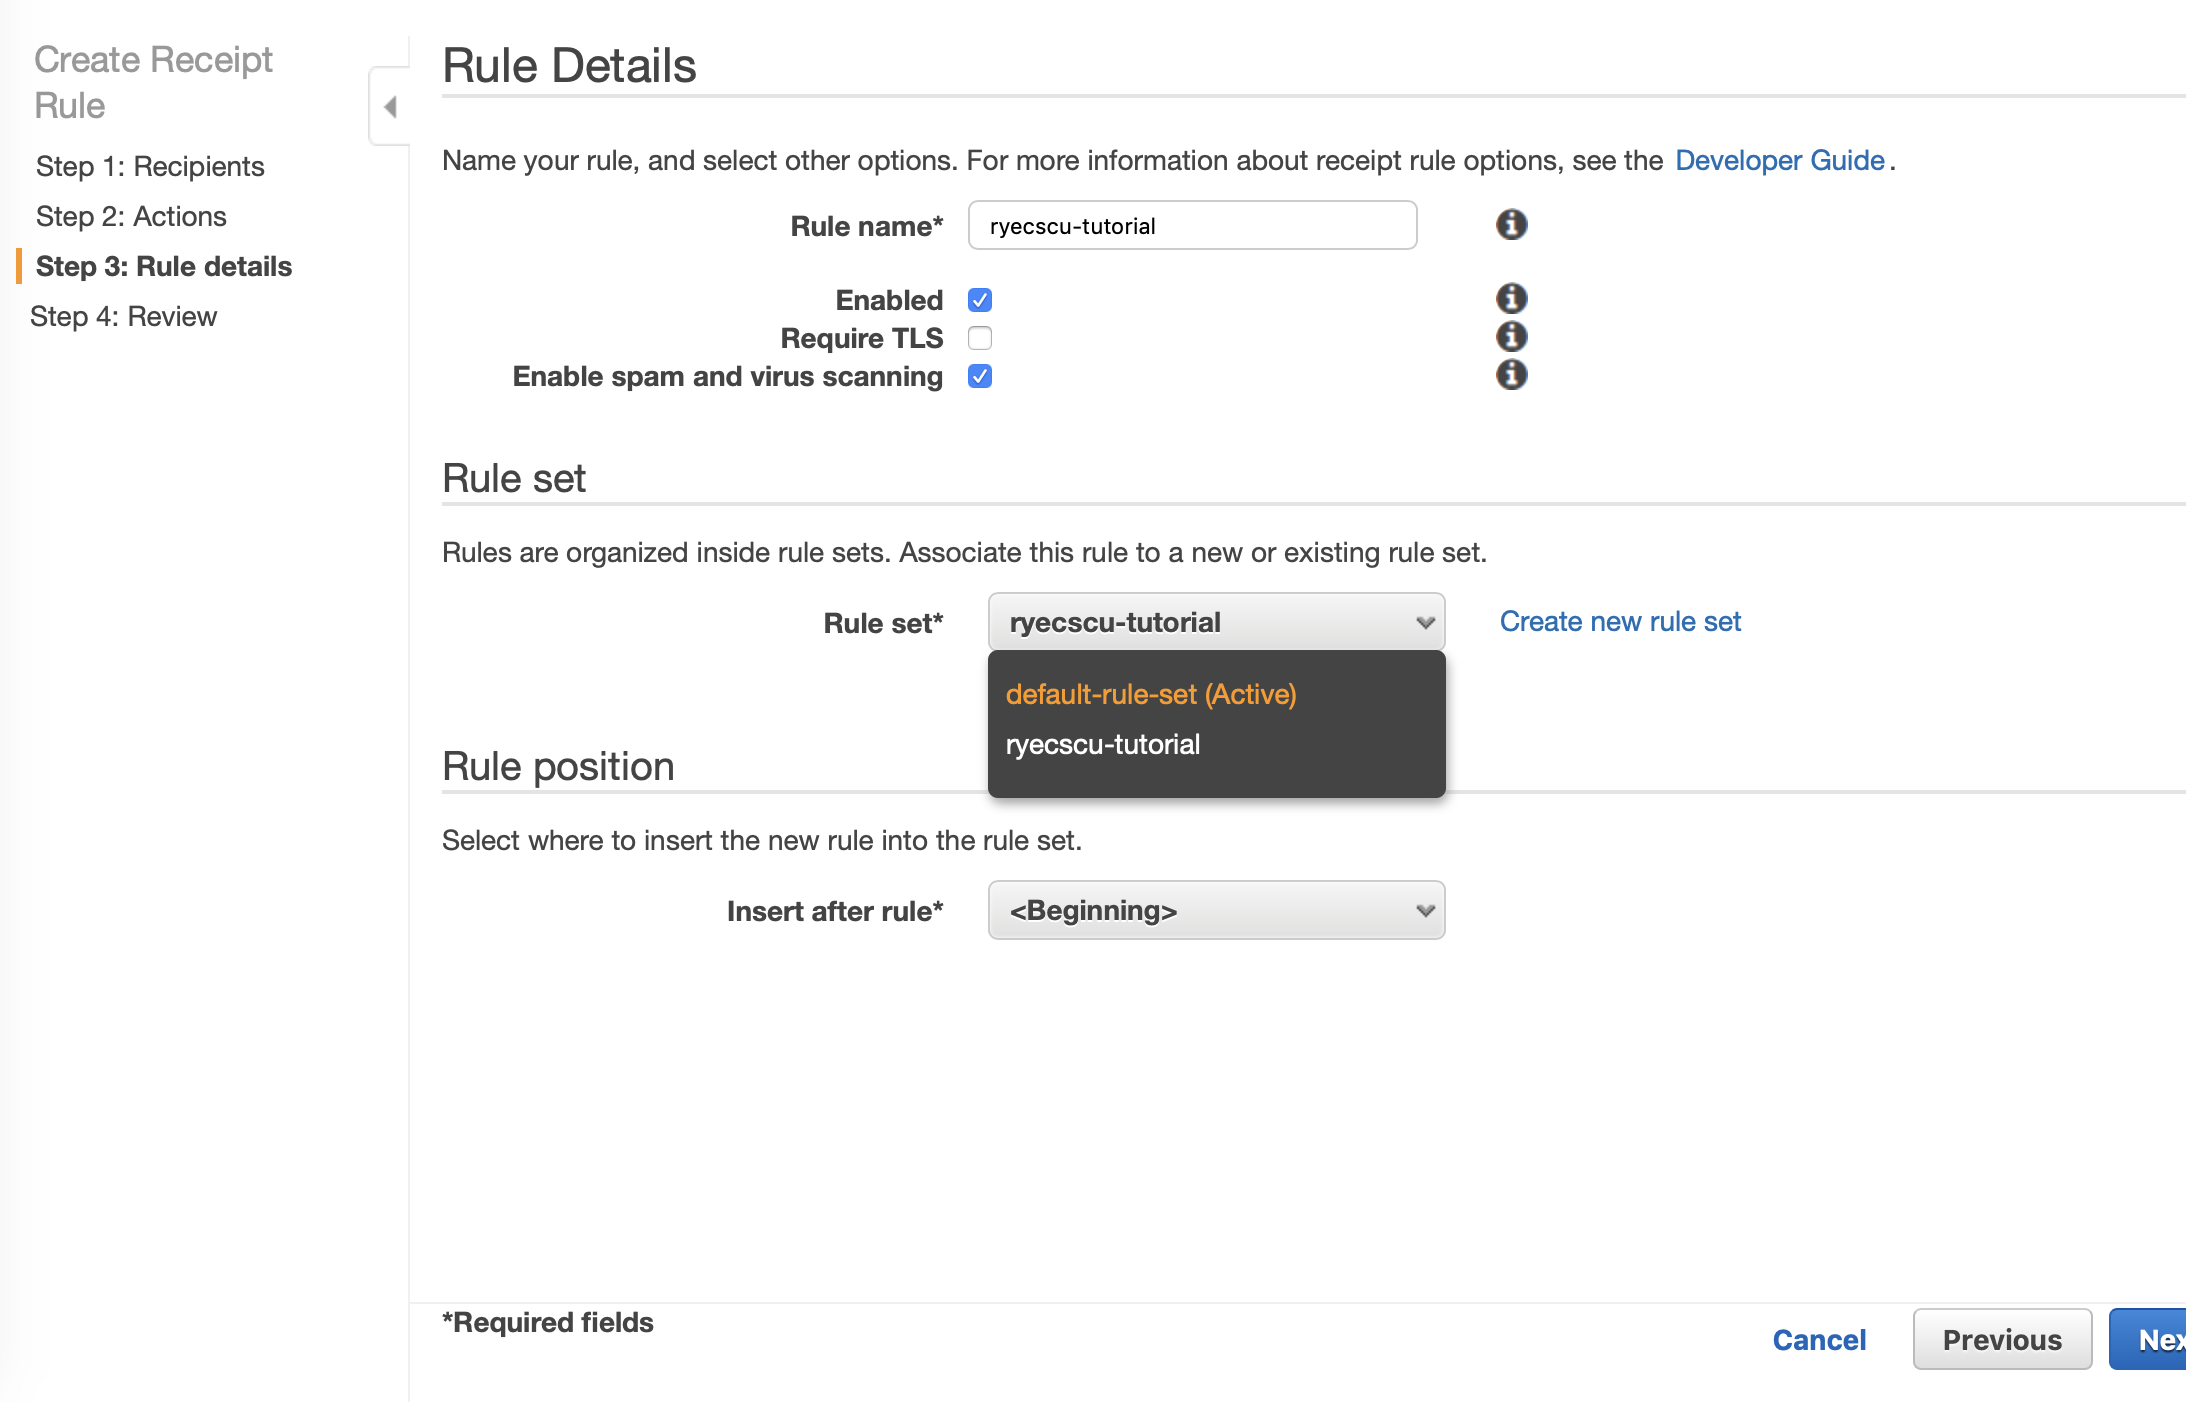
For Step 3: Rule Details, first name your rule. Leave all of the checkboxes their default settings. For the Rule set, if no other SES rule sets exist, choosing the default-rule-set is sufficient.
Once your page looks similar to the screenshot below, click on Next Step.
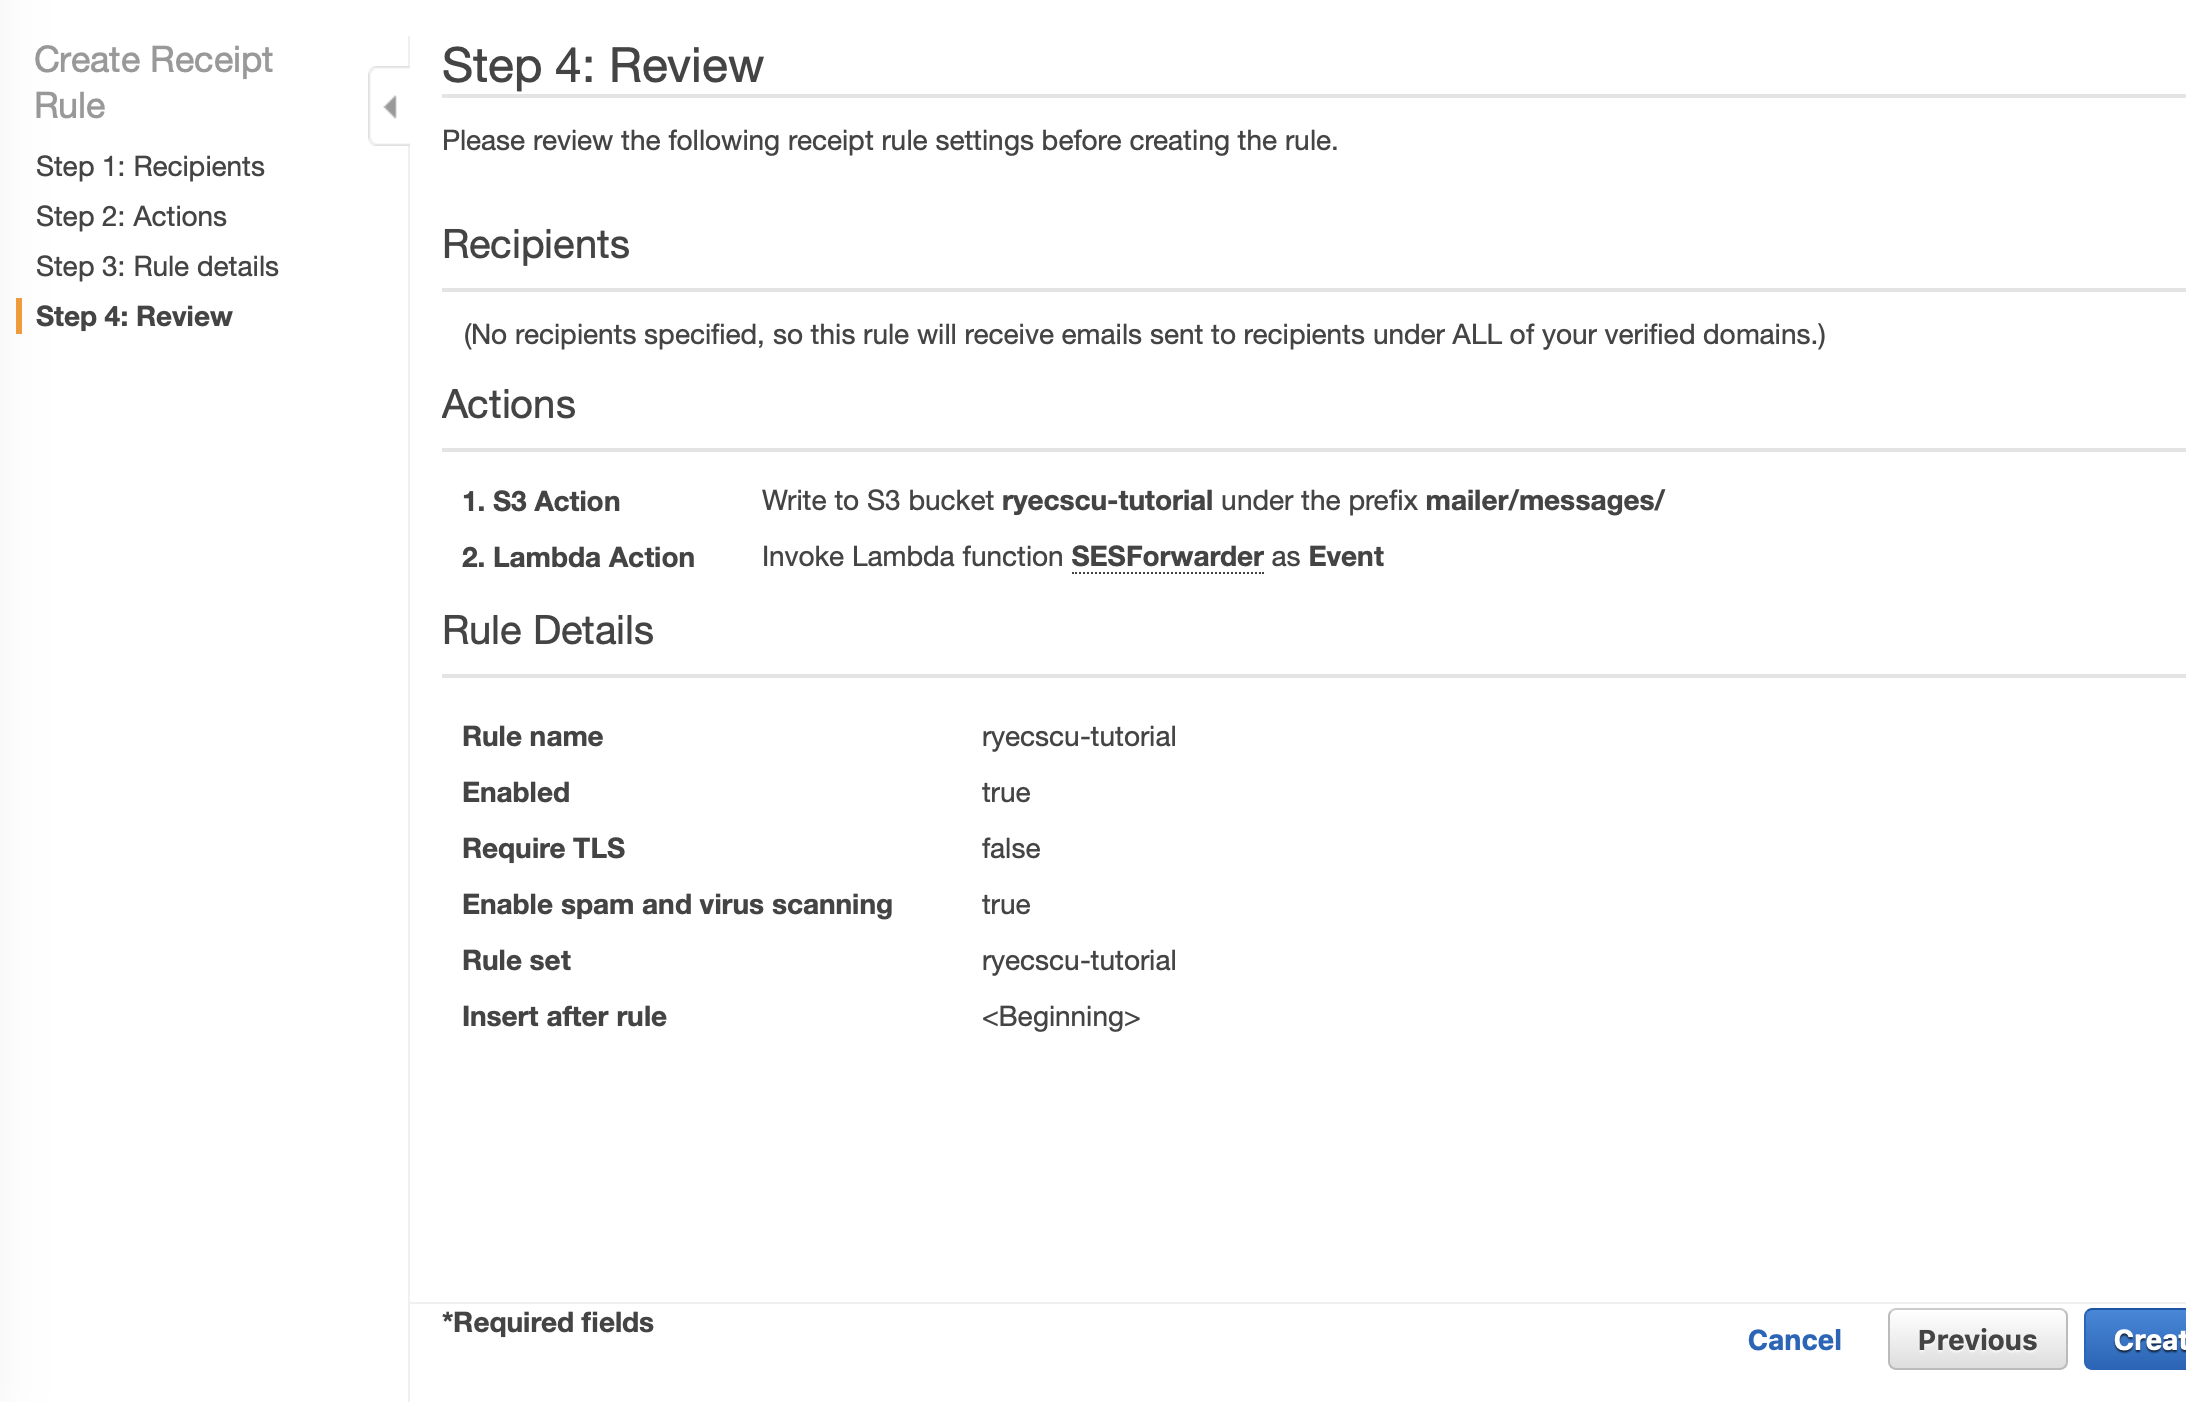
Make one last review of the Rule Set, and then click on Create Rule.
A dialogue like the one shown below will appear, click Add permissions.

And you will be redirected back to the rule set list.
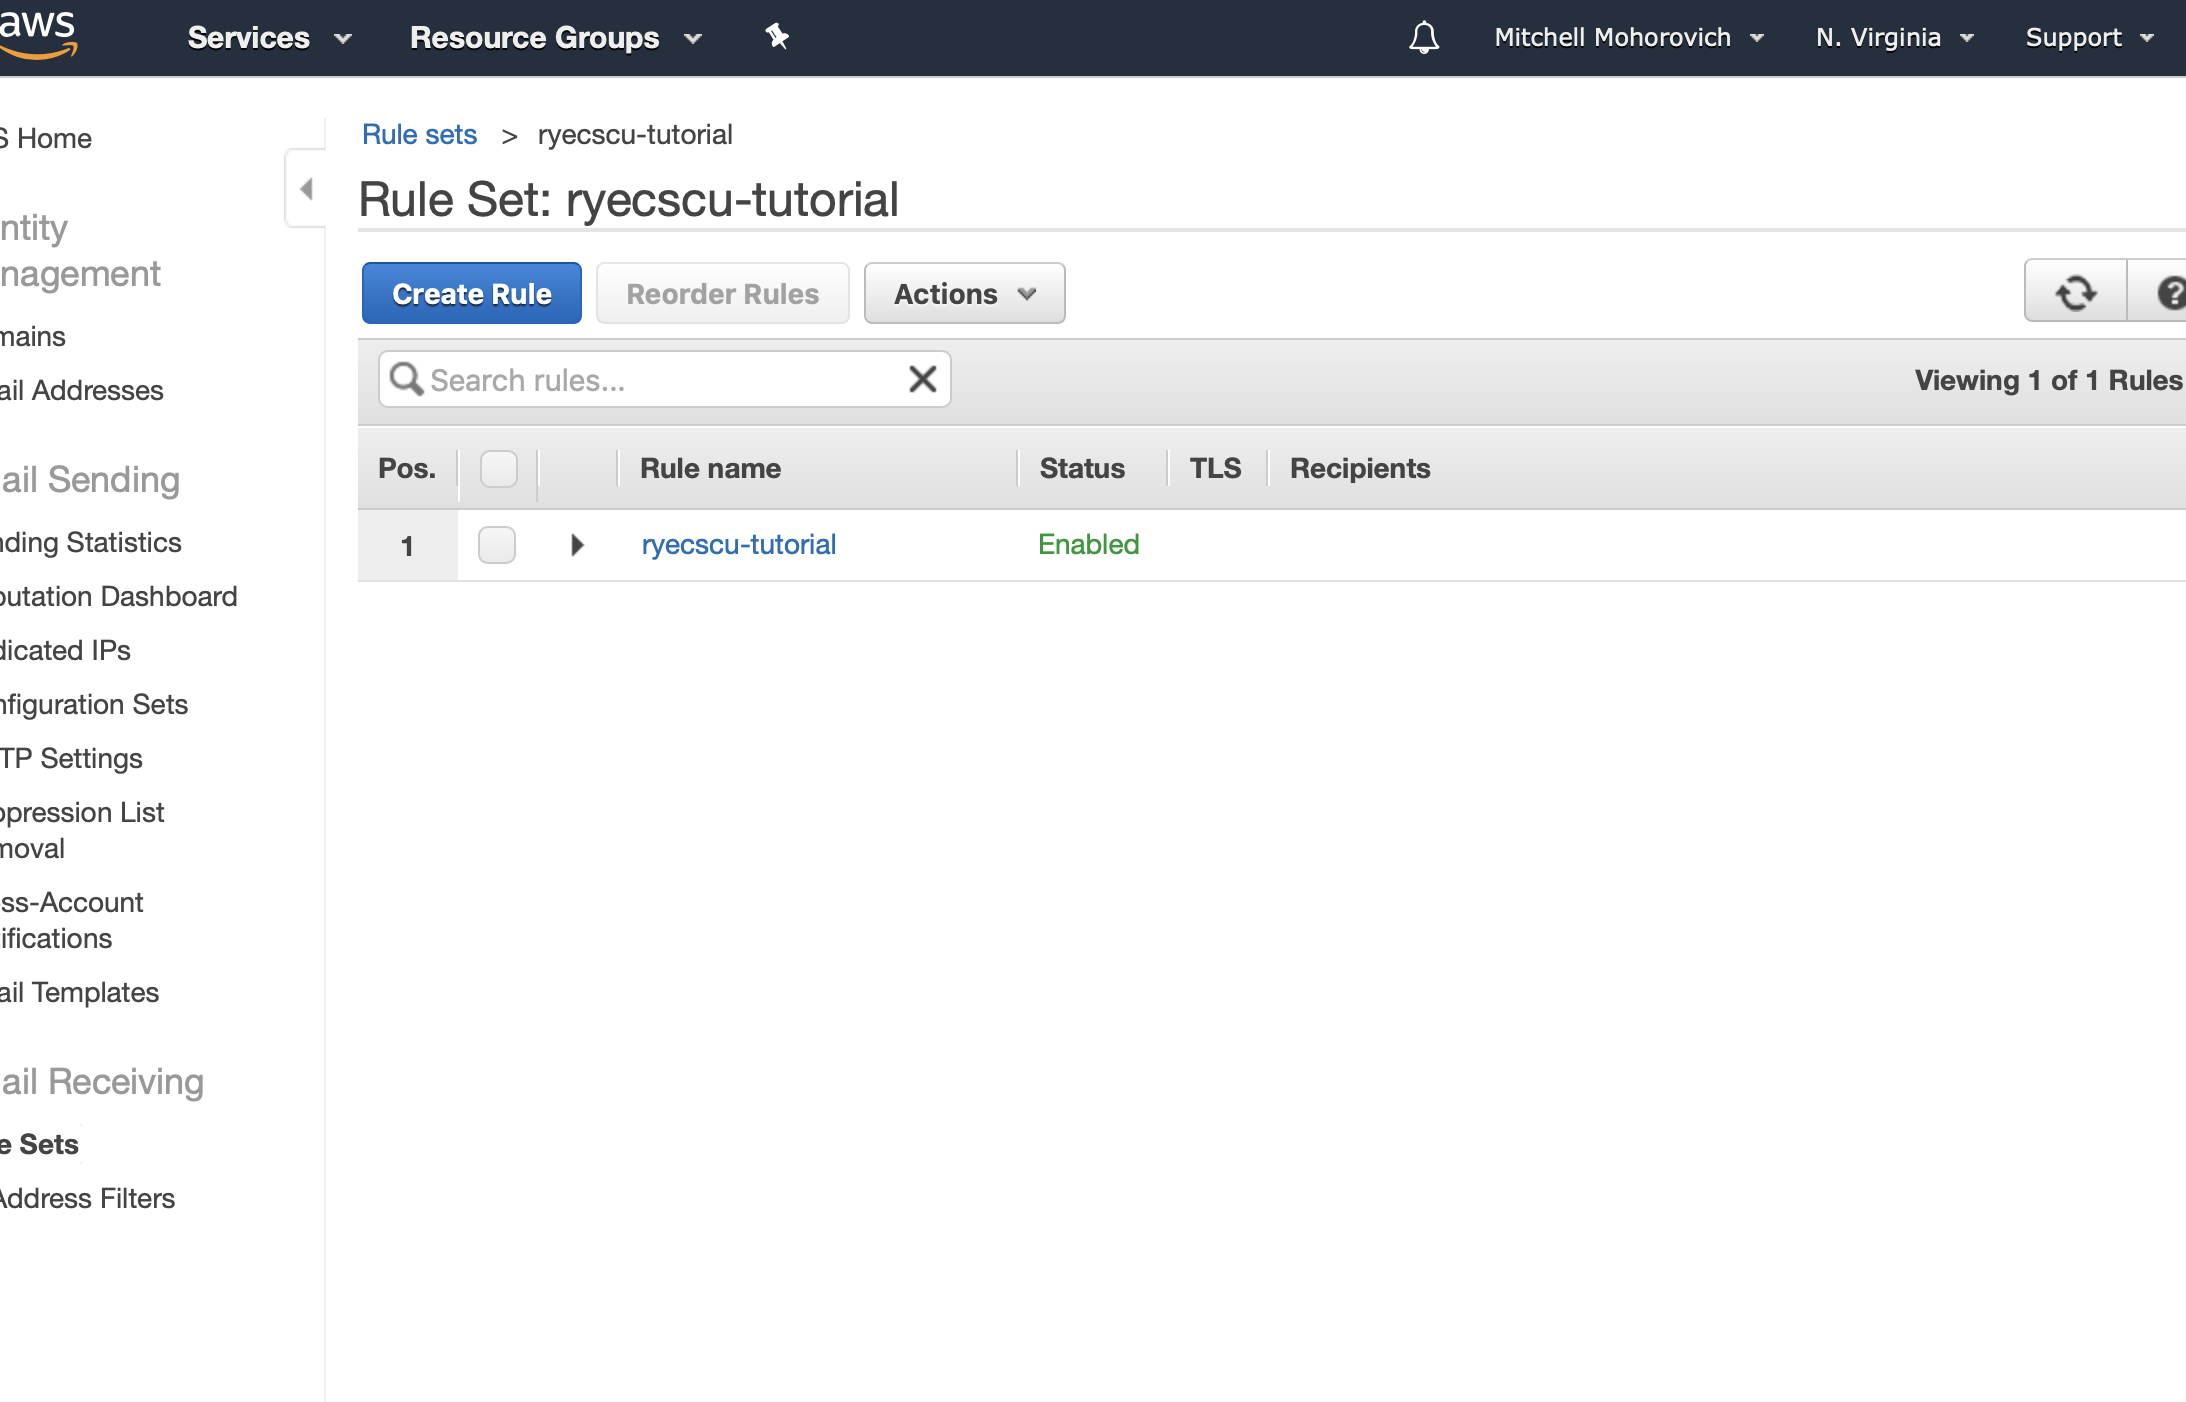
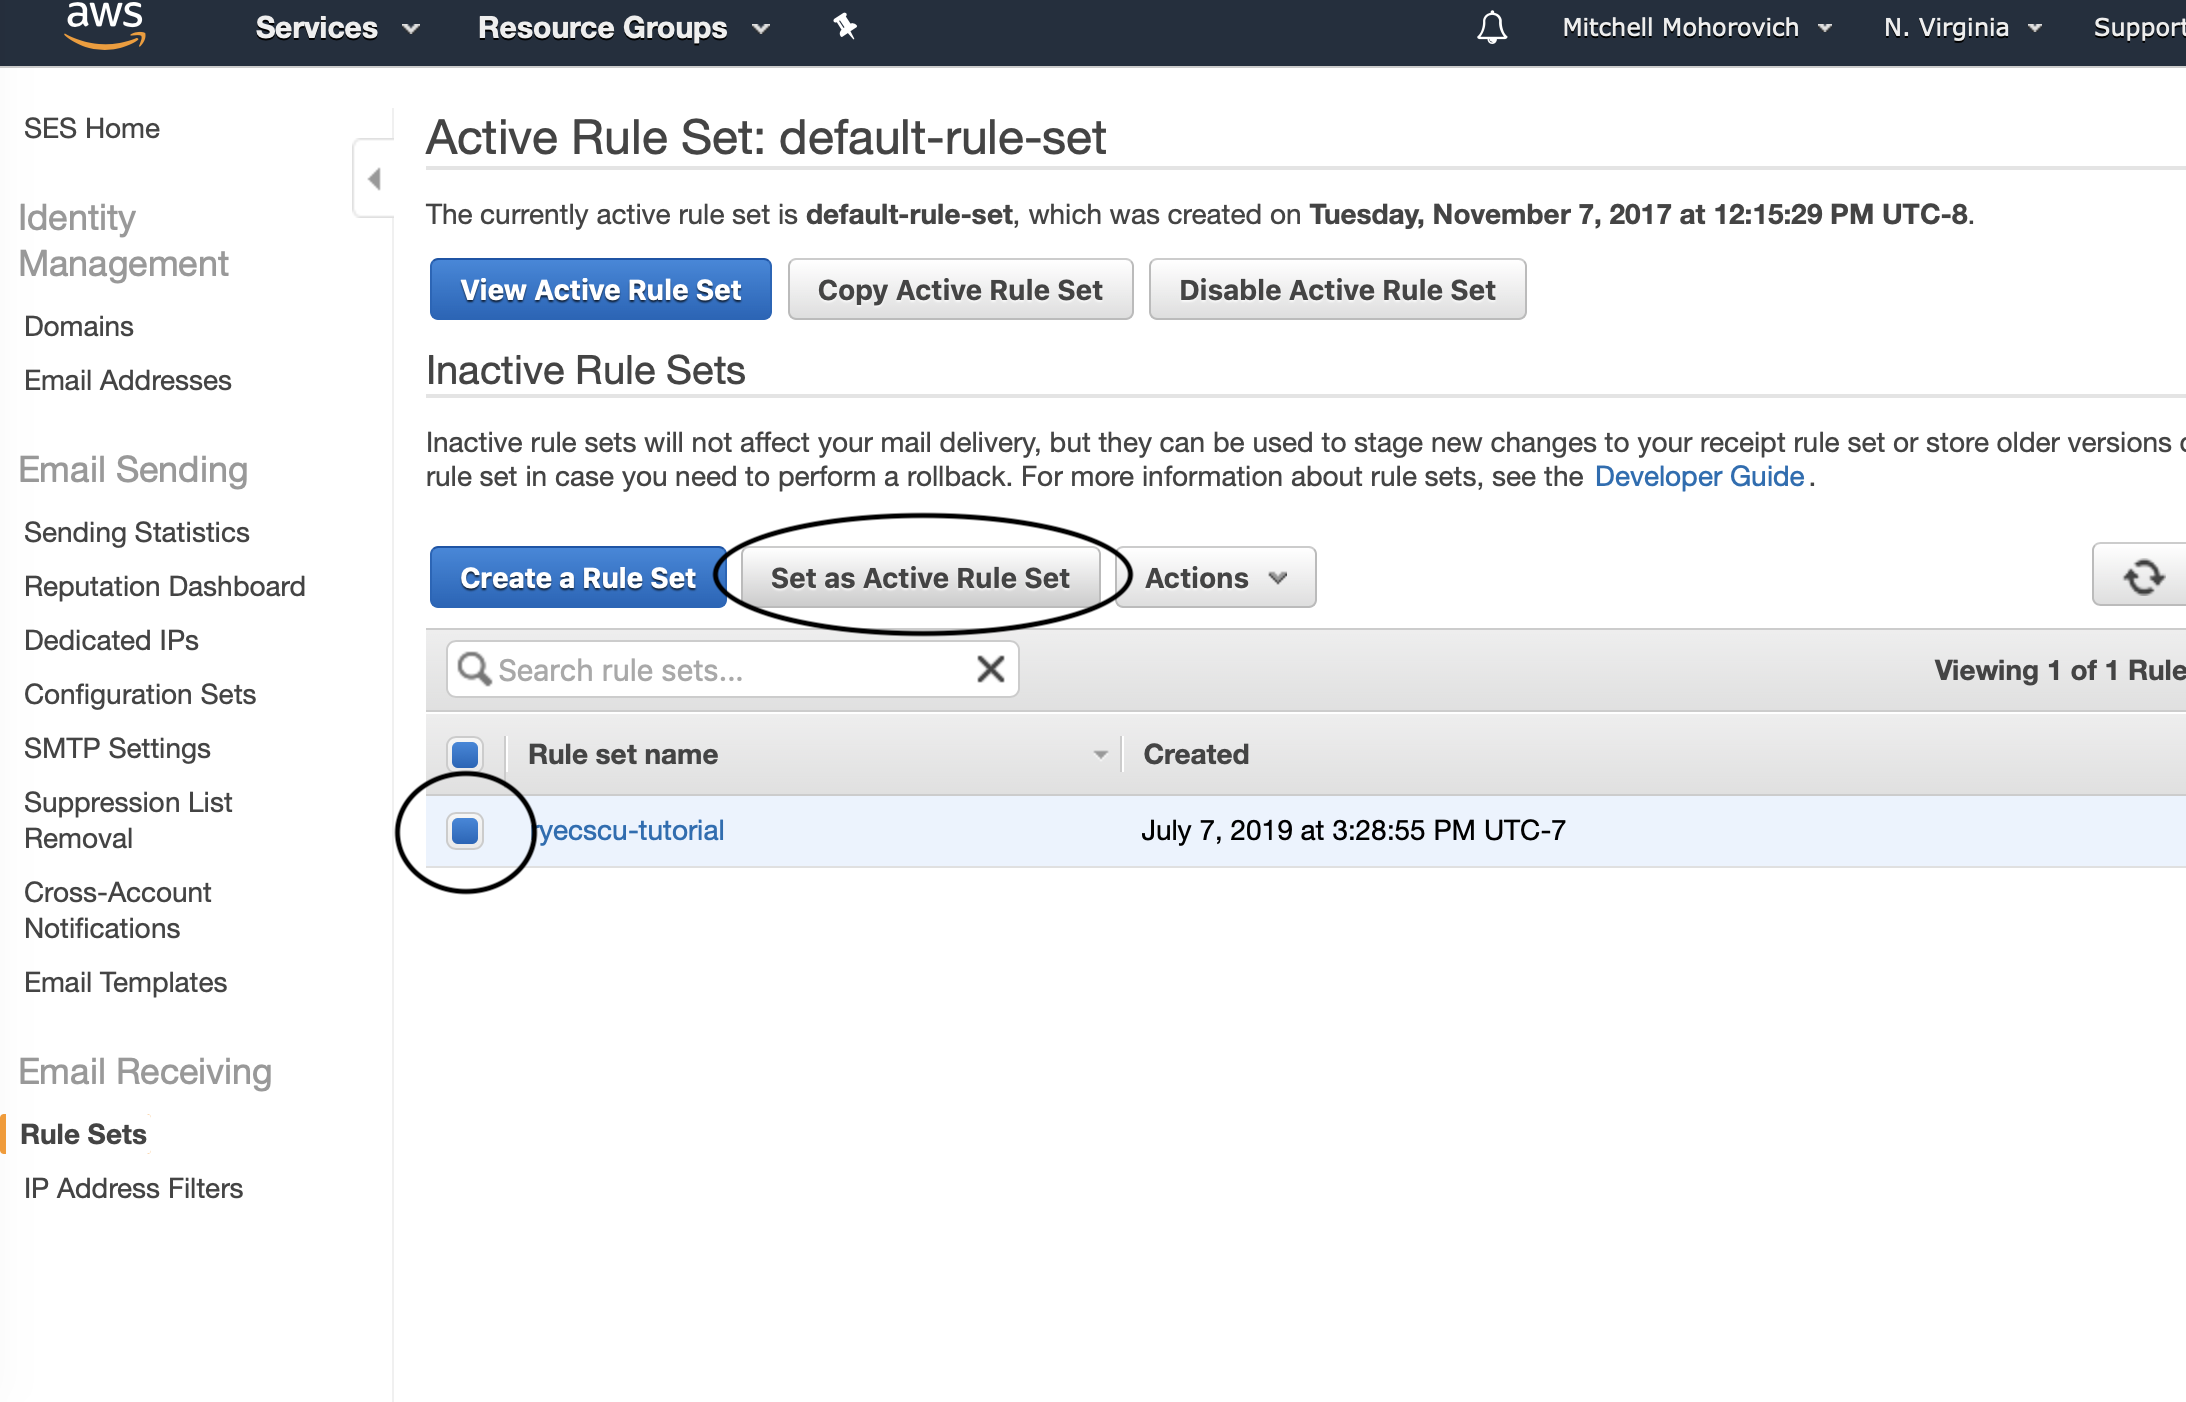
Navigate back to the main SES Rule Sets page (Sidebar -> Email Receiving -> Rule Sets) and validate that the active rule set is the one created. If not, select it from the table and click on Set as Active Rule Set.
Conclusion
After that rule set is active, the set-up is complete. Validation is as simply as just sending an email to the alias created when the lambda was initially set up.
Cheers 🍻